
How to Draw Wood Crates

The room is filled with the scent of dust and old wood as you pry open the creaking cellar door. Stacked in the corner are a few battered wood crates, their rough boards concealing who knows what treasures or traps inside.
Every good dungeon, inn or market needs a place to stash supplies or secrets. In this tutorial, I’ll show you how to draw some wood crates that can add a layer of believability or mystery to your fantasy map.
Want some free brushes to draw your maps? Get The Free Apprentice Brush Pack HERE
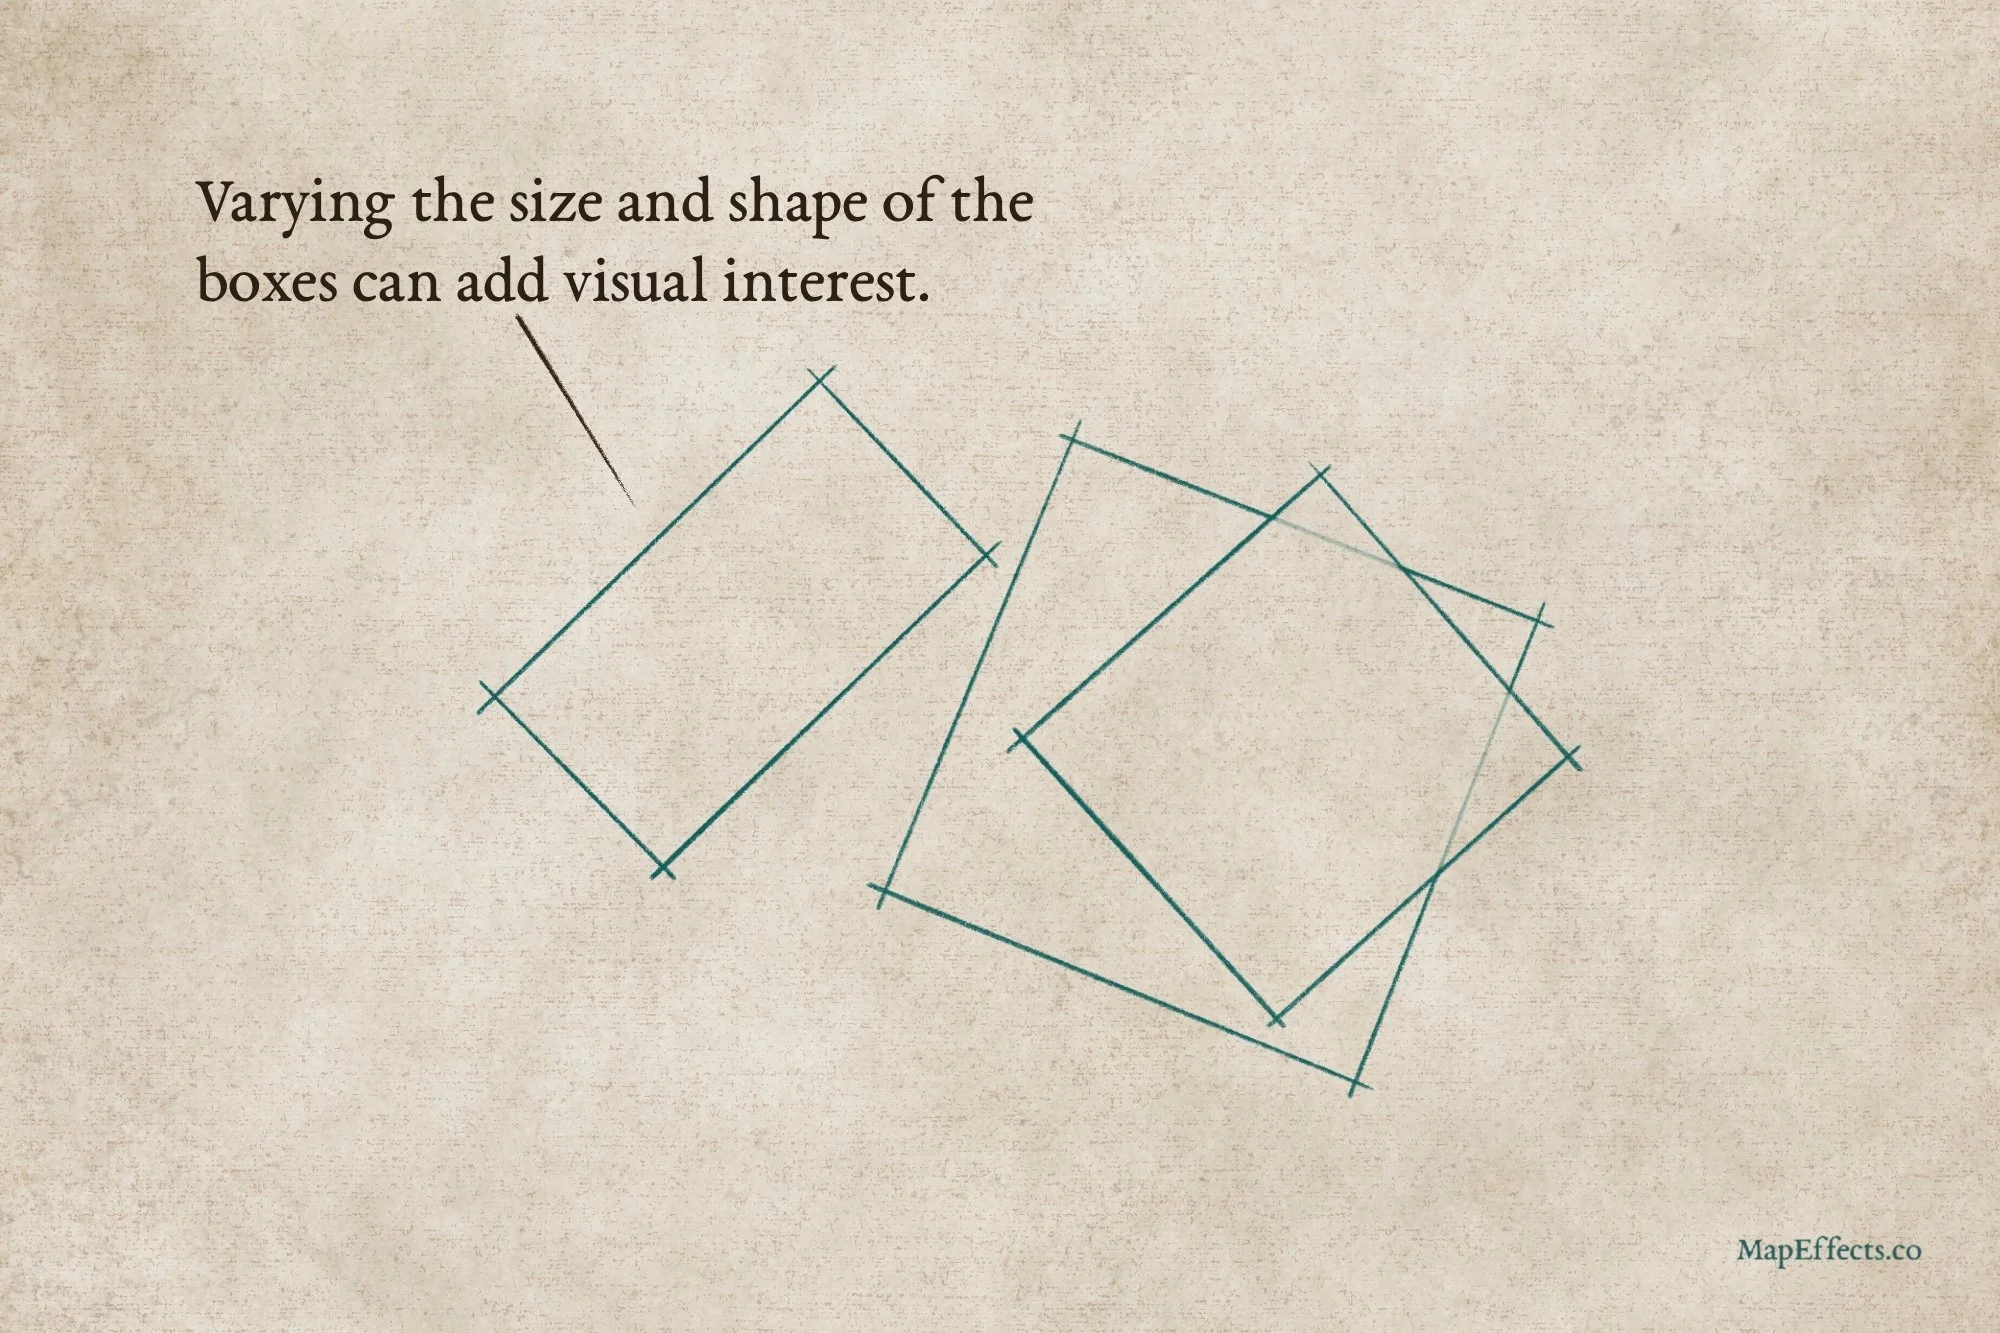
Sketch the Box Shapes
Begin by sketching a few boxes that you want to place in your map. Focus on scale and their overall shape. Combining boxes of differing sizes and shapes can help add visual interest. Unless of course, the setting needs to look more organized with similar-sized boxes!
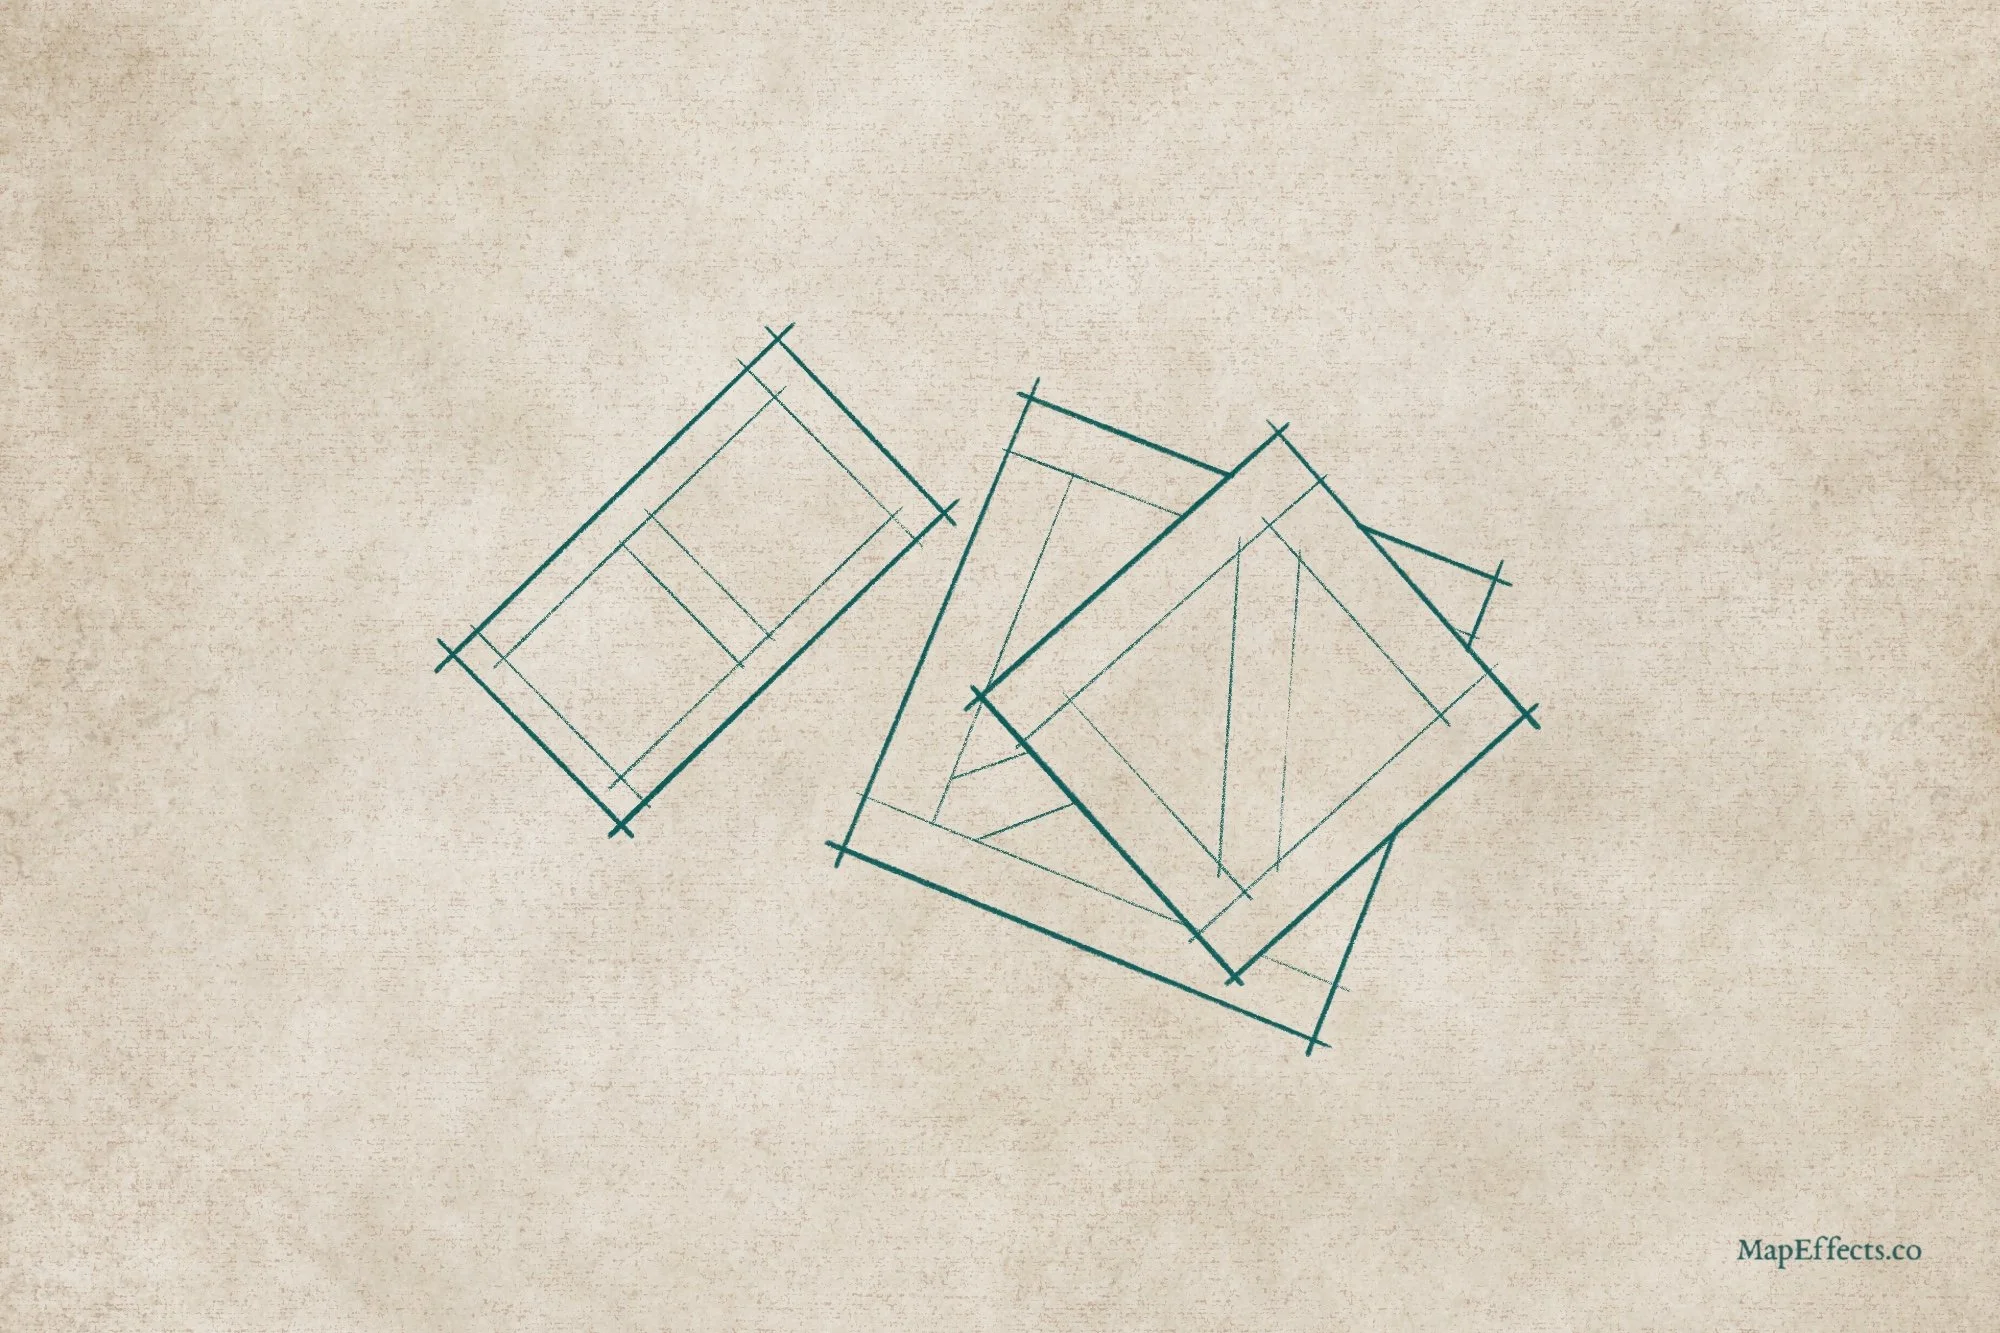
Sketch the Frame Boards
Add to your base shapes by drawing out the boards that will frame each box. Experiment with cross pieces that are parallel with the sides, like the crate on the left, and ones that run diagonally.

Add the Remaining Boards
Finally, add the rest of the boards that will make up the wood crate. For visual interest, I tend to draw these boards a little narrower than the ones that make up the frame.
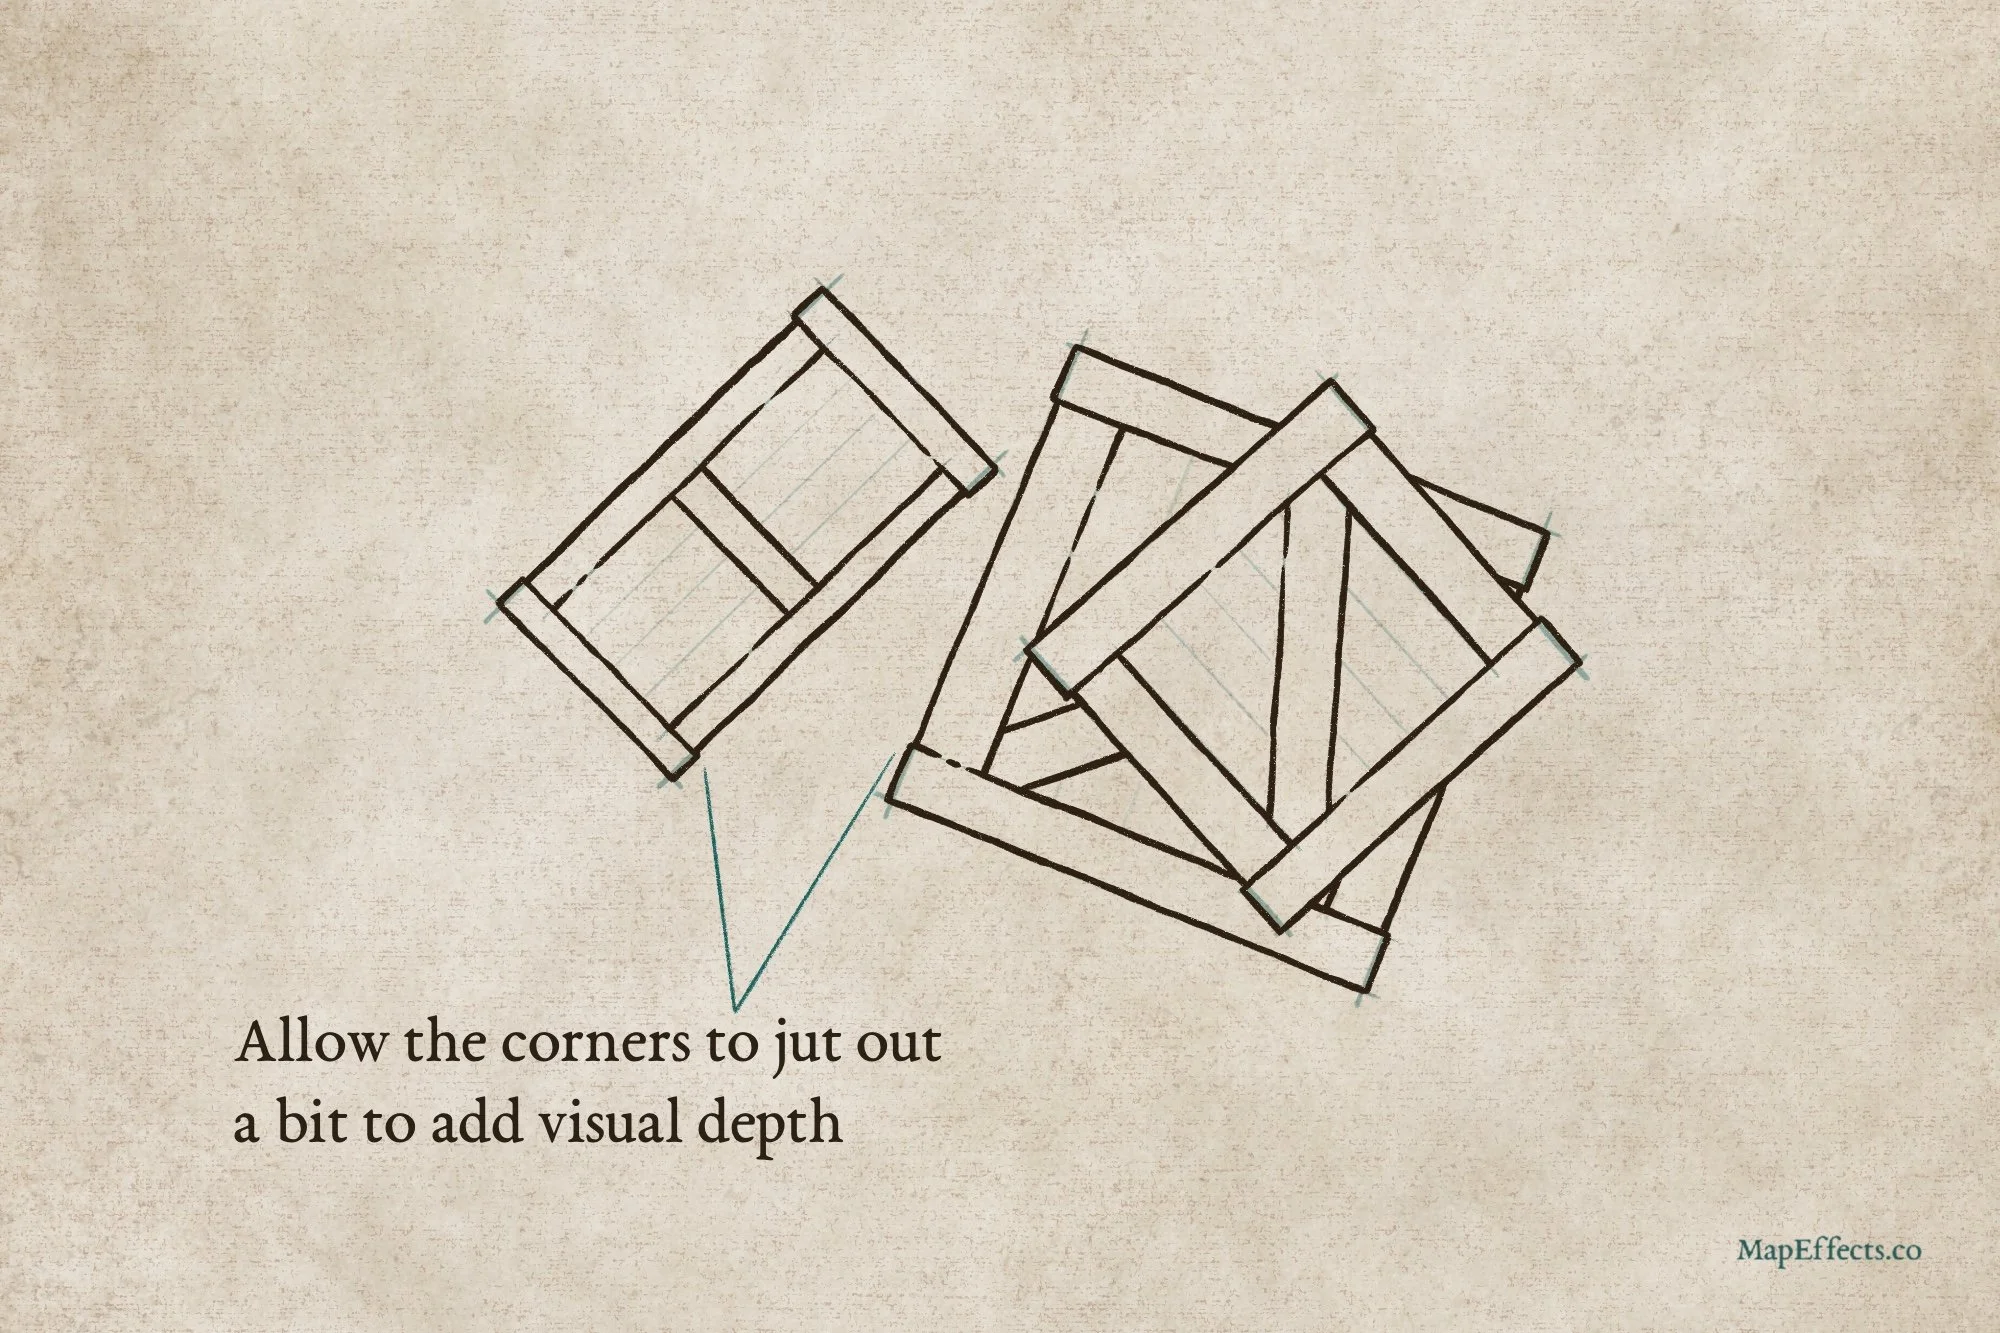
Ink the Main Shapes
Create a new layer if you’re working digitally, and switch to a line art brush with some pressure sensitivity. This will help you vary your line width and allow for subtle imperfections. You want the boxes to appear a little rough and organic, so allow some small breaks in your line as well like you can see in the sample above.
More Mapping Tutorials
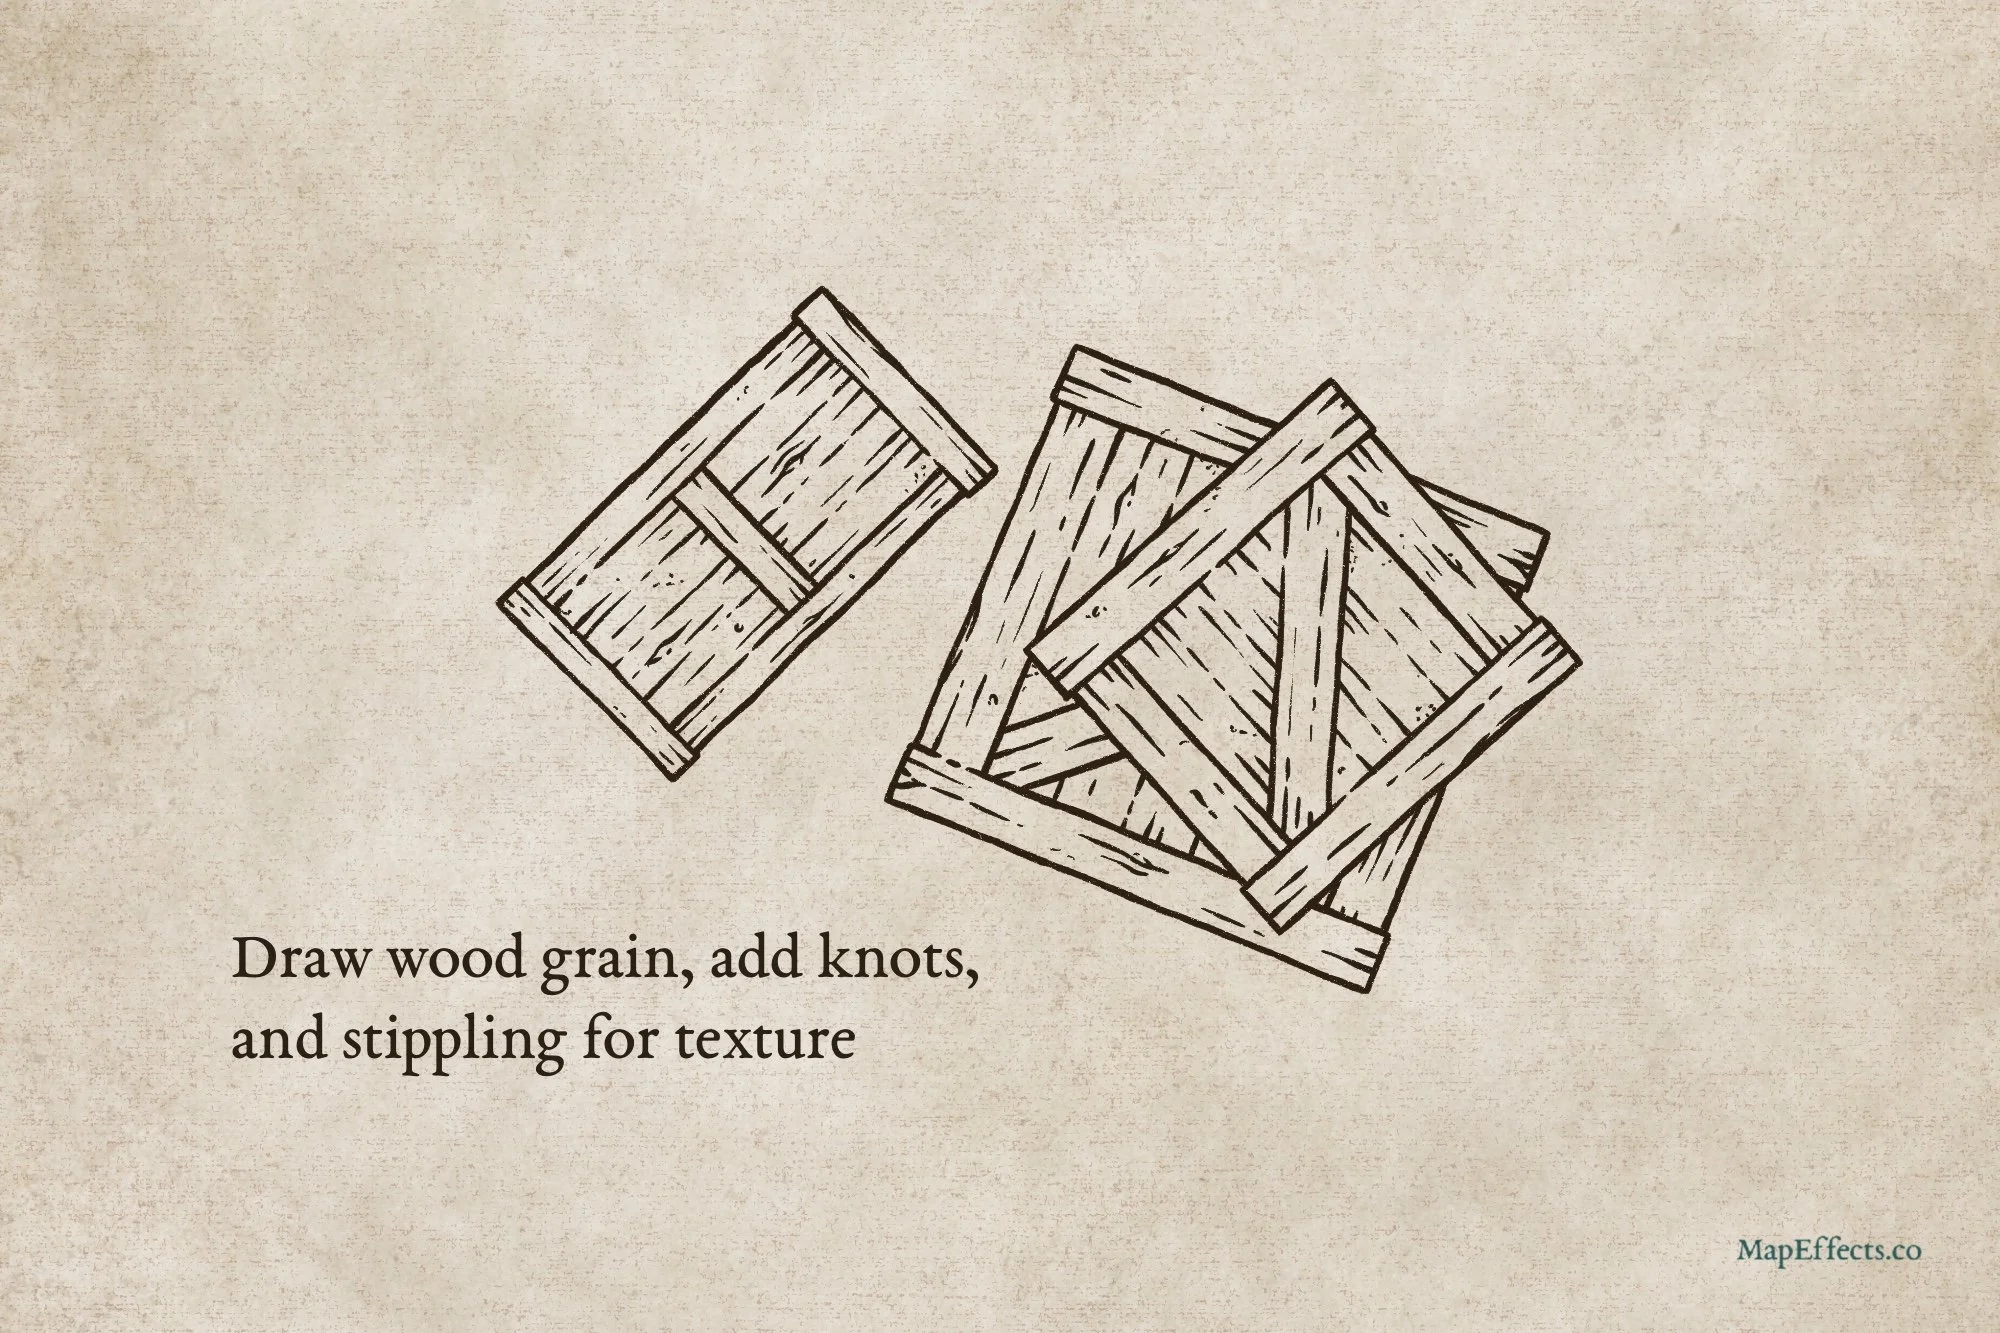
Draw the Boards and Add Texture
With all the main line art done, you can circle back and begin adding some texture. This admittedly is a bit of a balancing act and will depend on the scale they appear on your map. The smaller they are, the less texture you need. Make sure you add some lines that imply wood grain, and maybe a few knots in the wood.
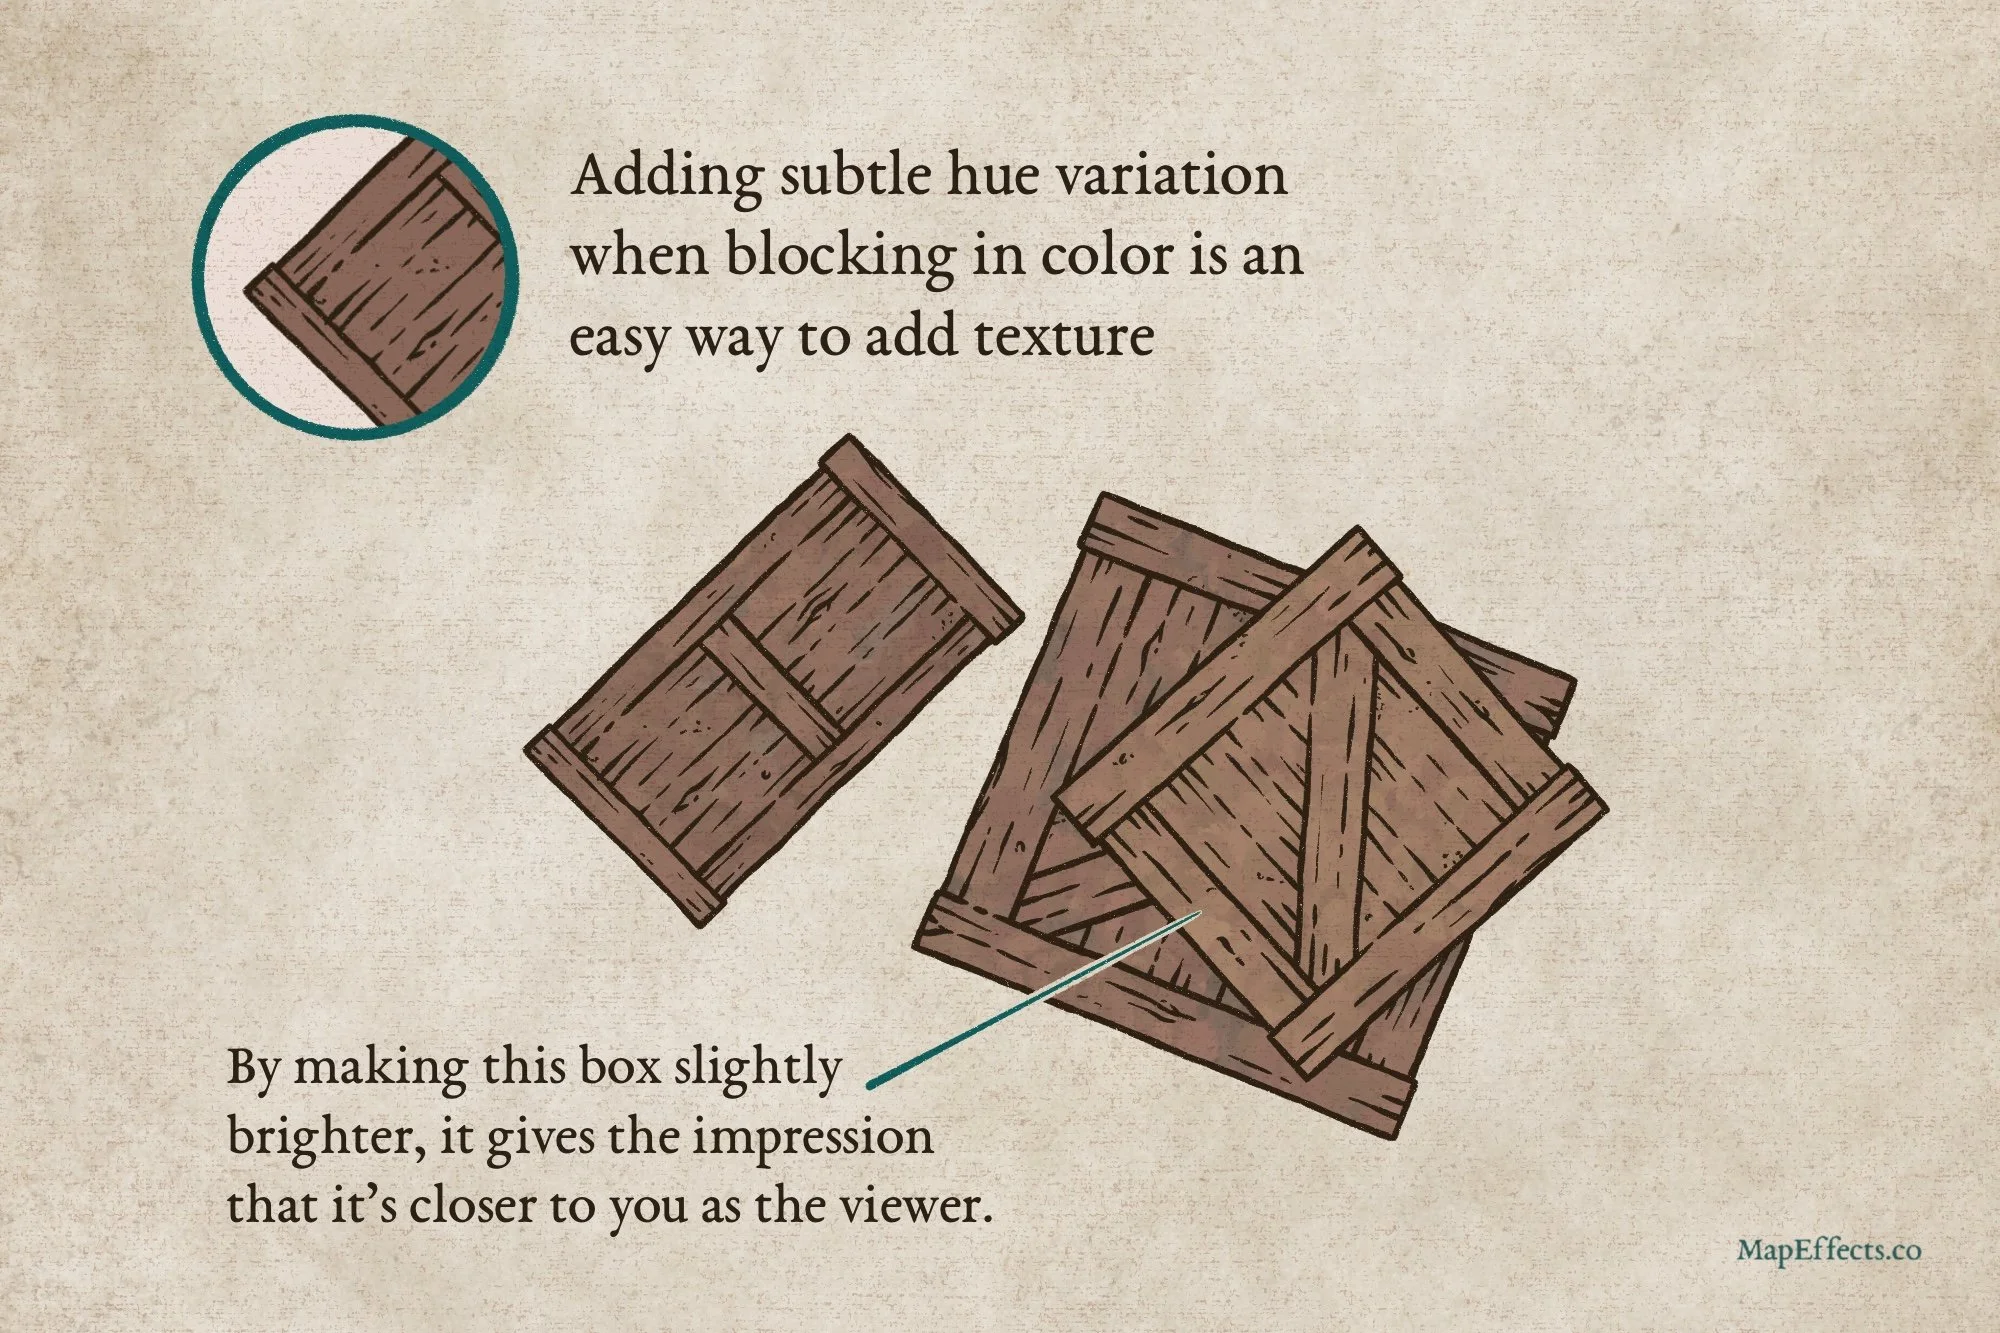
Block in Main Colors
Create a new layer below your line art and paint in some color. You can use a solid color, but I’d encourage you to also experiment with using a texture brush to add in some subtle variations. Just pick your main color, and then shift the hue, saturation, and brightness around just a little bit to incorporate variety.
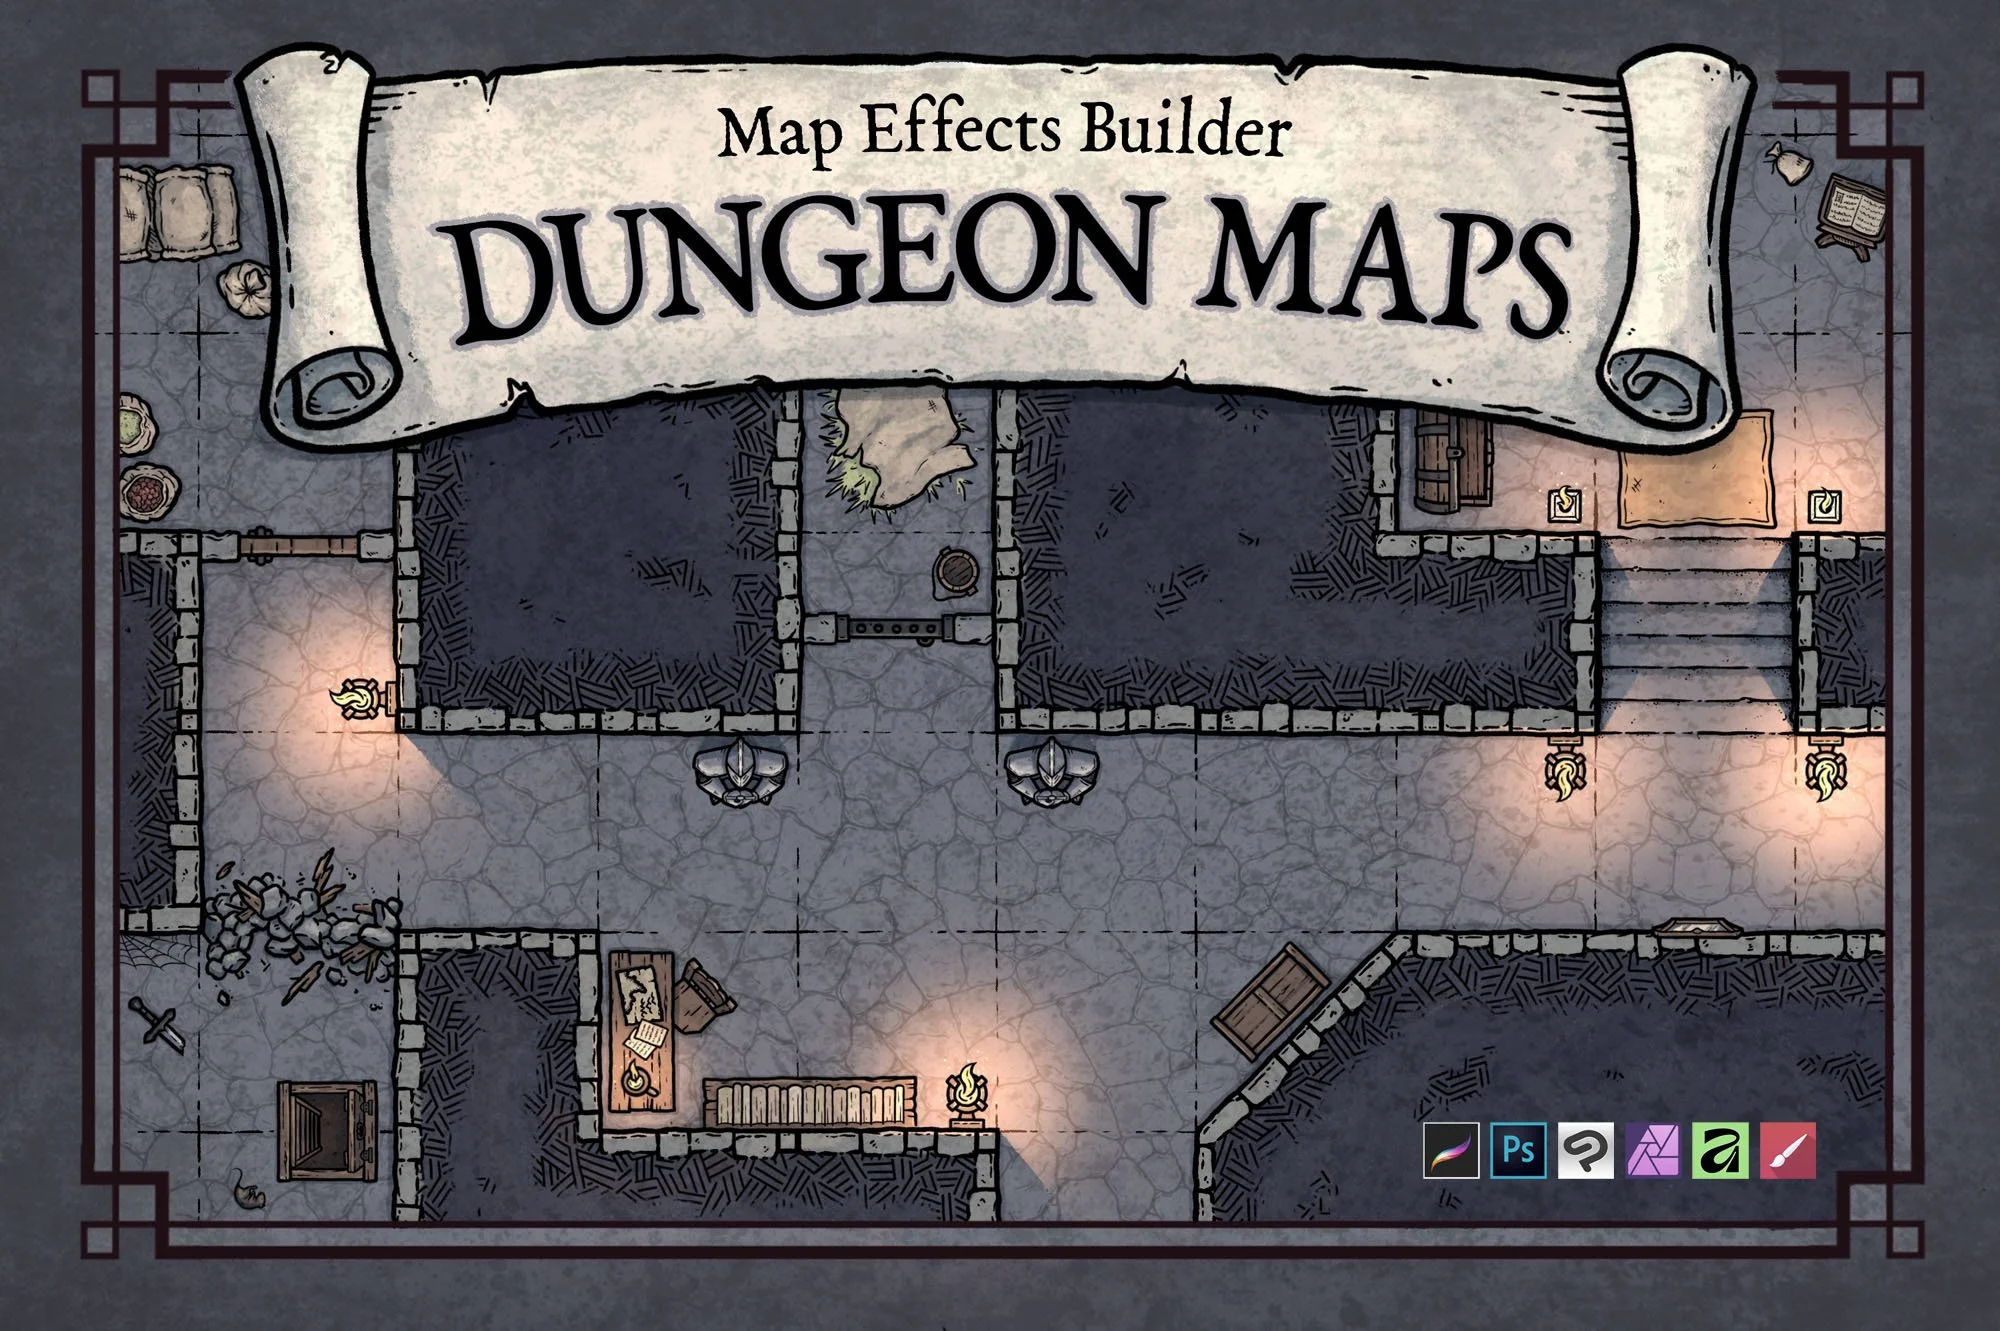
Quickly Create Dungeon Maps with 400+ Features
Compatible with Procreate, Photoshop, Affinity, Infinite Painter, & Clip Studio
Easily create dungeon maps with a classic hand-drawn style for your next rpg campaign with a few clicks and a bit of imagination. Best of all, you don’t need to invest hundreds of hours learning to draw!
Paint the Cast Shadows
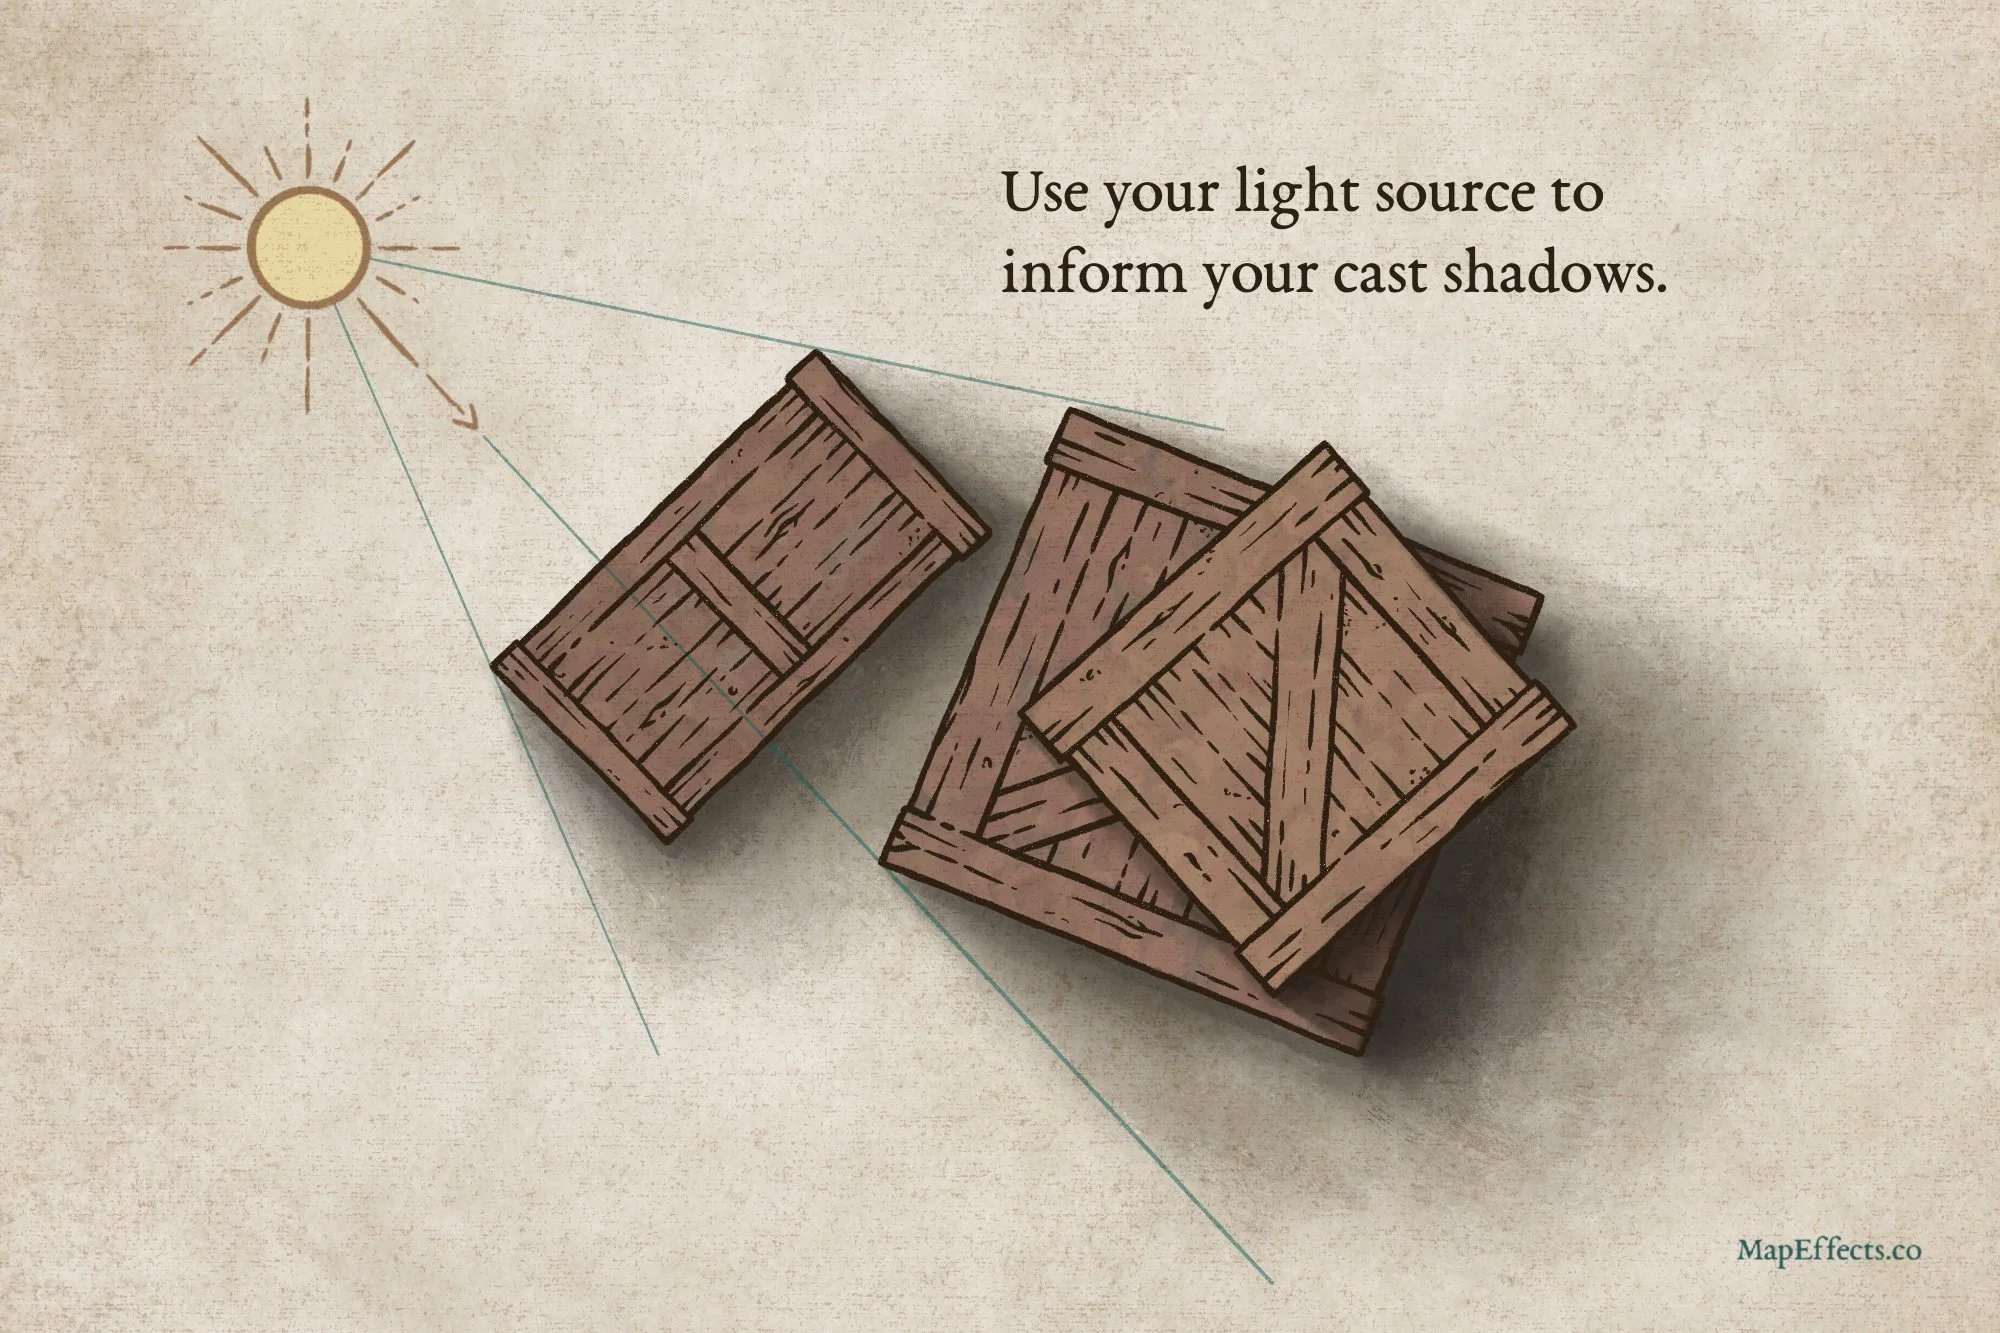
The first thing you’ll need to do is determine your main light source and where it is in relation to your wood crates. For an interior map, it may be coming from a fireplace, a torch, or a luminescent pool of dragon bile…you never know! The point is you want to use that light source to determine where the cast shadows are going to form on the ground.
Create a new layer, and set the blend mode to “Multiply” or “Linear Burn”. With a low opacity brush and a medium gray you can paint in the main cast shadows. Use your light source as a guide!
I would suggest keeping this simple in the beginning. Use some guidelines like I did in the sample above, and make the shadow sharpest right next to the corner of the box and fade it out the further away it gets. Yes, with a small light source like a torch, it would technically be casting a sharper shadow, but then you’ll have to mess around with the height and form of the box. If you’re just getting started, I would fudge on it and just fade out the shadow to give the impression of a larger, soft light source. Almost no one will notice except other artists, and they’ll understand why you did it haha.
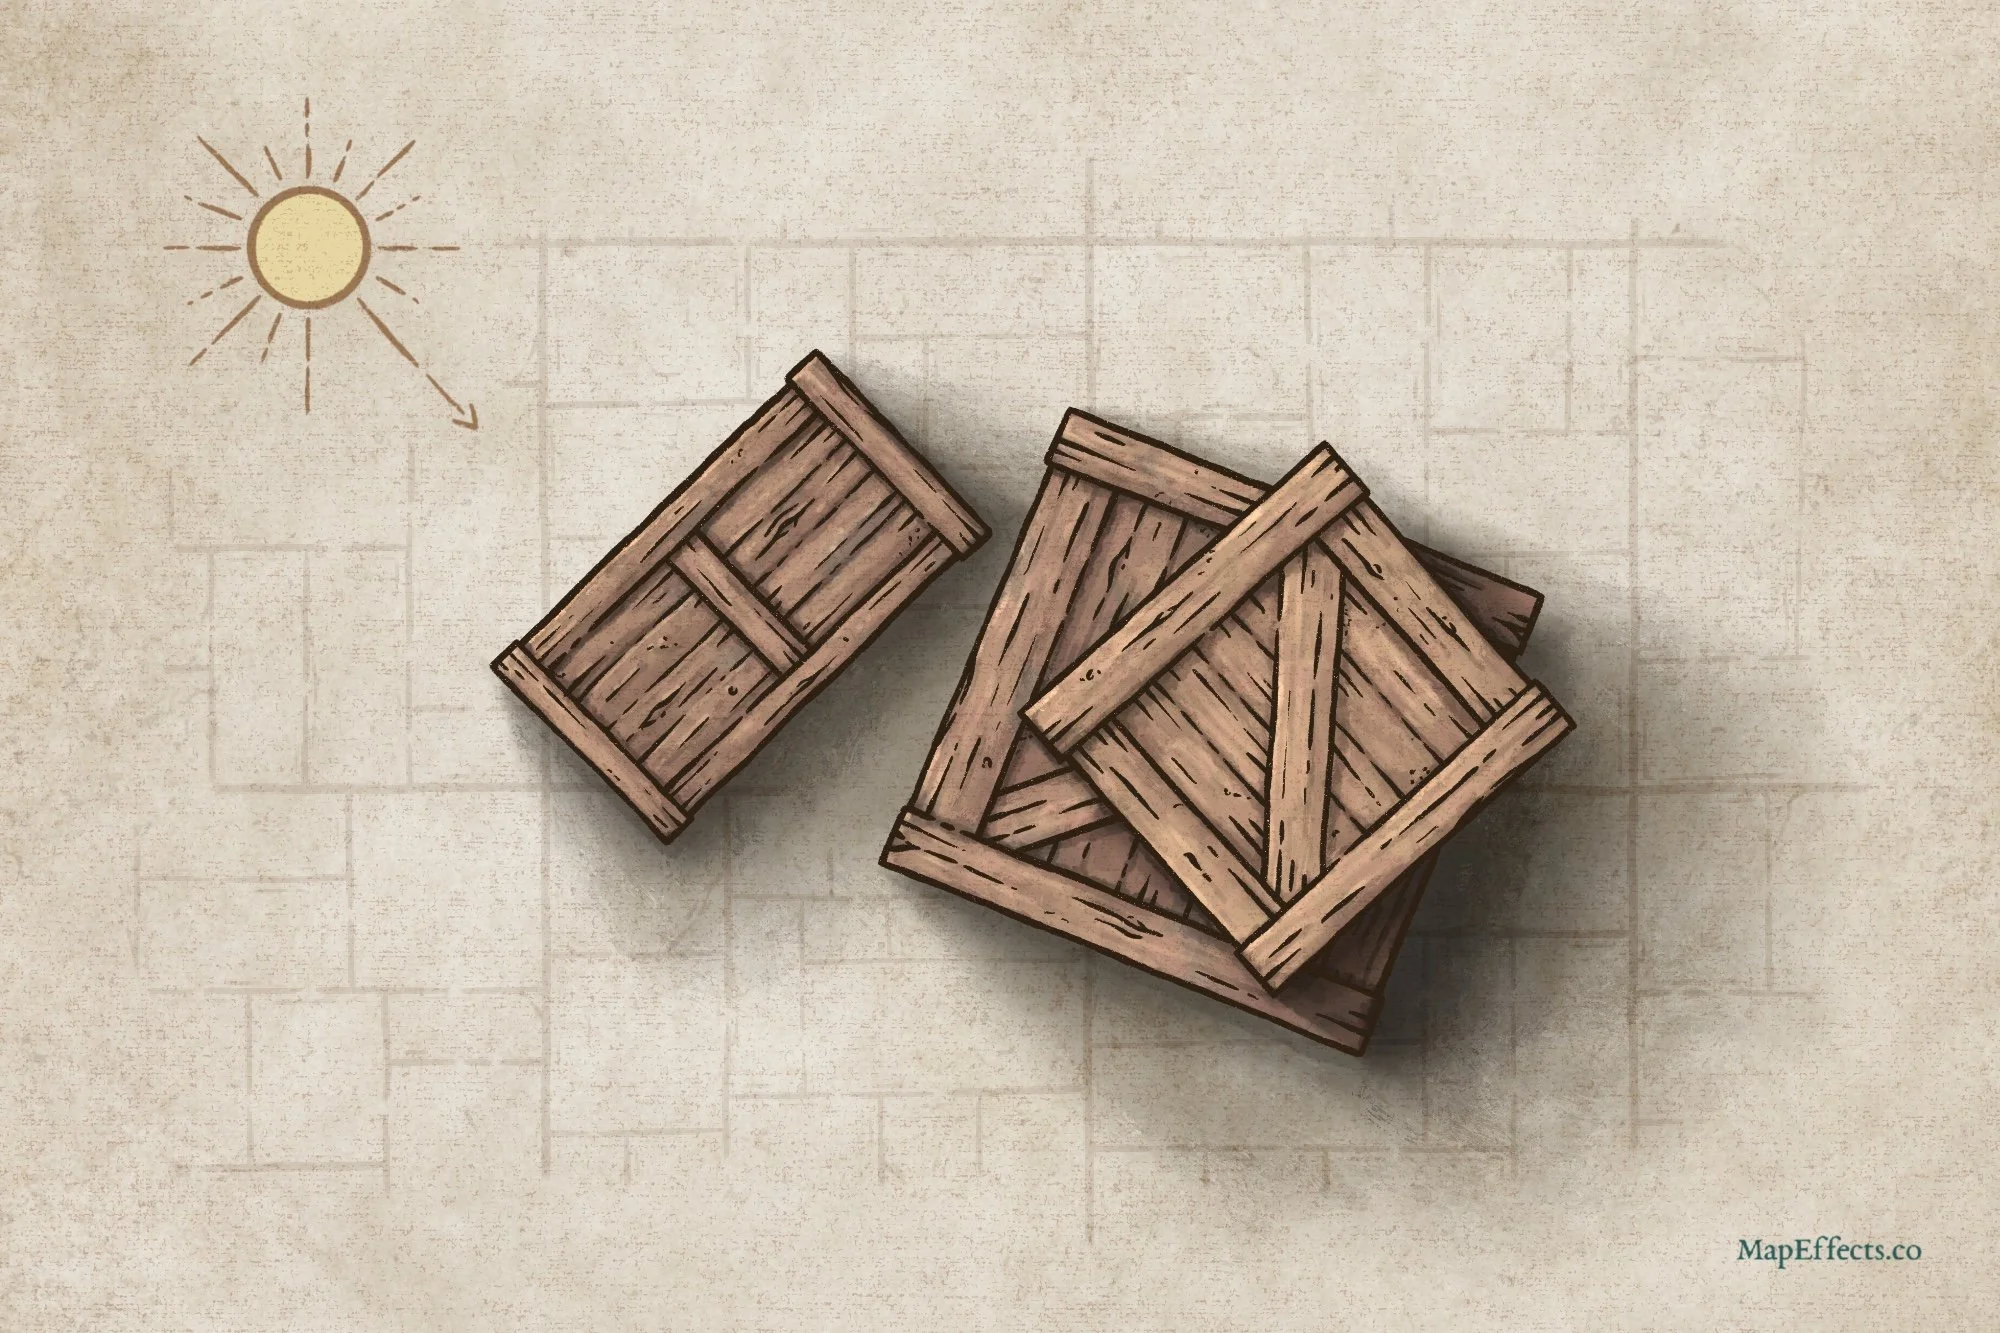
Add Detail Shadows
You can now circle back and start deepening shadows and painting them in on the top of the boxes. Personally, I usually create a new layer for this step, once again with the blend mode set to “Multiply” or “Linear Burn”. Look for places where boards overlap and meet, and paint a bit of shadow in those areas.
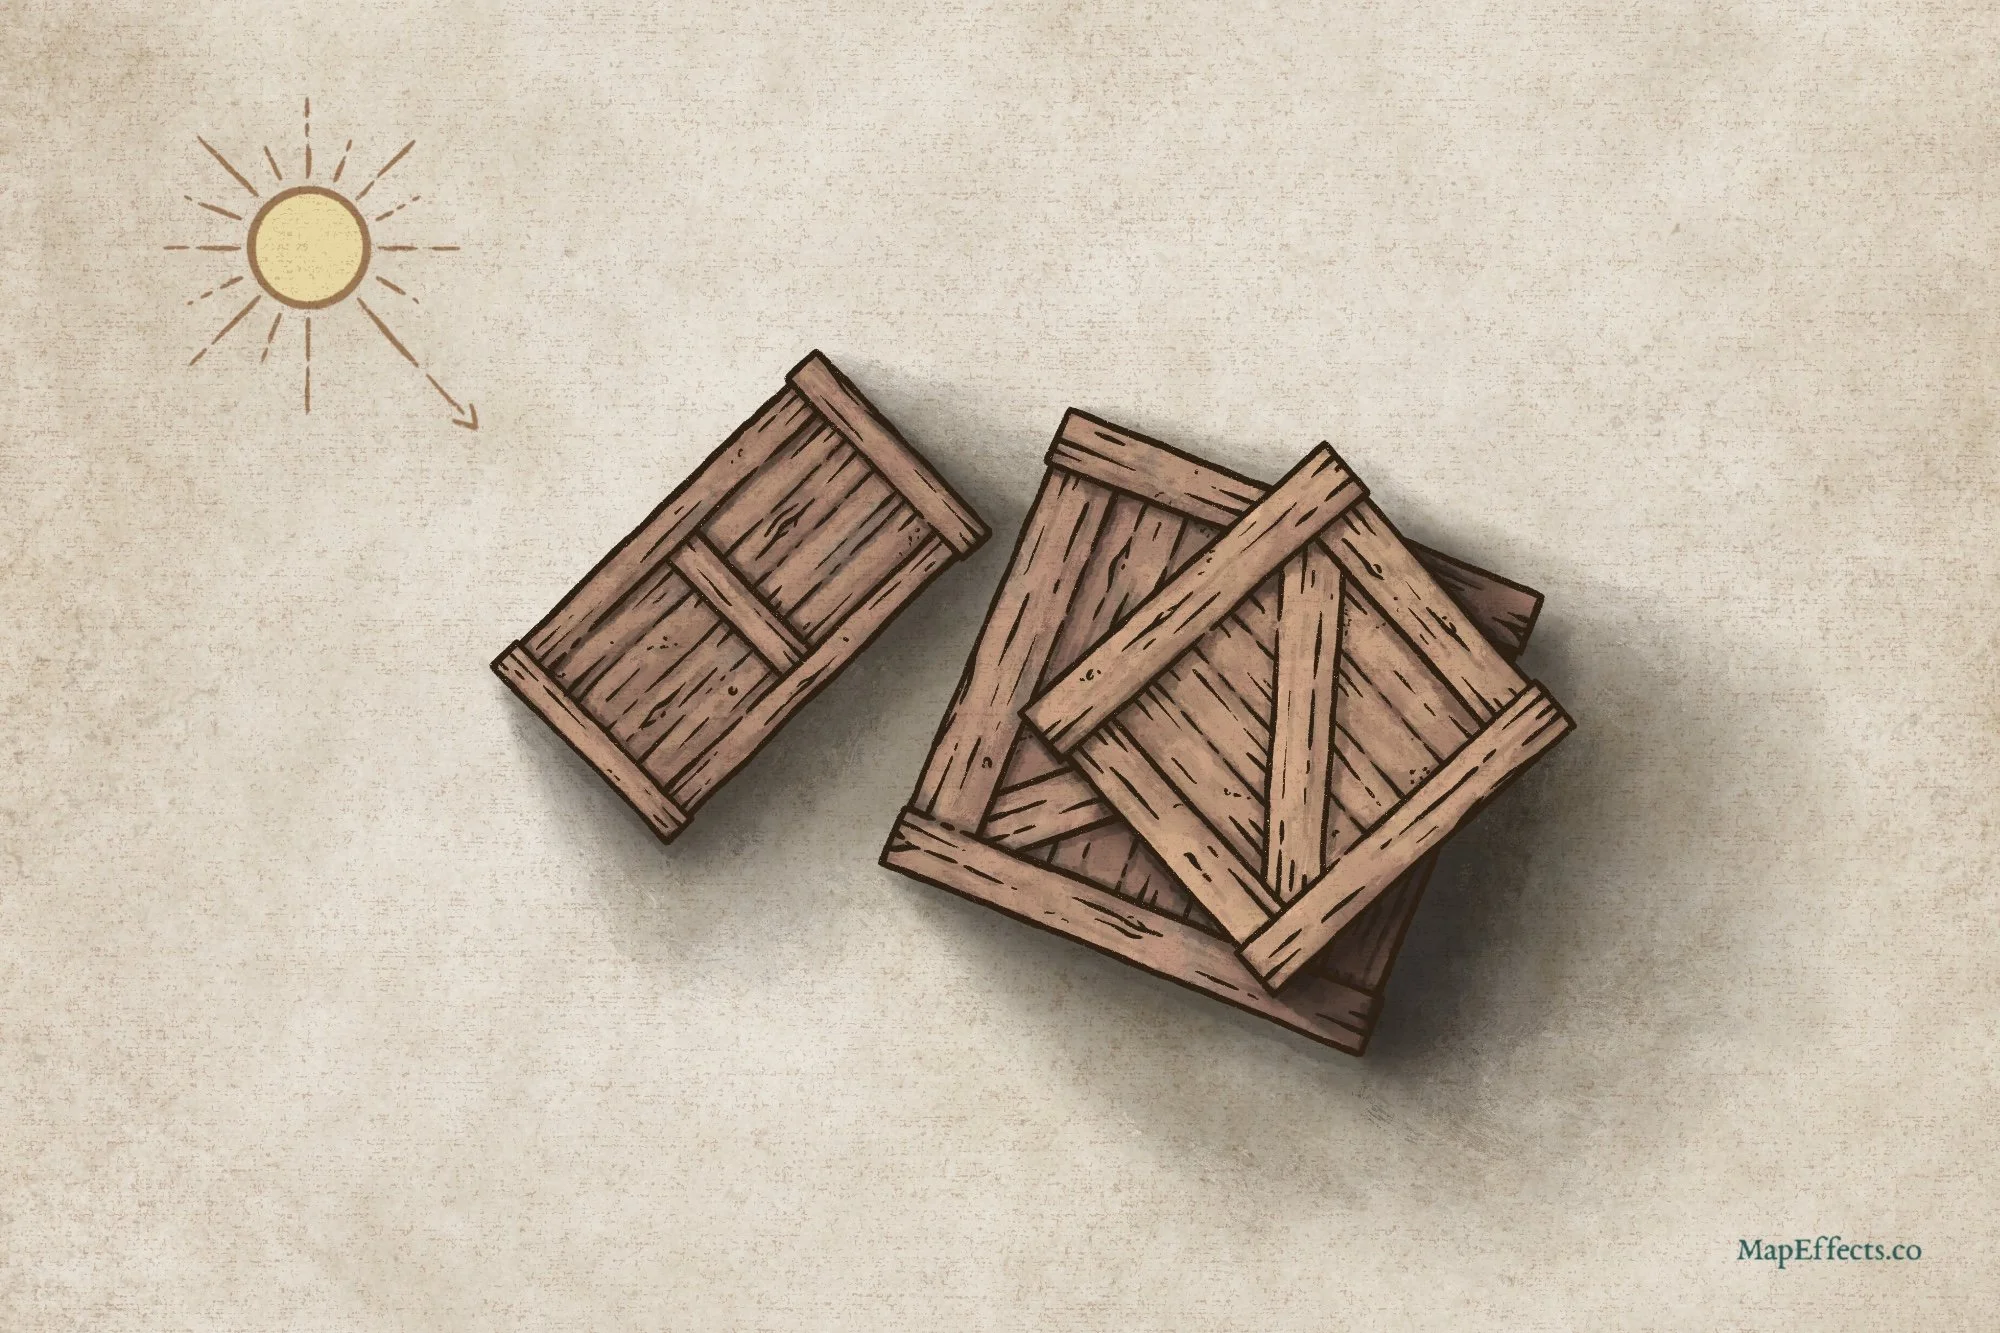
Paint the Main Highlights
Create another new layer, but this time set the blend mode to “Add” or “Screen”. The result of each is pretty different between Procreate and Photoshop, so just experiment and see what works for you. With the same low opacity brush, select a warmer color to reflect the more yellow torchlight of an interior map. At this point just focus on painting the tops of the boards broadly where the light would be illuminating them. Once again, you’ll add more detail in the next step. This just helps them pop and stand out a bit more.
A Final Pass of Highlights
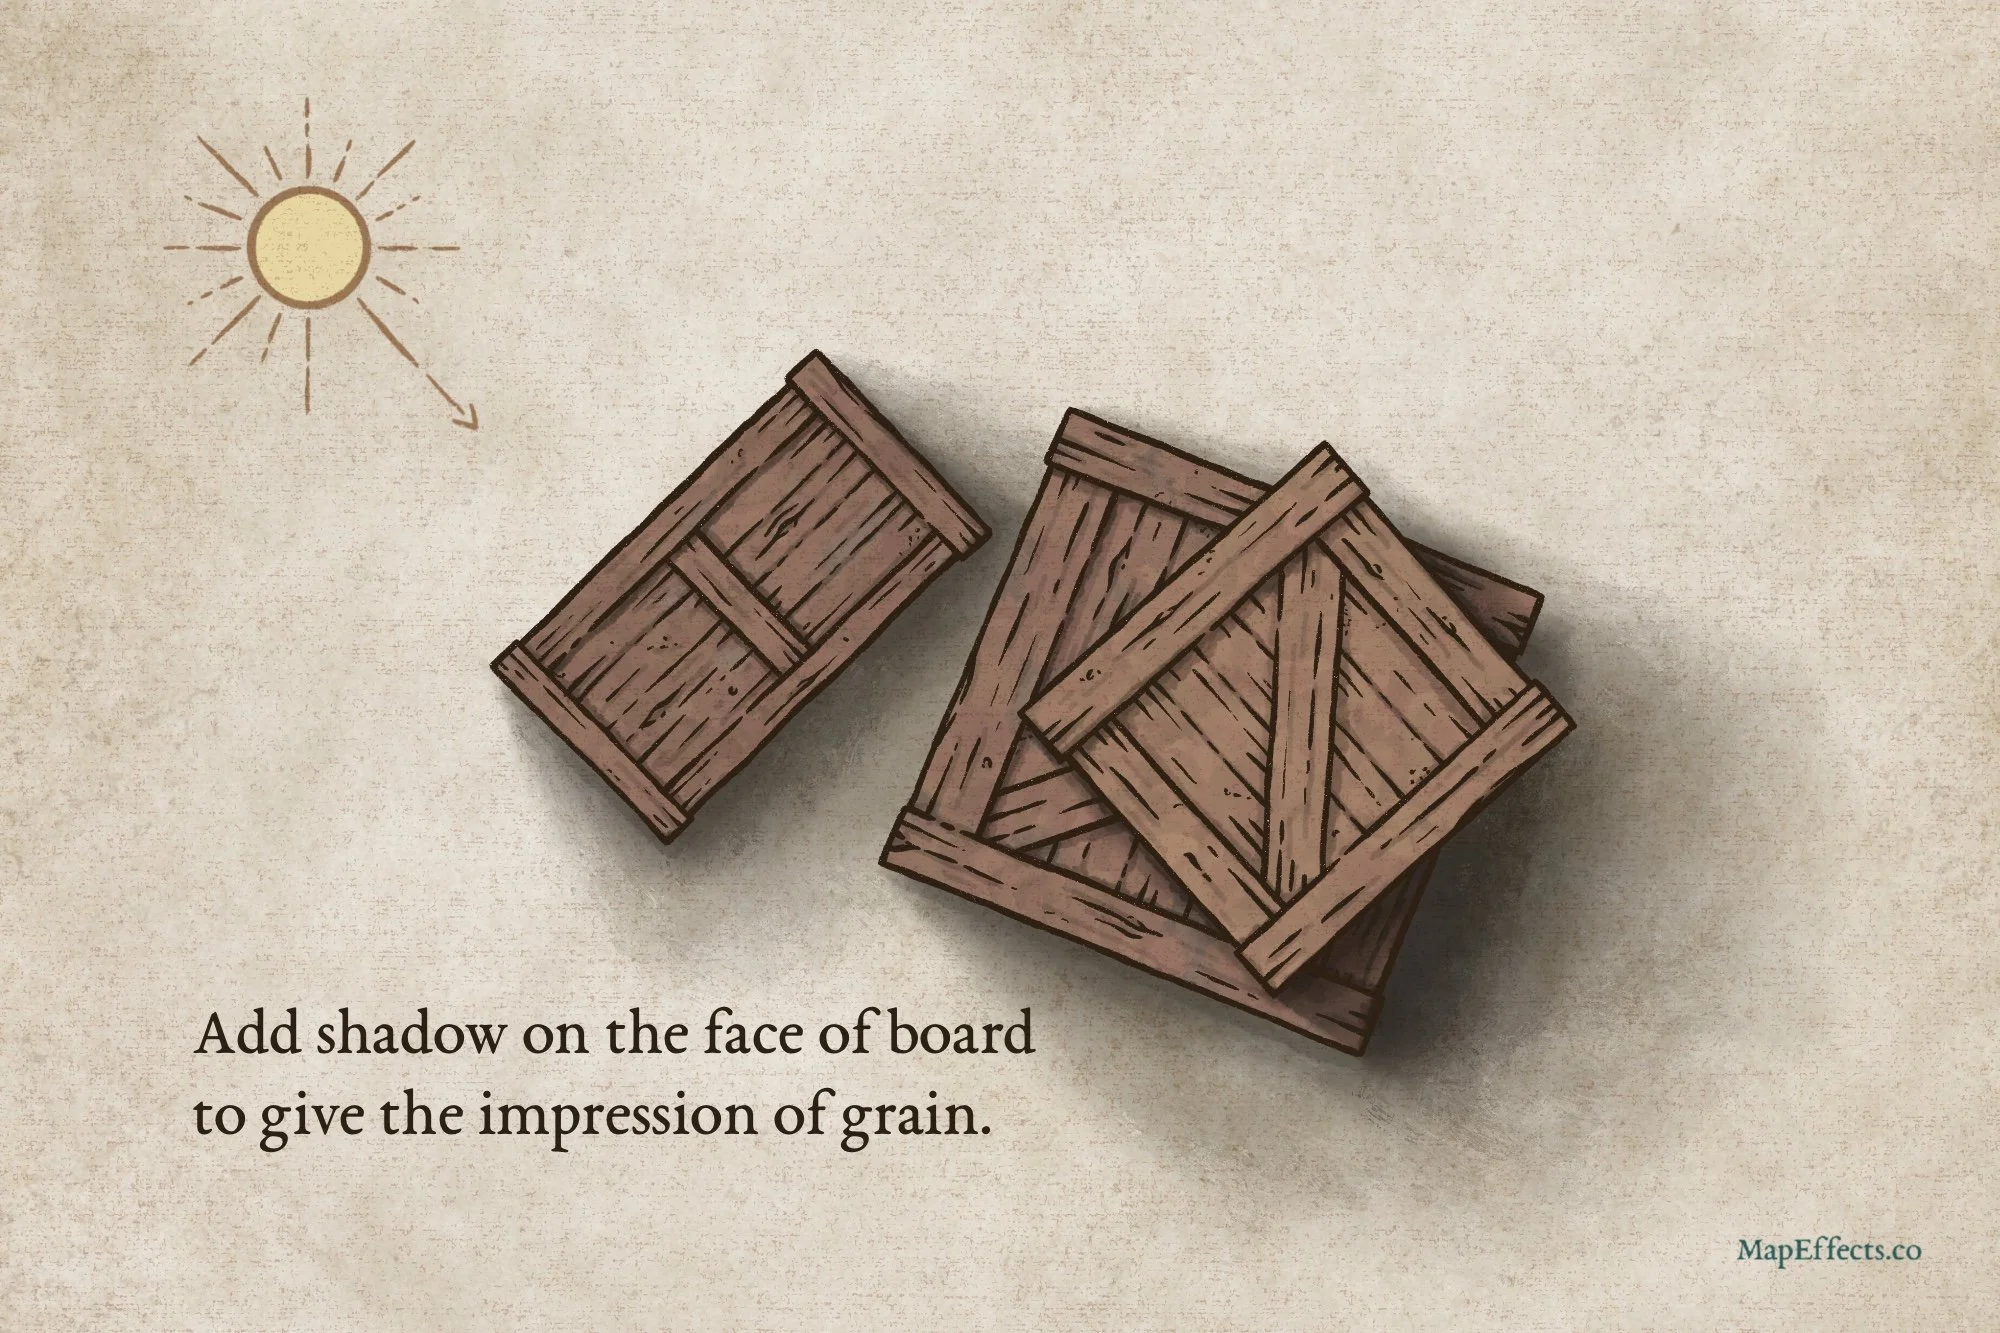
For the last step, note where your light source is and paint some sharper highlights on the edges of the boards closest to the light. You can then add some sharper highlights on the face of some of the boards to further give the impression of wood grain.
Thank You!
You’re done! I hope you found this helpful, so you can draw some wood crates on your next map! Be sure to check out some of the other tutorials below to help you in your map-making journey.
Happy Mapping!
Josh


