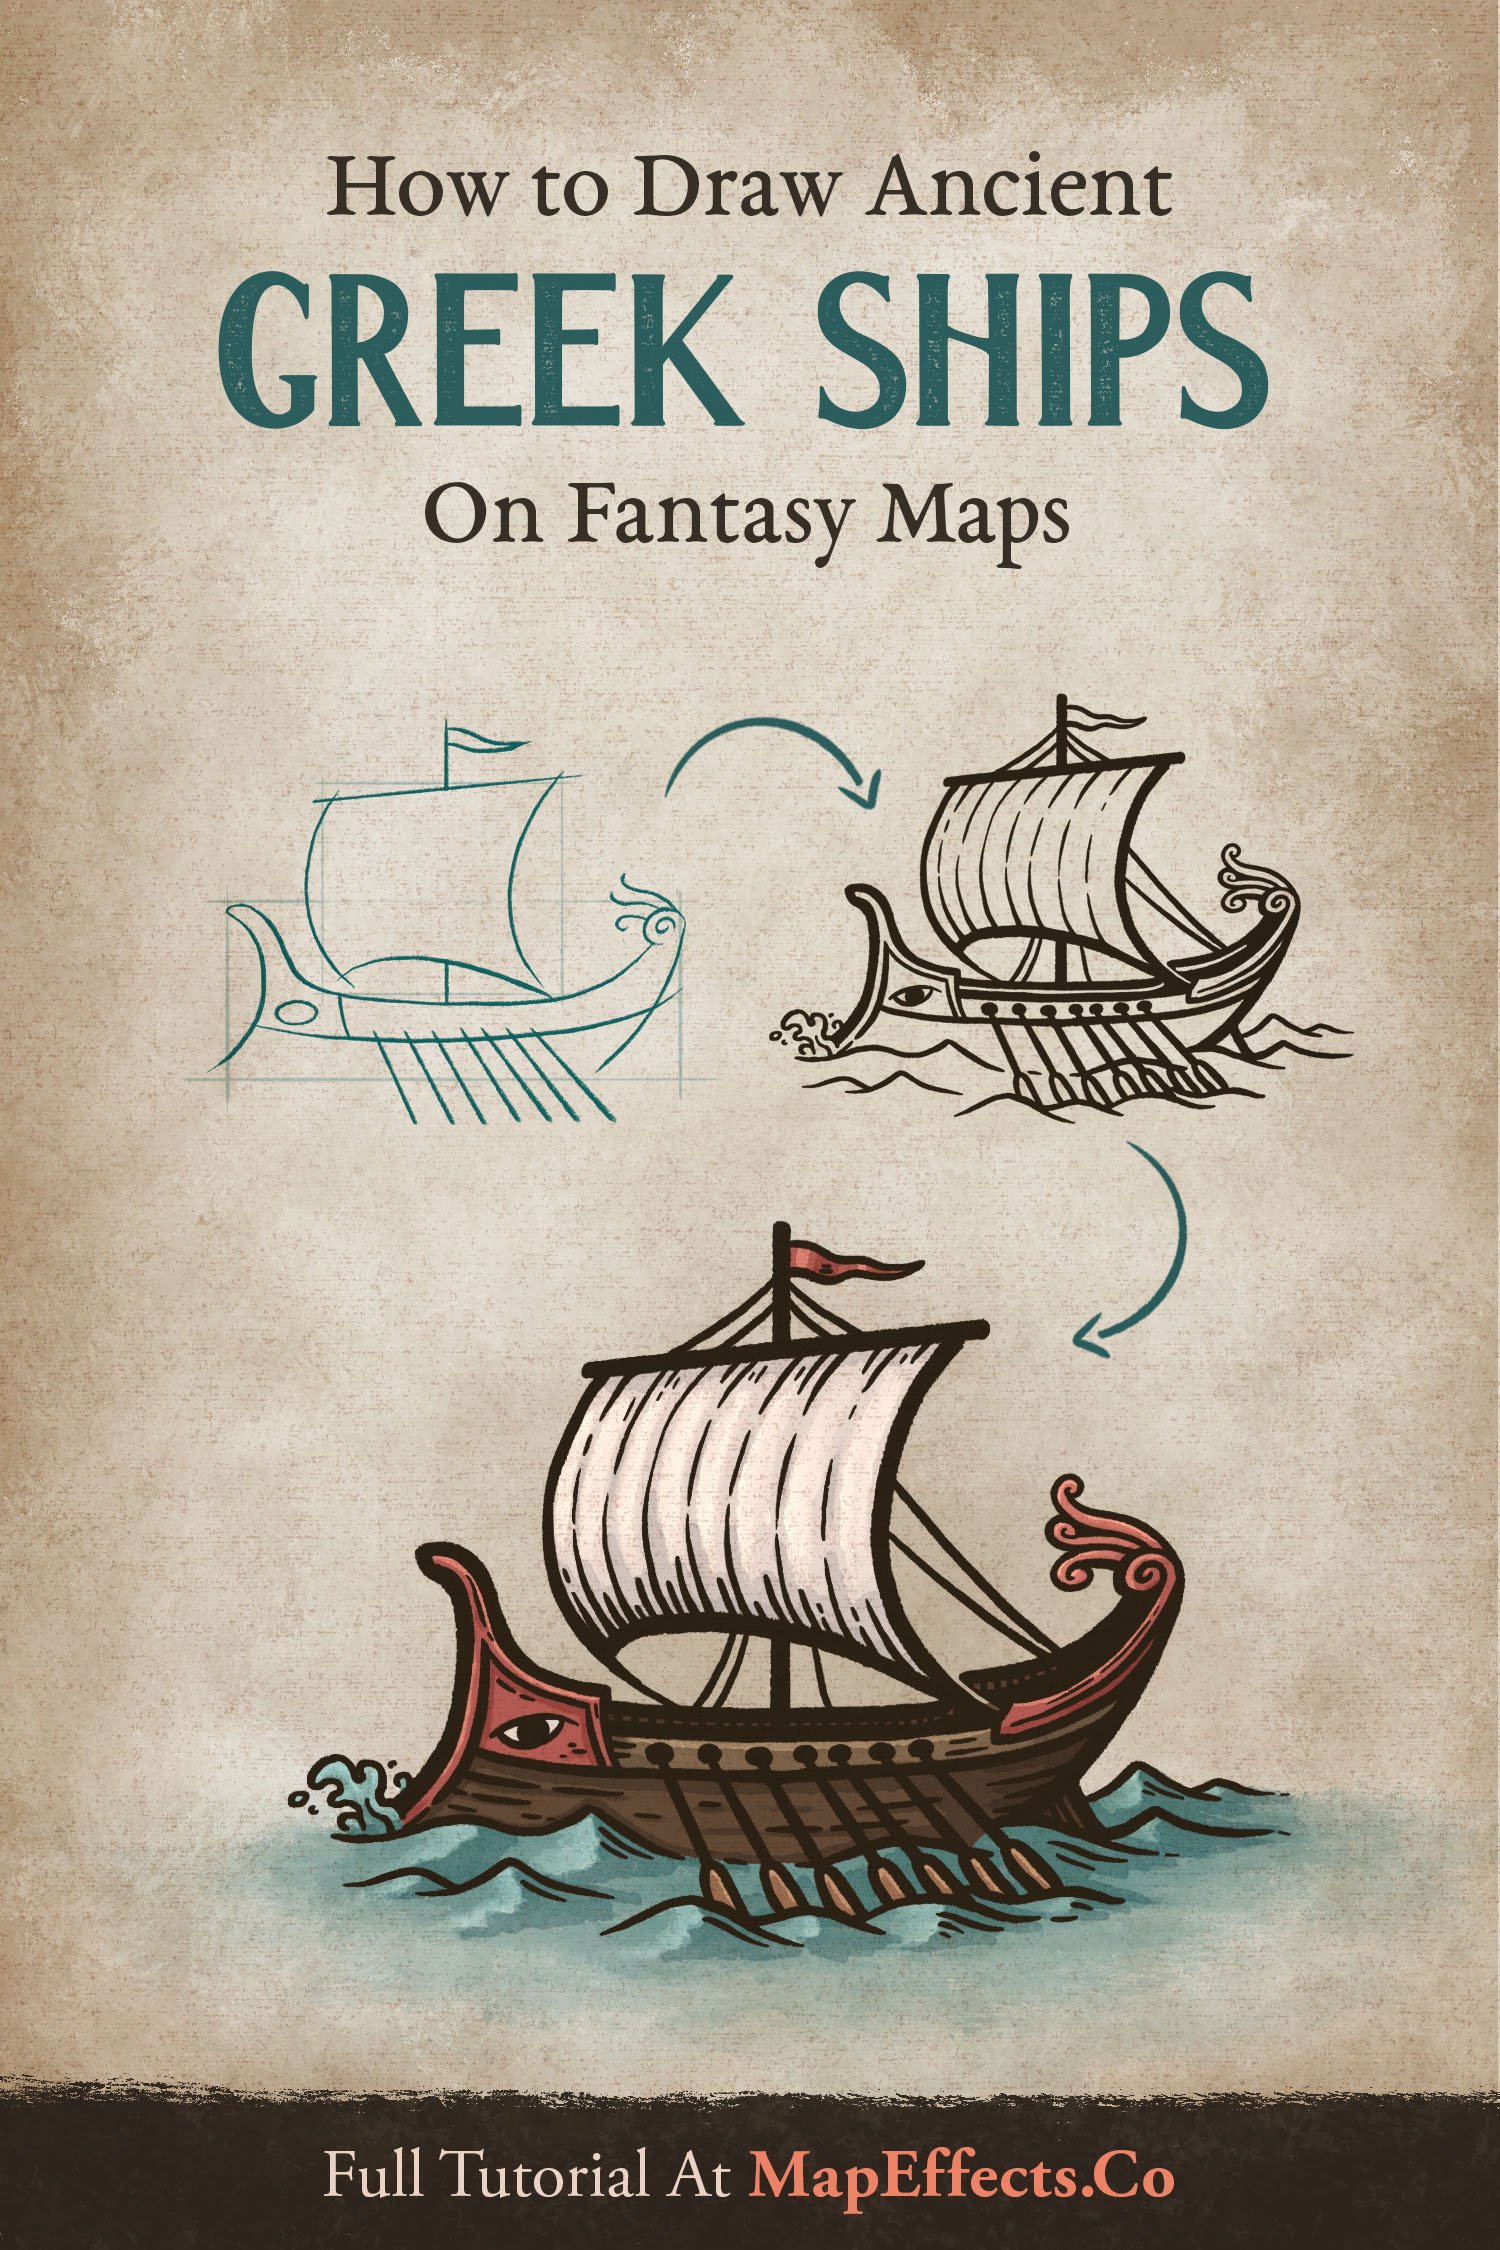
How to Draw a Ancient Greek Ship

The sea stretches before you, the same wine-dark expanse crossed by Odysseus as he wrestled with gods, monsters, and the whims of fate. Greek ships like his carried stories across the Mediterranean for centuries, their painted eyes watching the horizon for both danger and destiny.
In this tutorial, I’ll show you how to draw an ancient Greek ship like those that shaped epics, inspired mythologies, and still spark our imagination thousands of years later.
Want some free brushes to draw your maps? Get The Free Apprentice Brush Pack HERE
Observation: Ancient Greek Ship Design
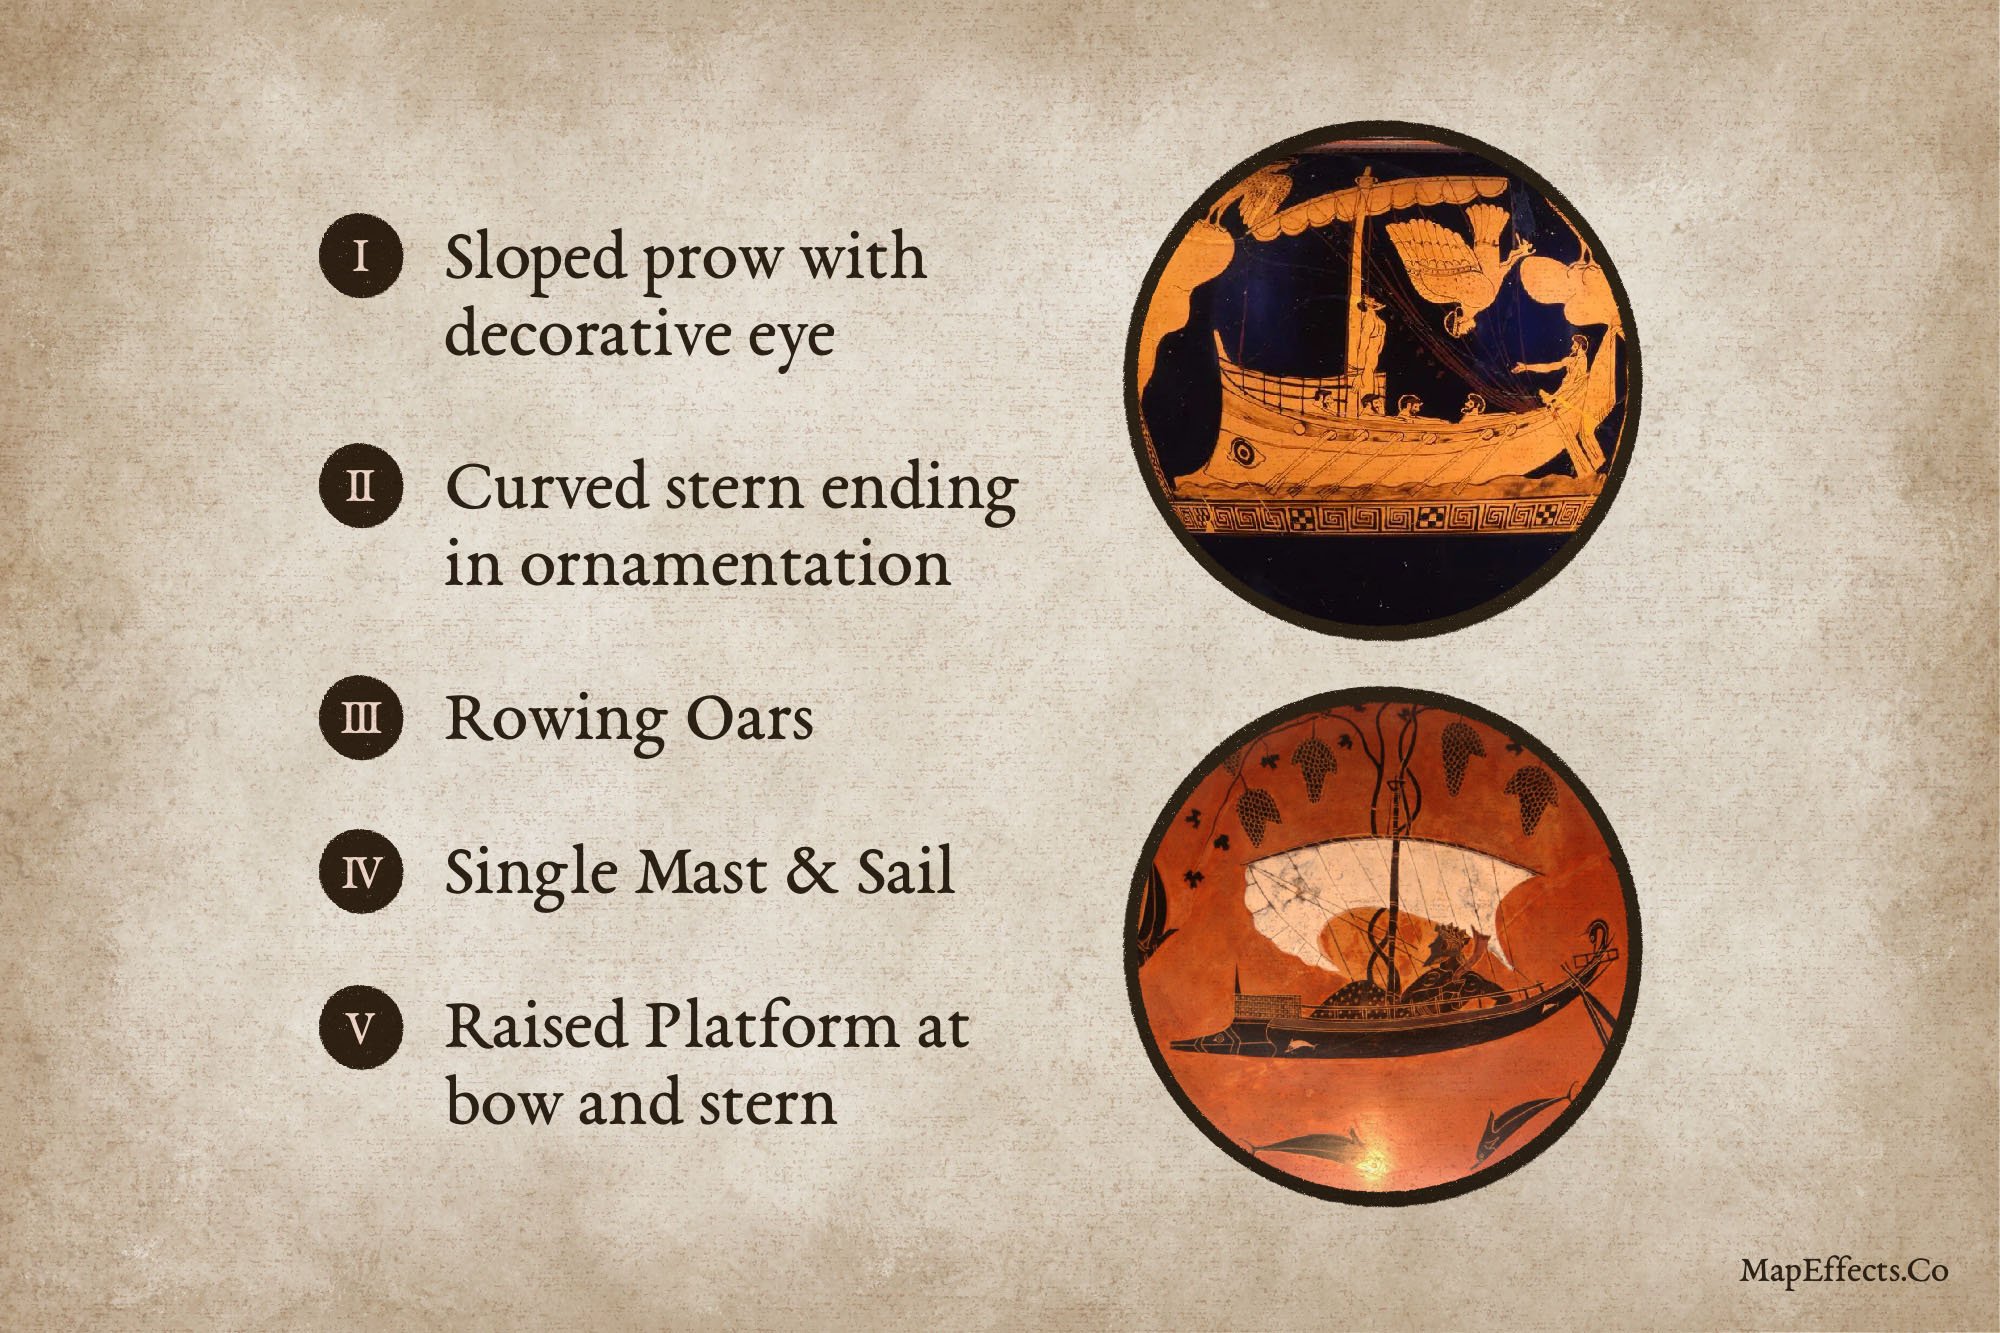
Before sketching your own ship, it helps to understand the signature elements that defined Greek vessels in ancient art. These features appear again and again on pottery and you can use it as a source of inspiration. It’s important to point out that the goal is not a precise scholarly illustration that is 100% historically accurate to a particular time period. Even some of the things listed above have exceptions in history (Like having more than one mast). What you are doing is compiling a mental list of shapes and aesthetics that all cause your final illustration to look “Greek” to a viewer.
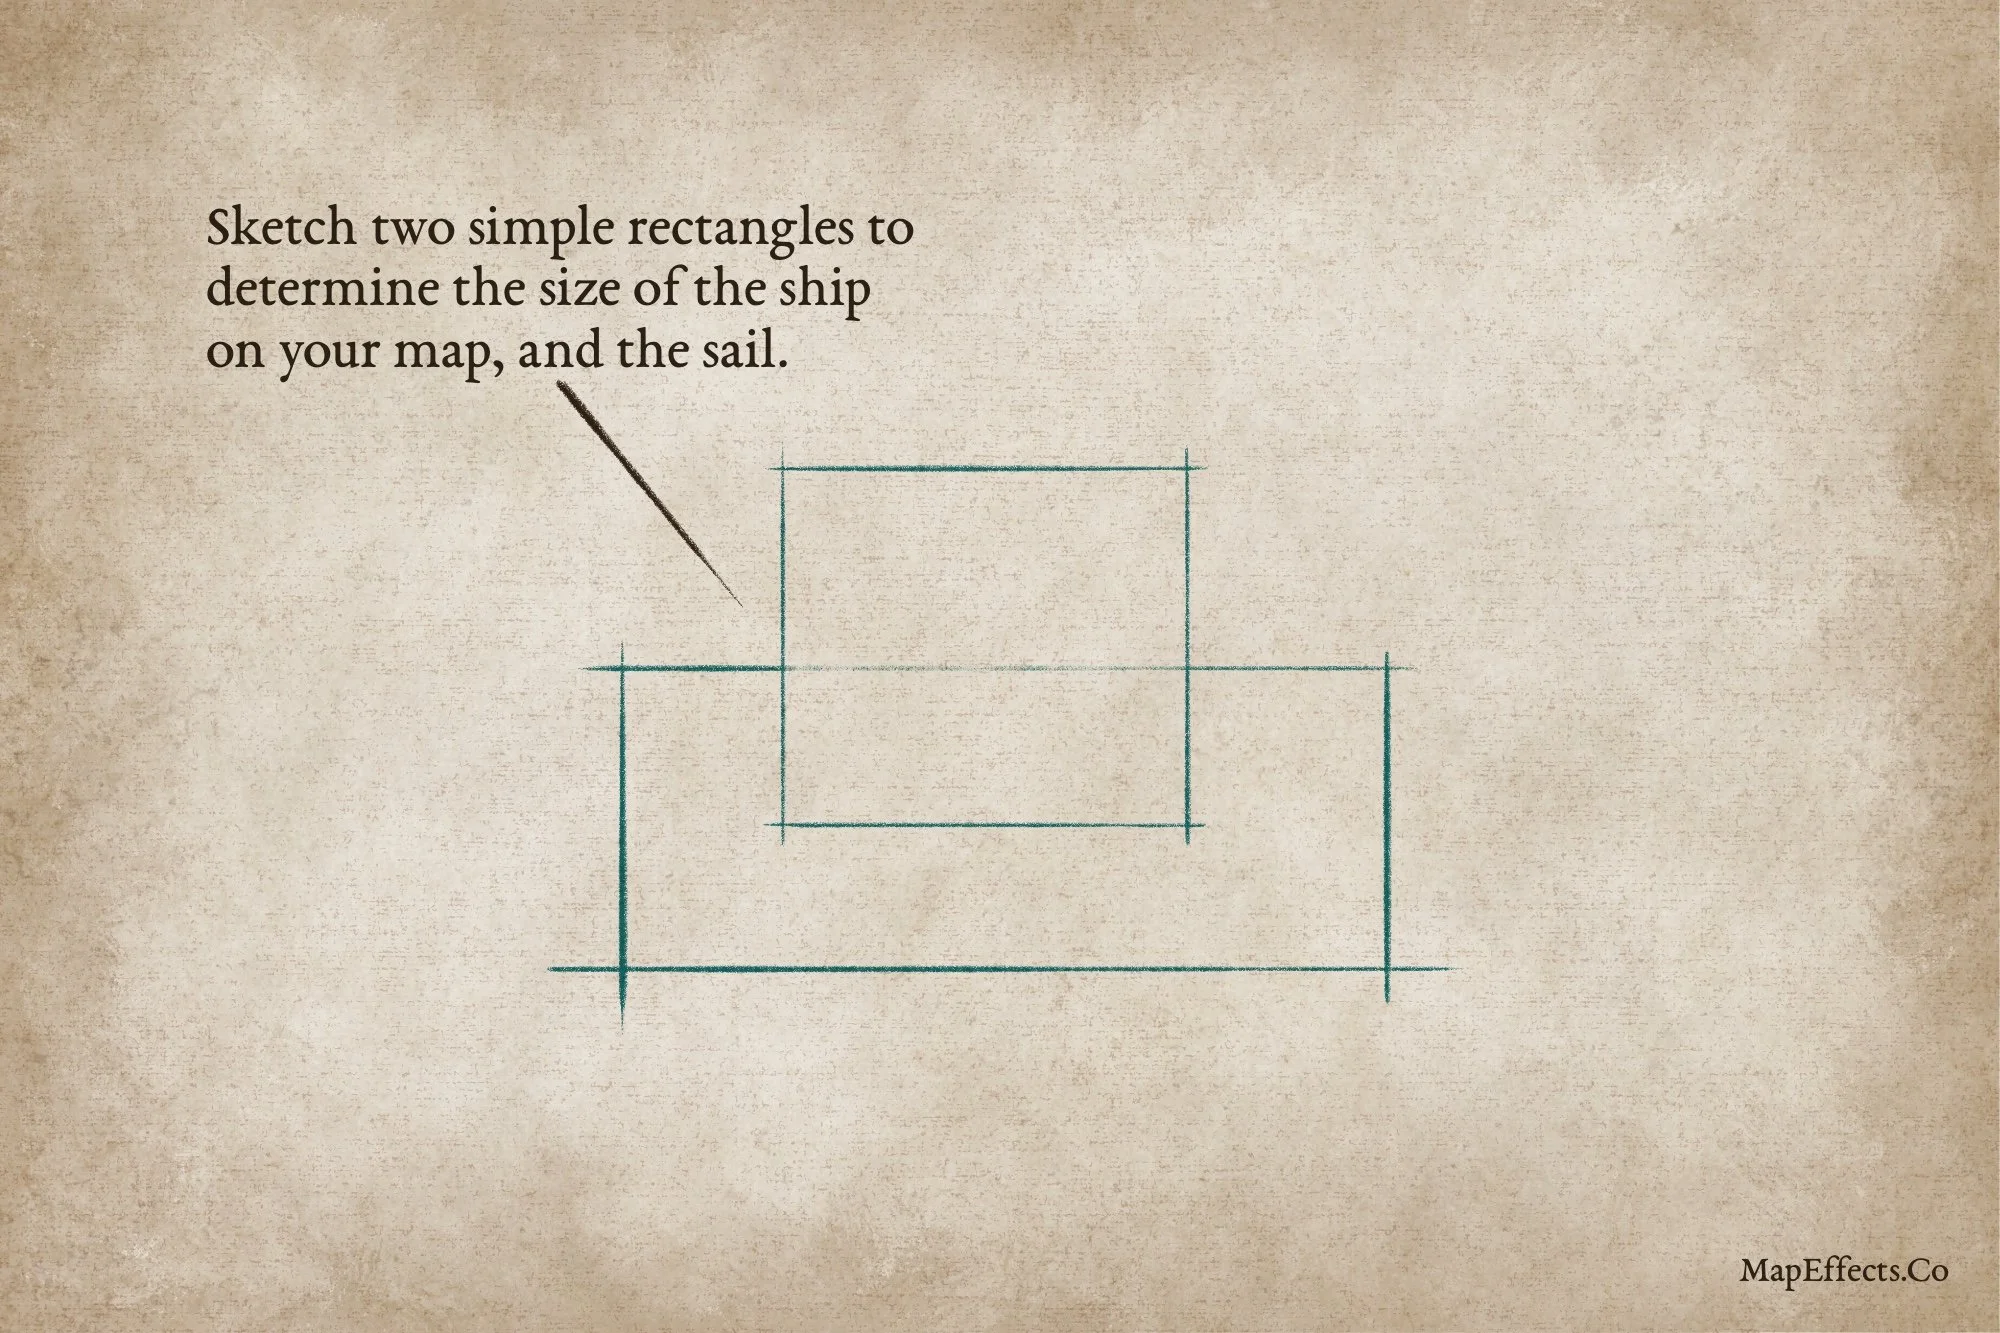
Sketch the Size of the Ship
With our list in mind, we can begin by sketching a couple of simple rectangles, which mainly inform the overall size of the ship and mast.
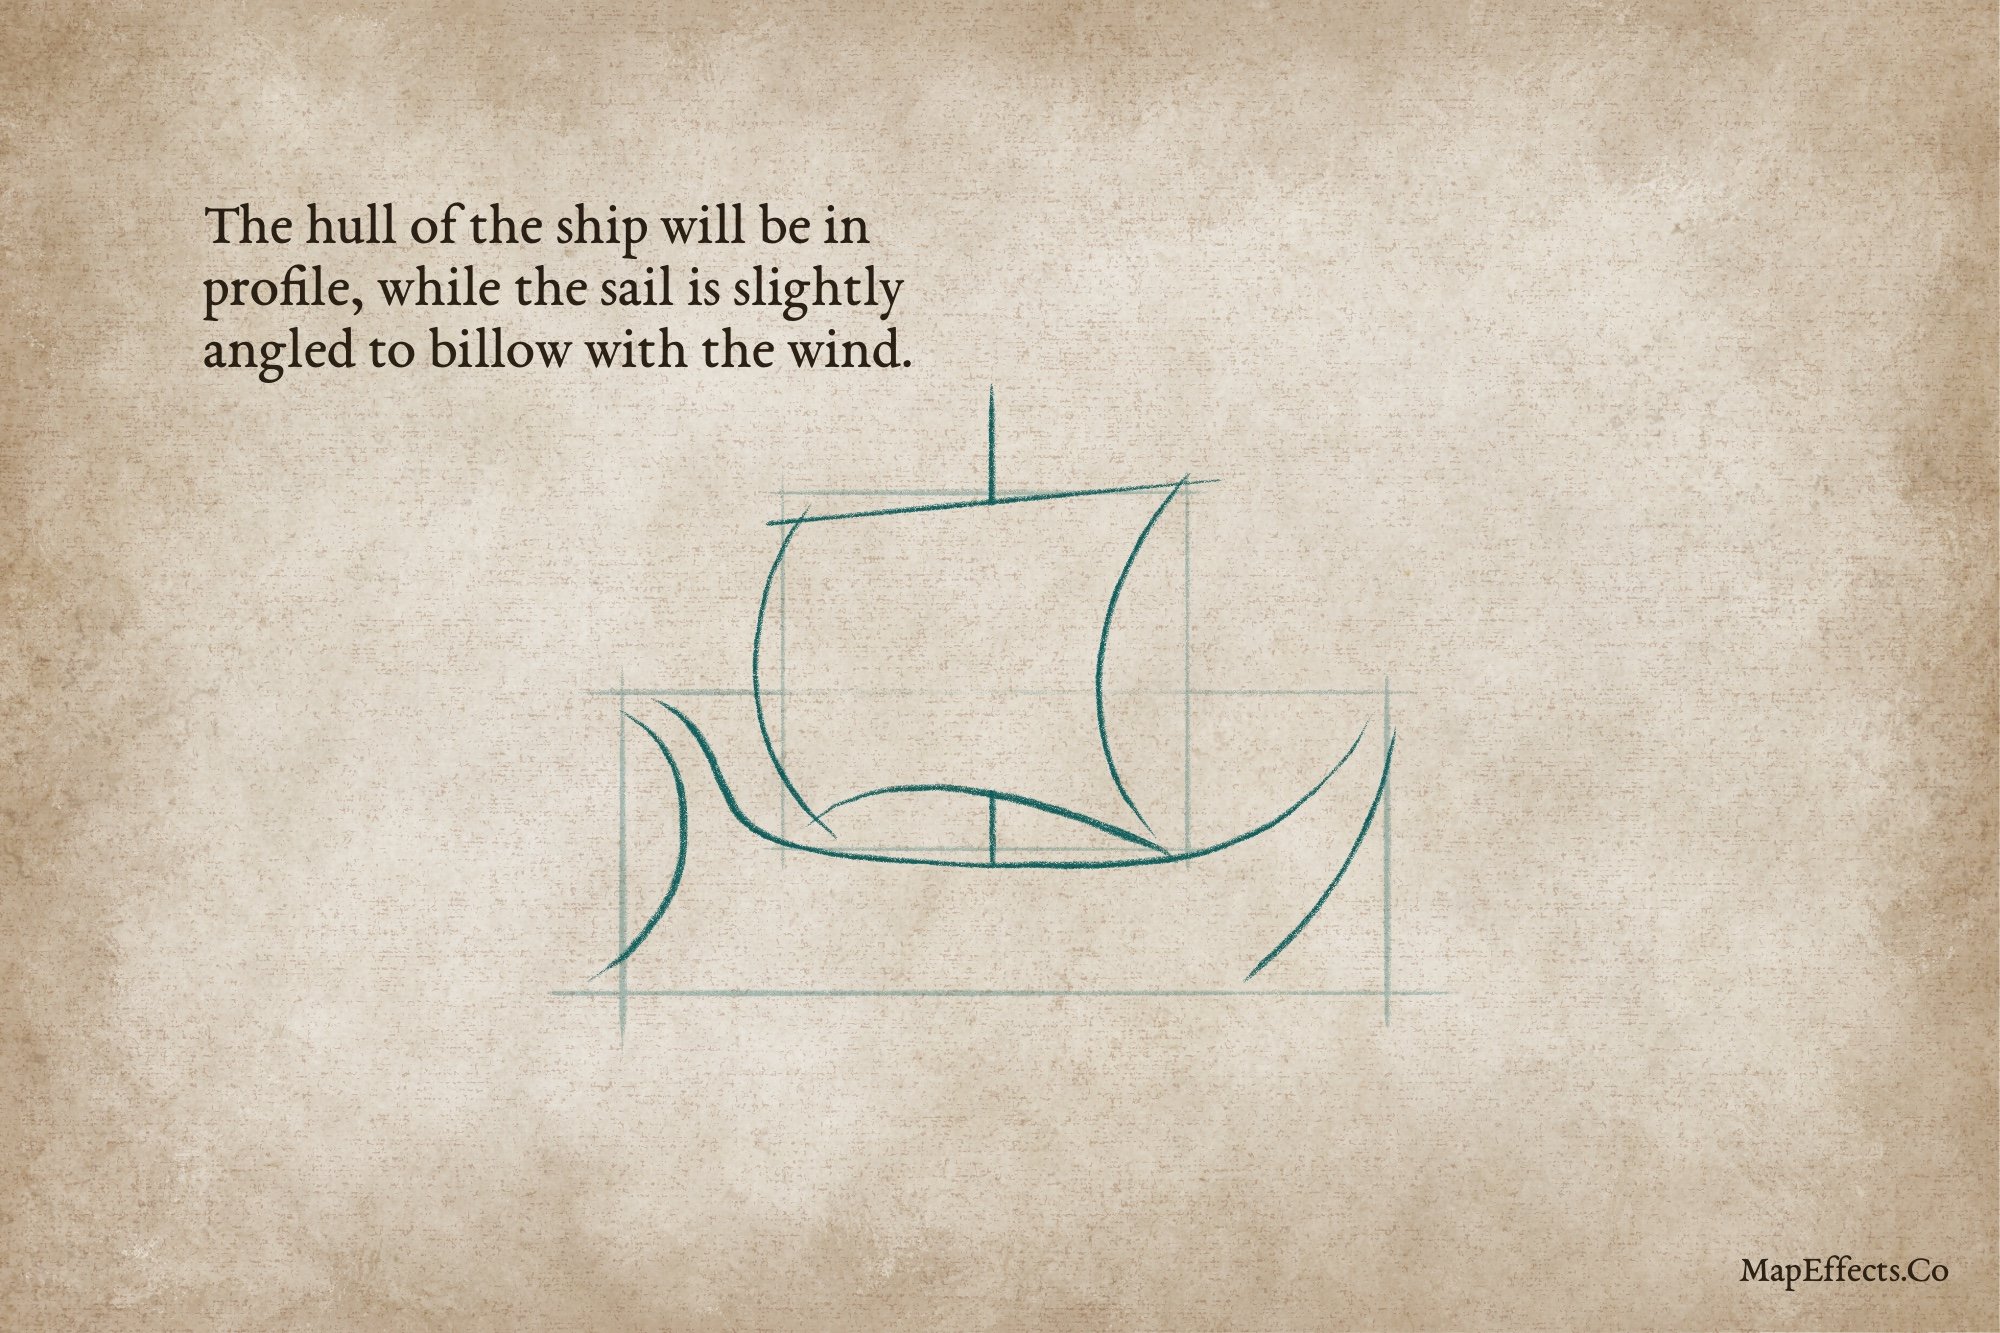
Sketch the Silhouette of the Ship
You can now begin carving out the main silhouette of your ship within the boxes from the previous step. Remembering the sloping shape of the bow, and the elegant curve in the back. Even with just this, it already looks like an ancient Greek ship.
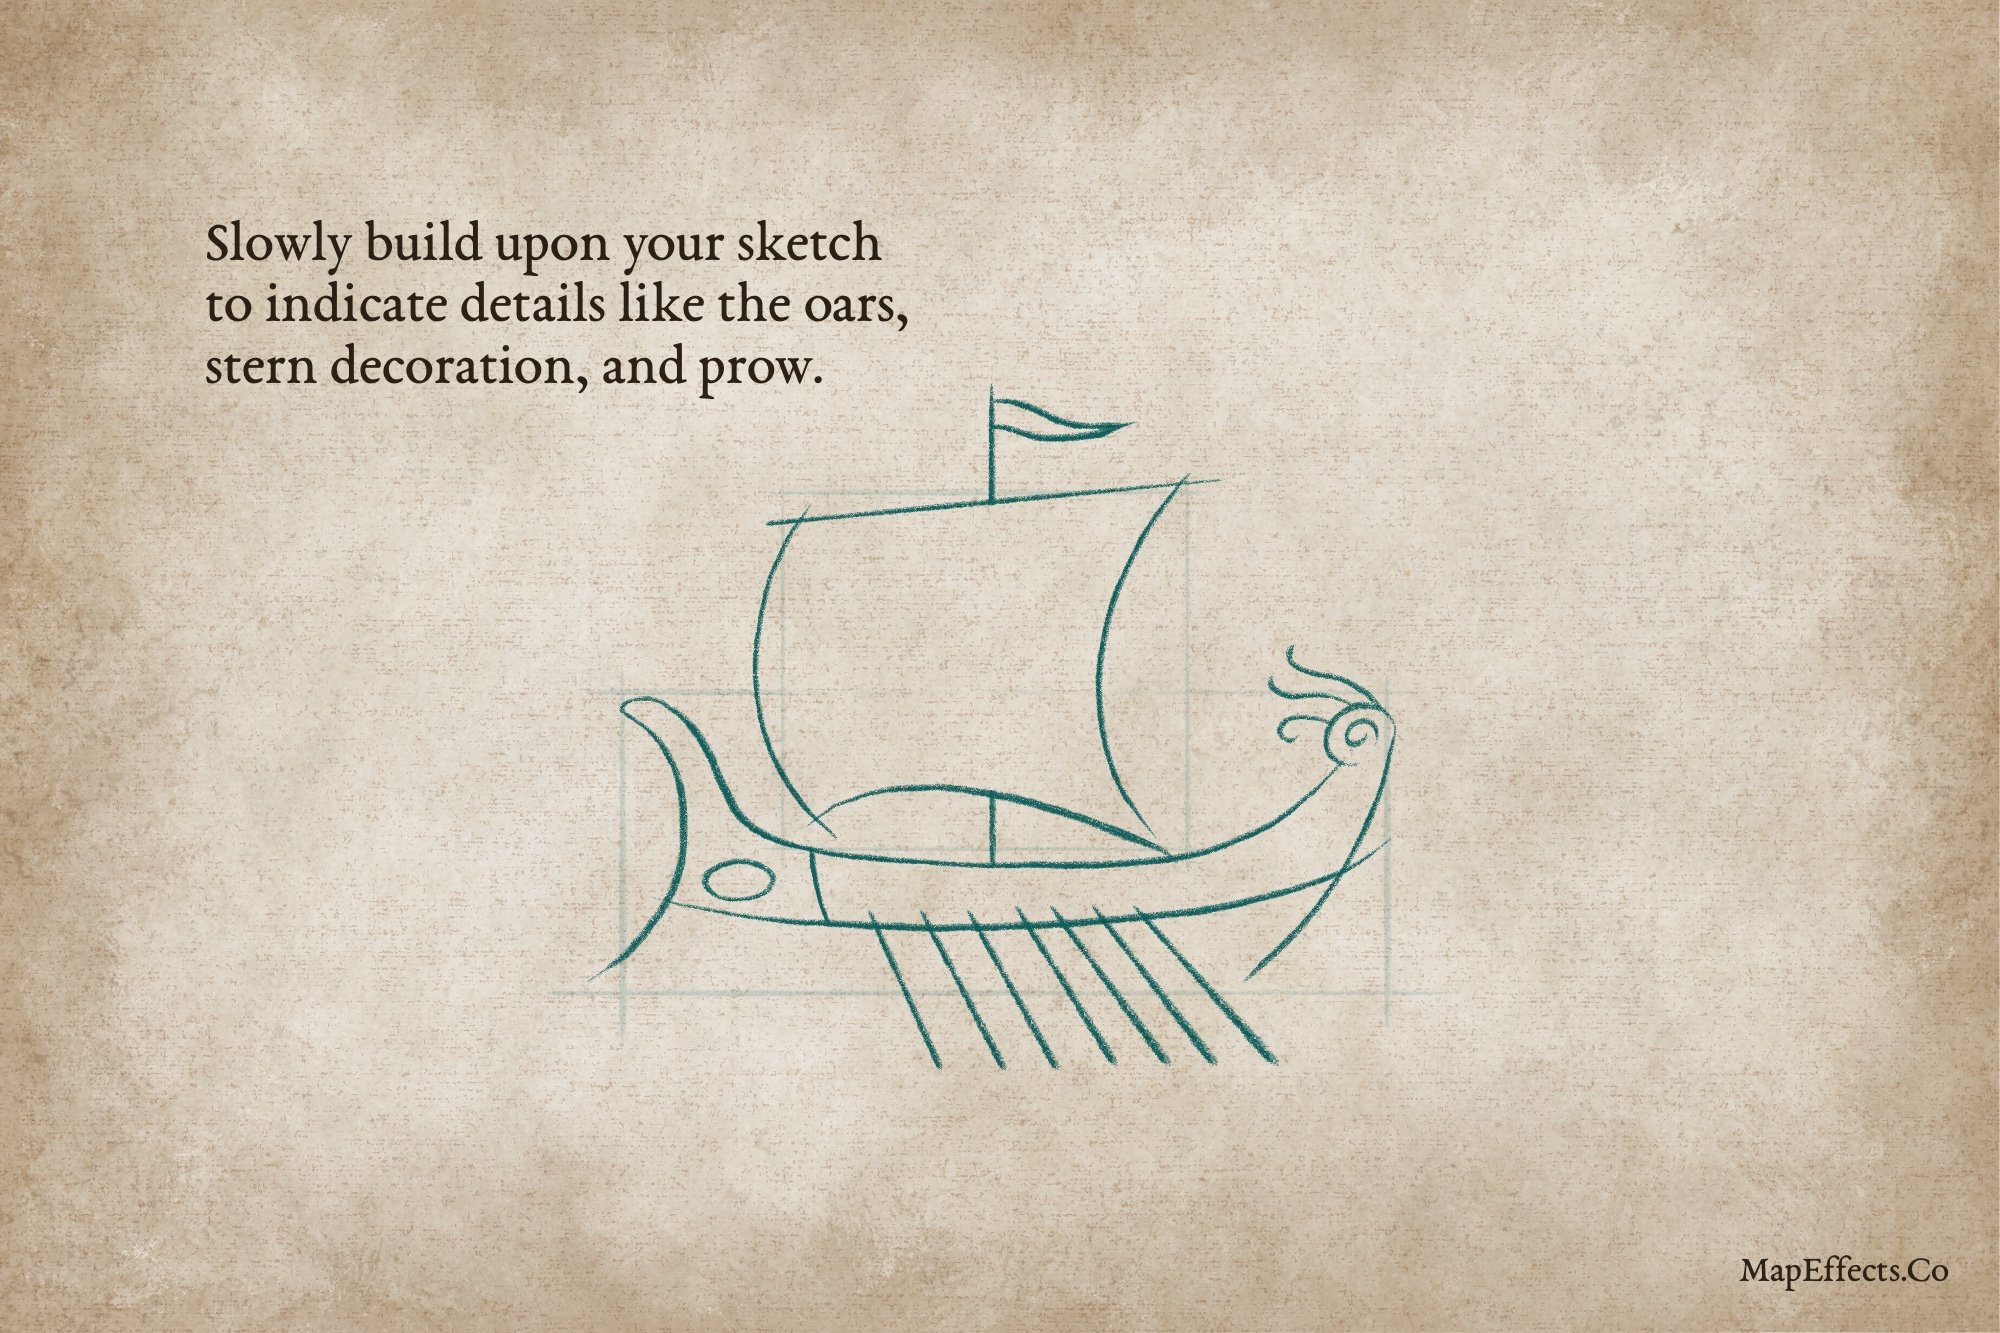
Add Basic Details like Oars and Ornamentation
We begin with simple shapes and work toward complexity. Now you can sketch in things like oars coming out of the side of the ship, as well as the eye at the front and the tail feathers at the back.
Decoding the Symbolism
The Eye
The most distinctive feature on the prow is the painted eye, an emblem meant to protect both ship and crew. To the Greeks, this eye helped the vessel “see” its course, ward off evil, and navigate the uncertainties of the sea. It’s one of the oldest and most widespread symbols in Mediterranean maritime culture, appearing on artifacts for centuries.
The Feathers
At the rear of the ship, you’ll find an upward-curling stern ornament, often shaped like a fan of tail feathers called an “aphlaston.” For the Greeks, it was one of the most iconic features of their ships. Capturing the aphlaston of an enemy ship was a public sign of triumph. Cities displayed captured aphlasta in temples as trophies of naval conquest. Tomb reliefs for sailors and captains included aphlasta to mark their identity and status.
More Mapping Tutorials


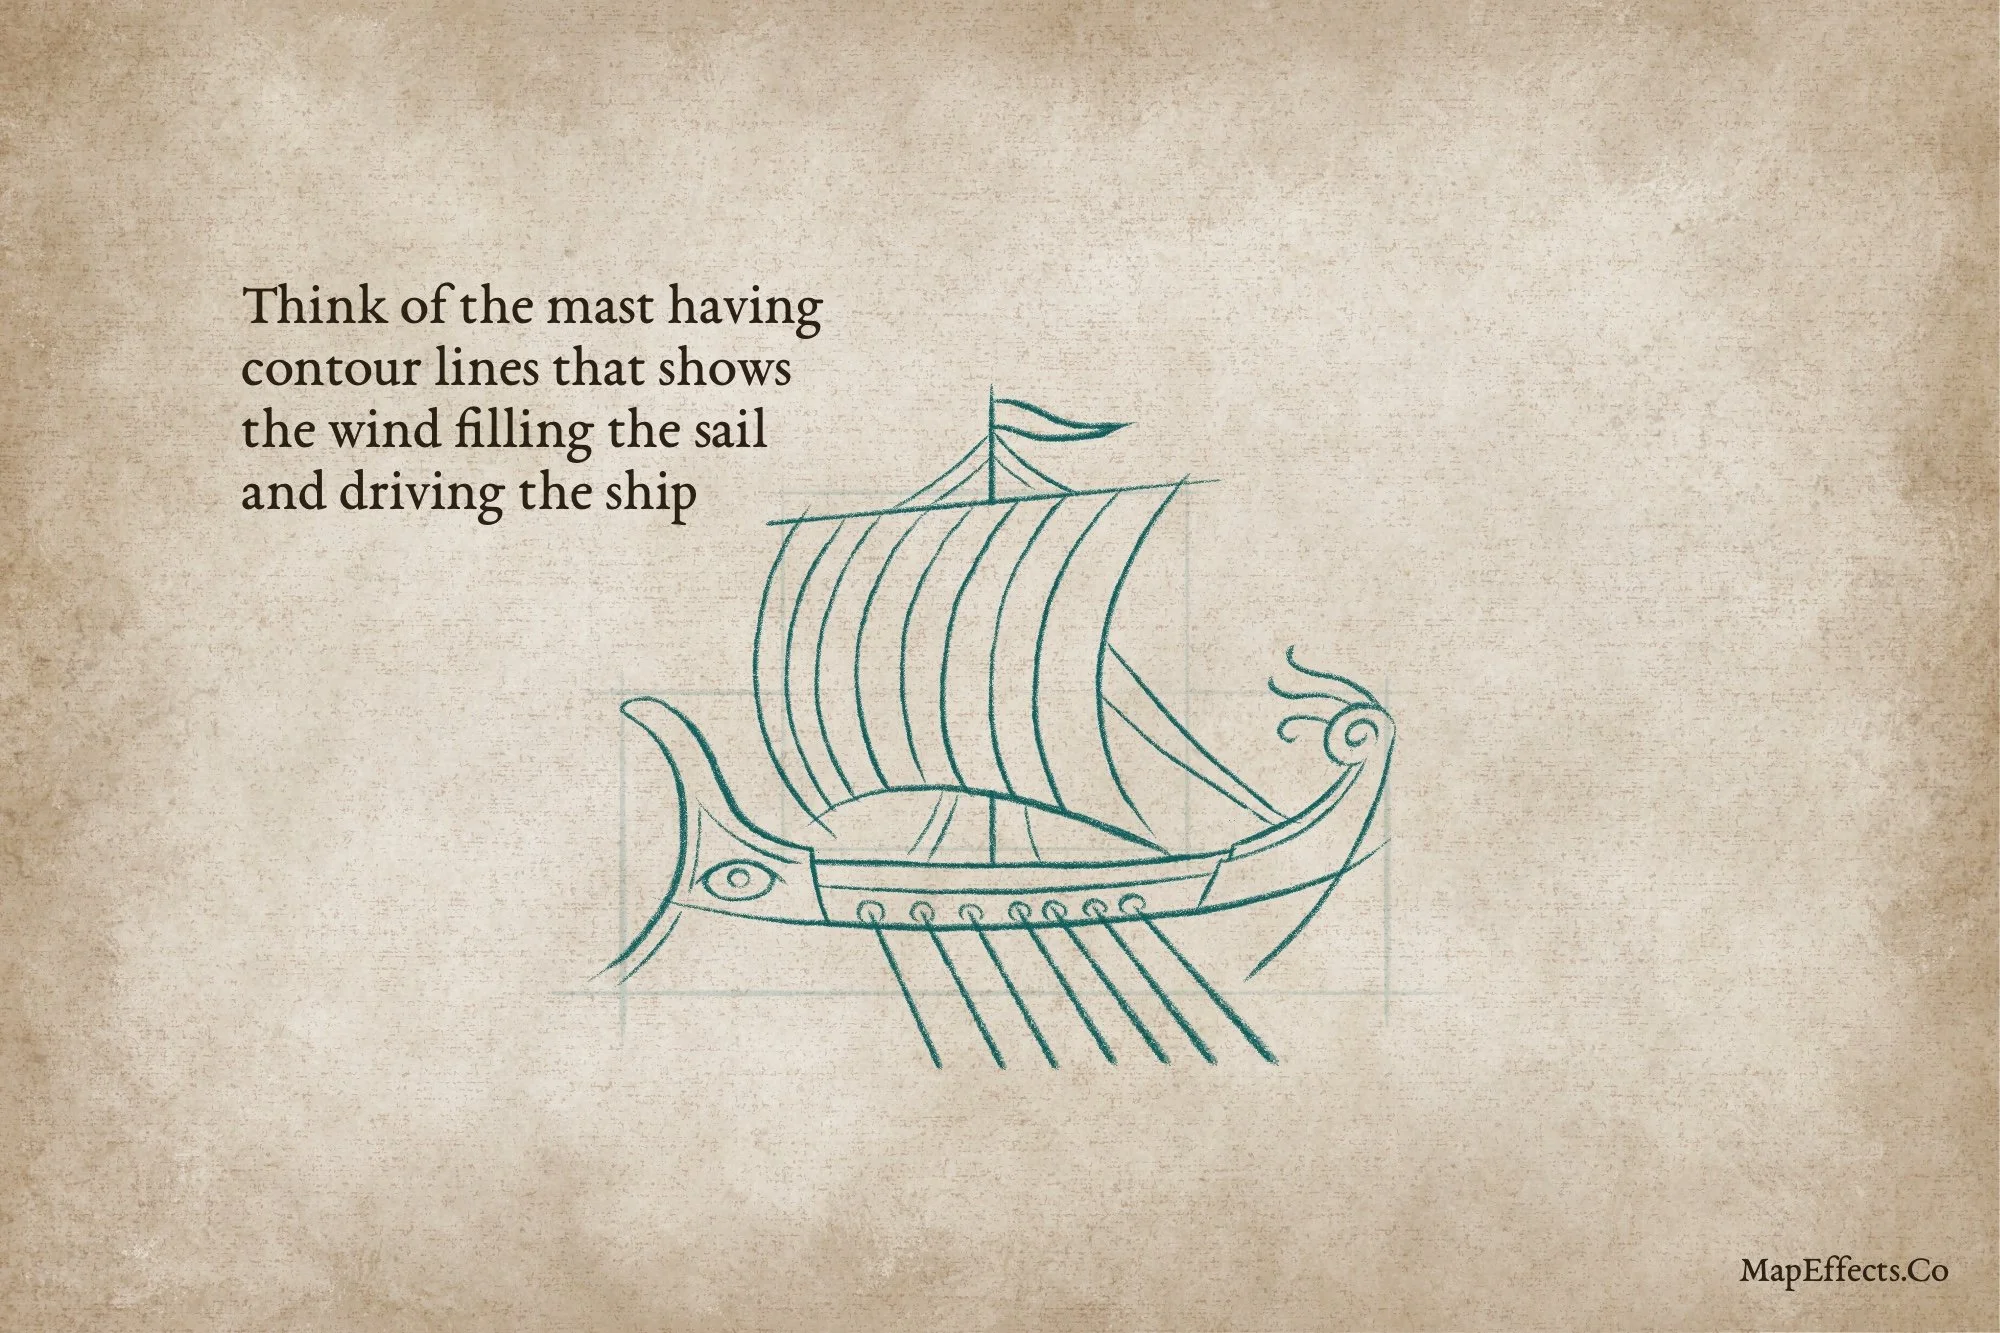
Draw Contours on Sails, Ropes, and Railings
Add contour lines to the sail, and imagine it filling with the wind as it drives the ship through the water. You can also add some further detailing to the eye, railings, and rear of the ship.
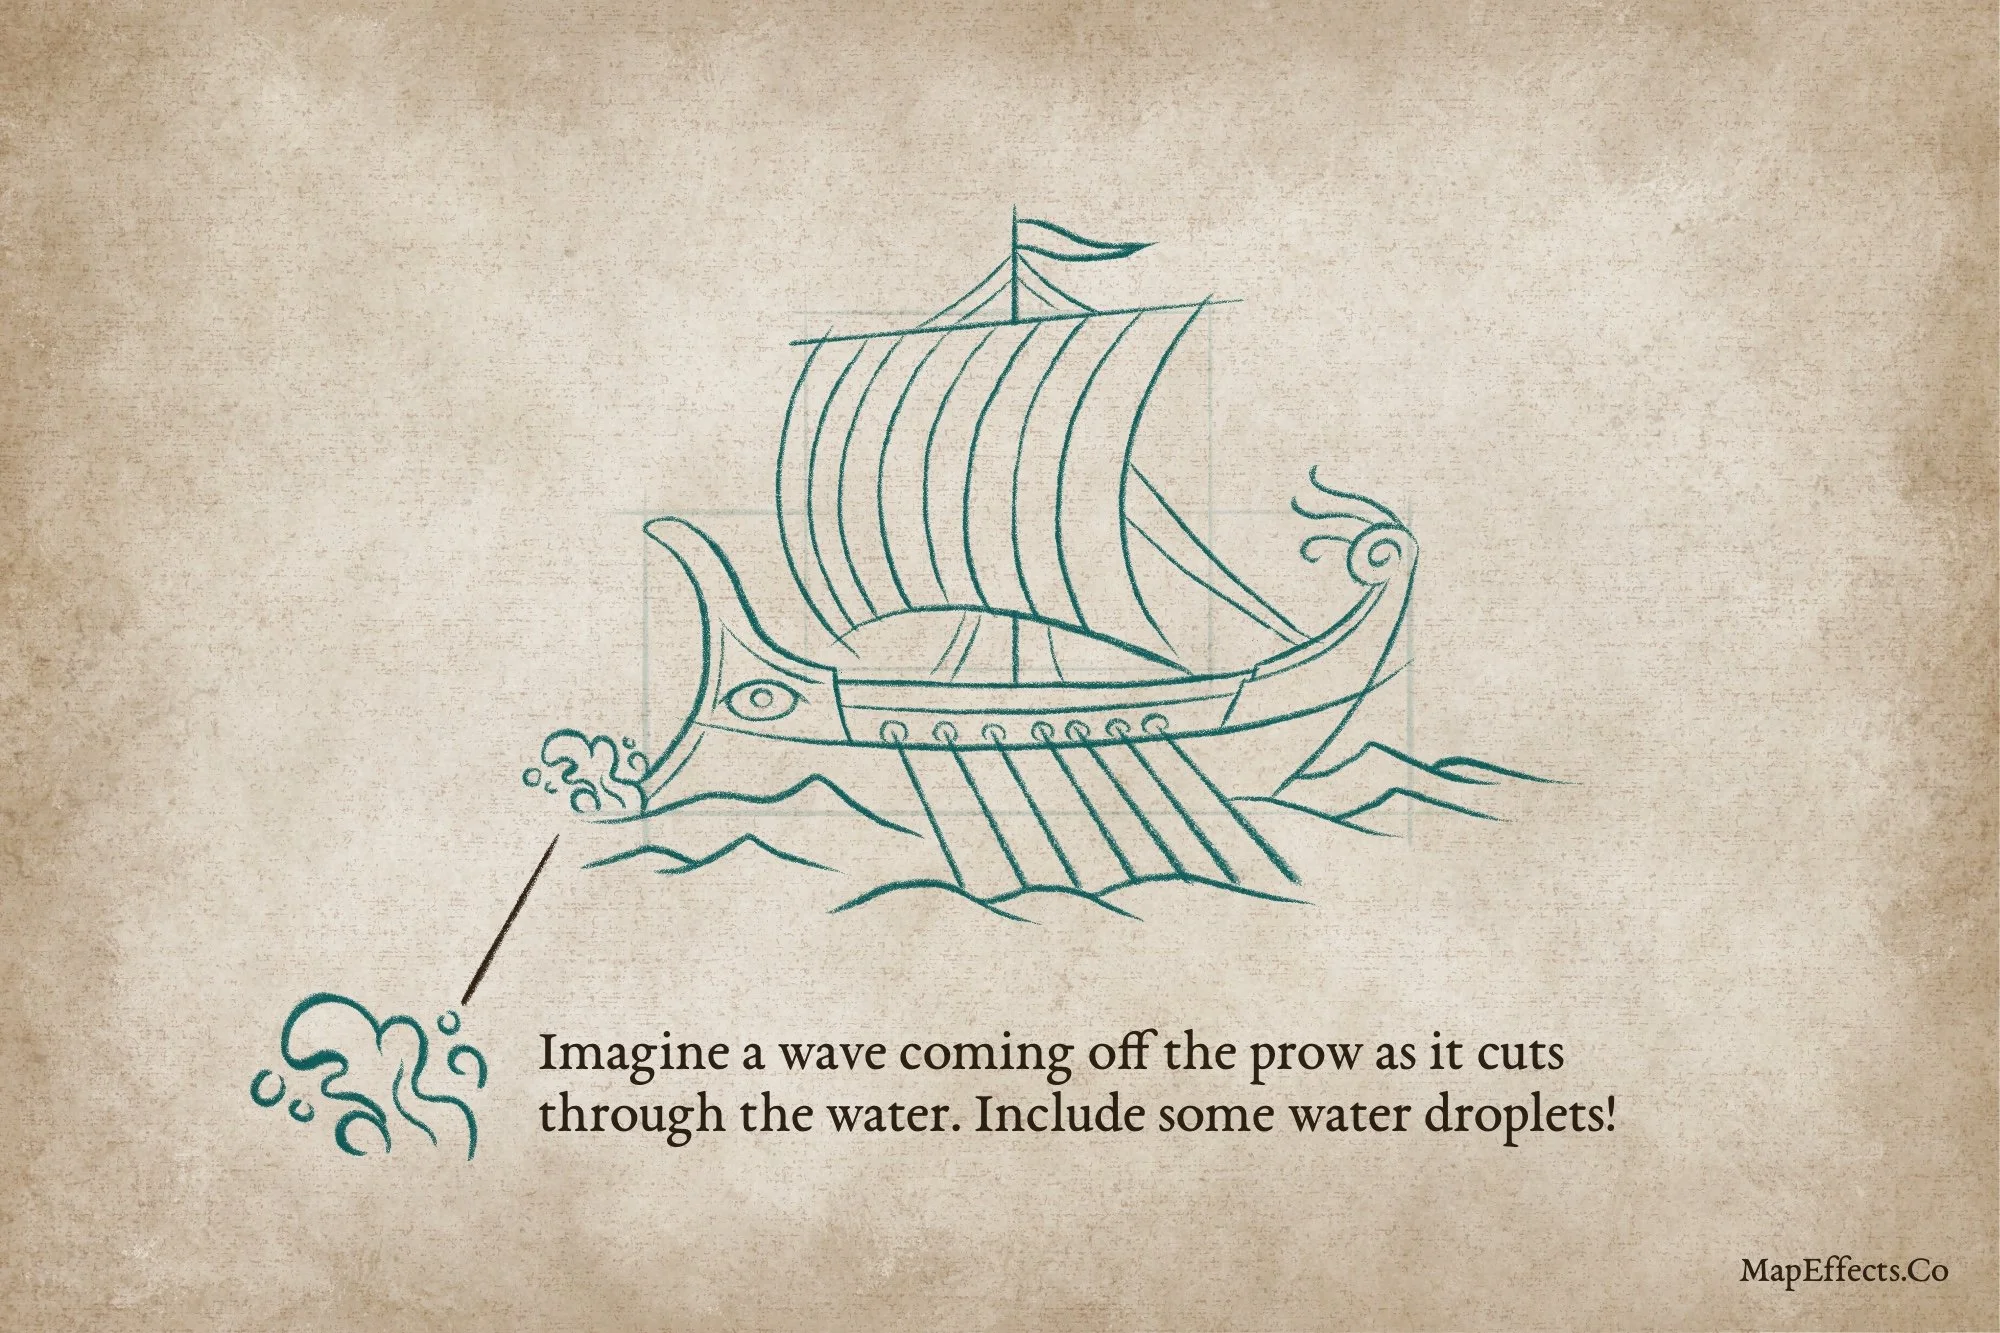
Sketch Waves and Water Details
It’s now time to put our ship in the water. Draw a series of waves with either rounded tops, slightly pointed, or a combination of the two. You can then add some sea spray at the front to indicate the ship slicing through the water.
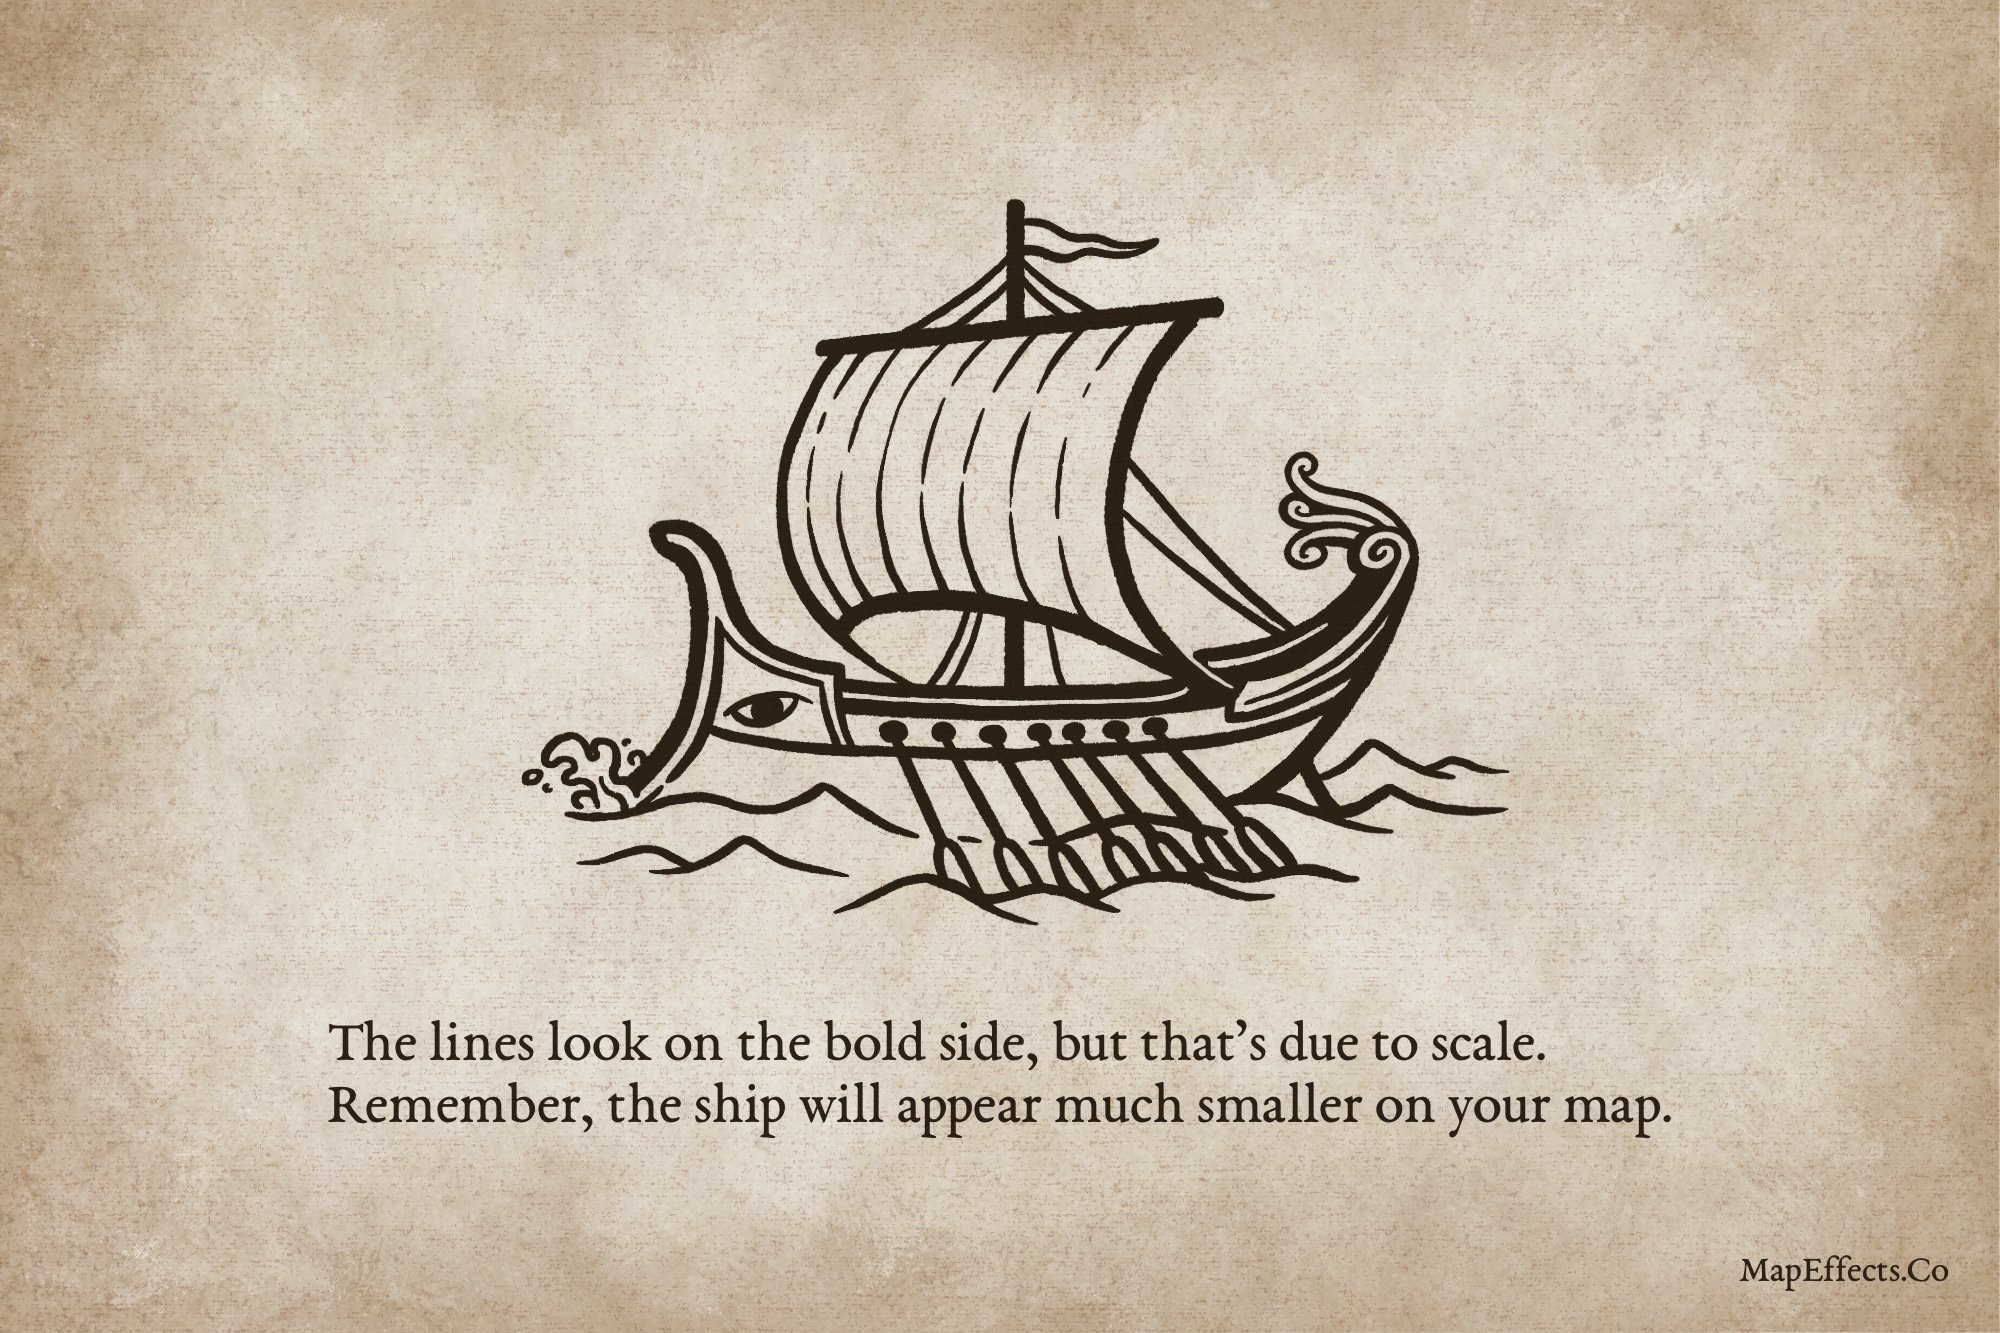
Ink the Main Shapes of the Ship
If you are working digitally, you can create a new layer above your sketch and ink in all the main shapes. I like to use a pressure-sensitive brush or brush pen for this step so I can vary the width of the lines easily. The lines may appear a bit bold in this example, but trust me, it will look great when it’s a smaller scale on the map itself.
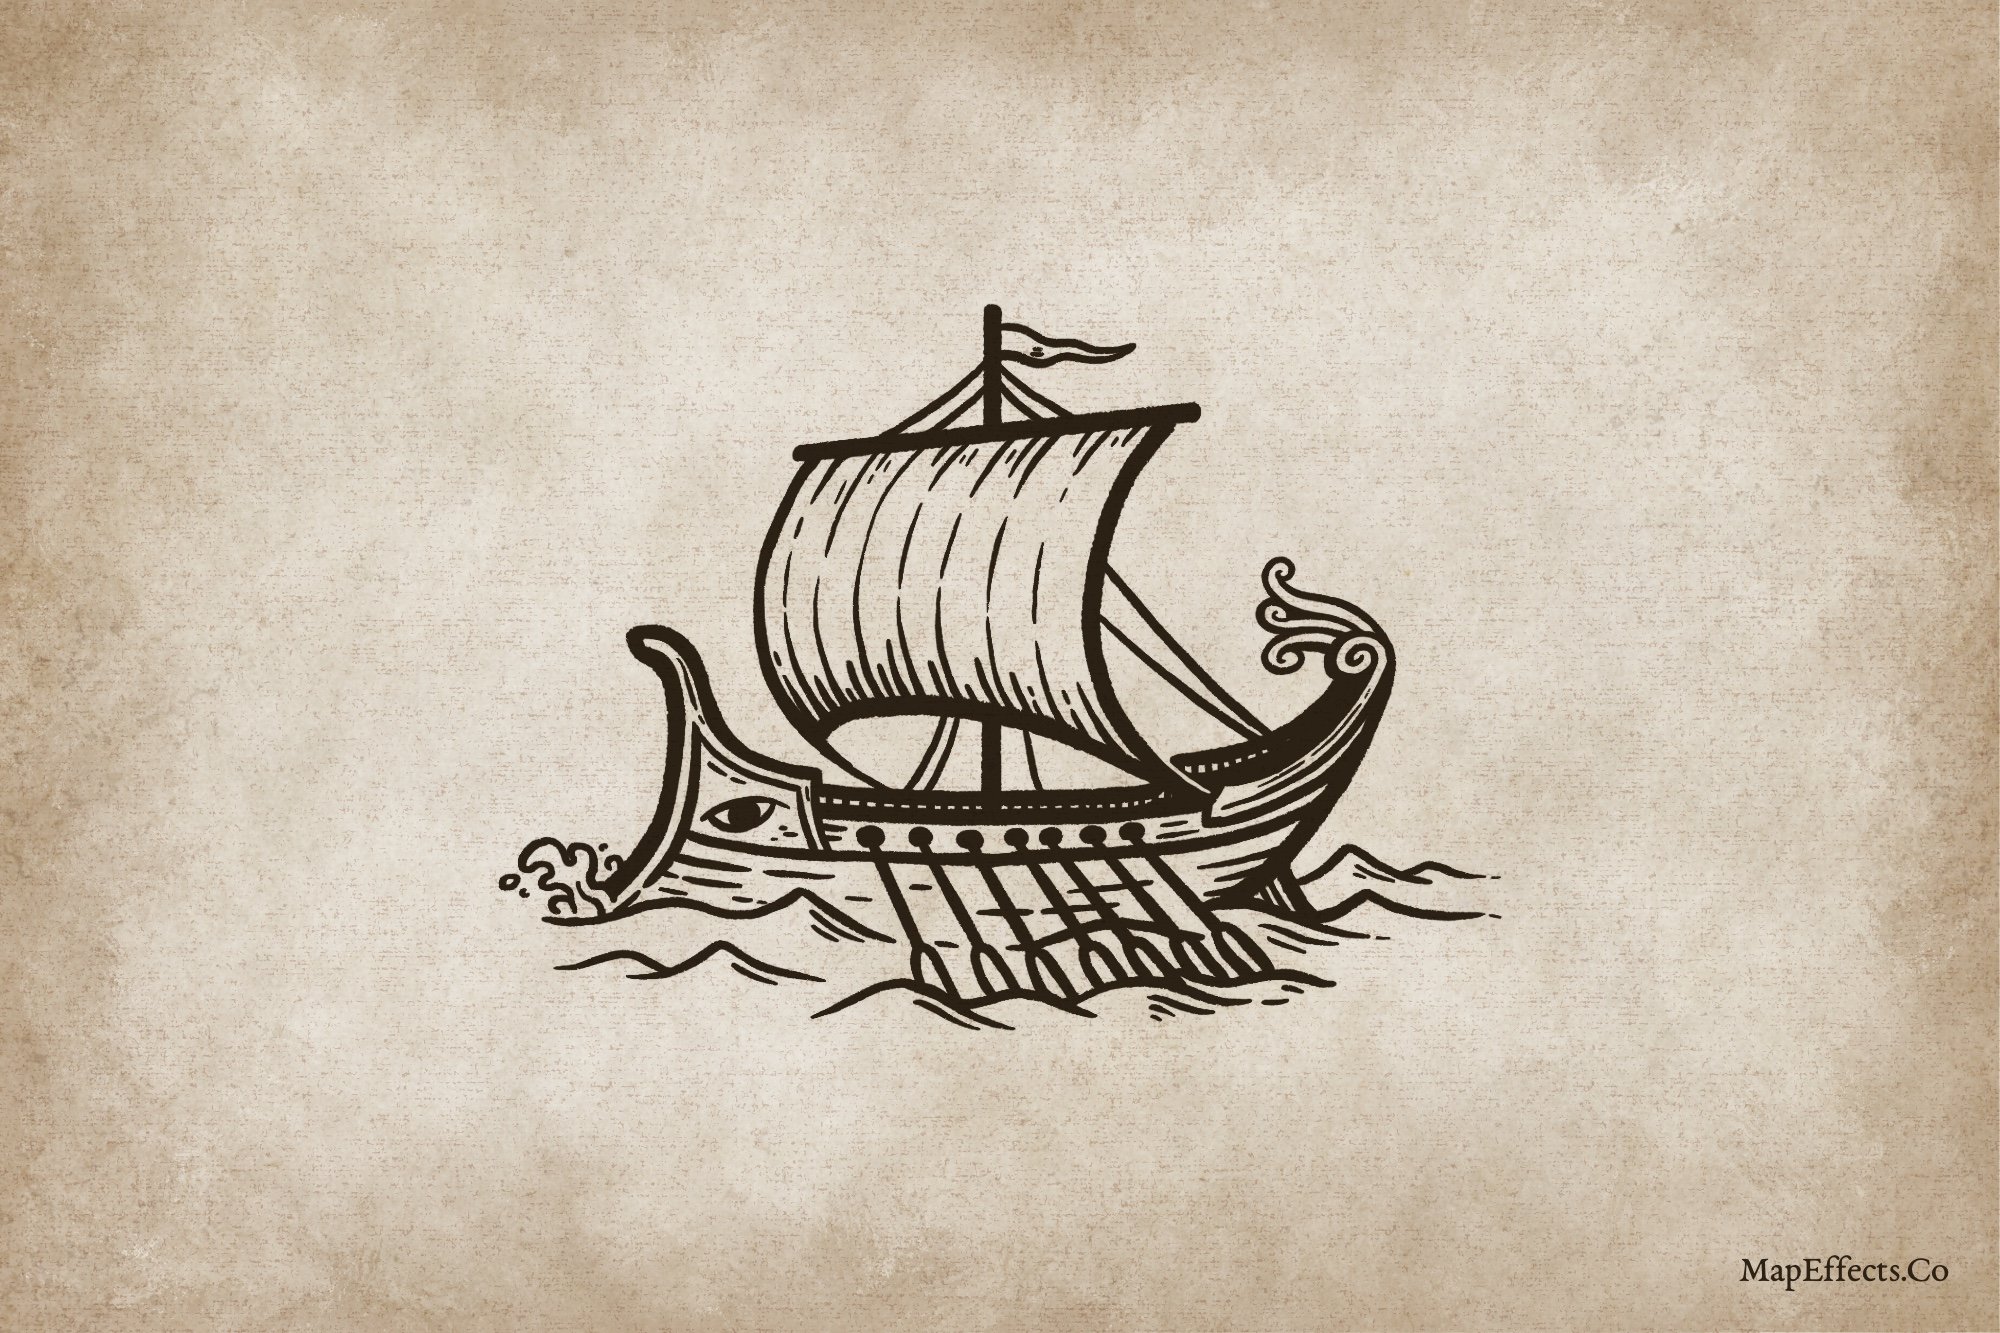
Finish Inking the Details
To finish off your line art, go through and add some subtle hatching lines to indicate shadow. You can also add a bit of texture to imply boards along the hull of the ship.
Now, let’s add some color!

Quickly Create Fantasy with 300+ Features
Compatible with Procreate, Photoshop, Affinity, Infinite Painter, & Clip Studio
Easily create regional maps with a classic hand-drawn style for your next rpg campaign or book with a few clicks and a bit of imagination. Best of all, you don’t need to invest hundreds of hours learning to draw!
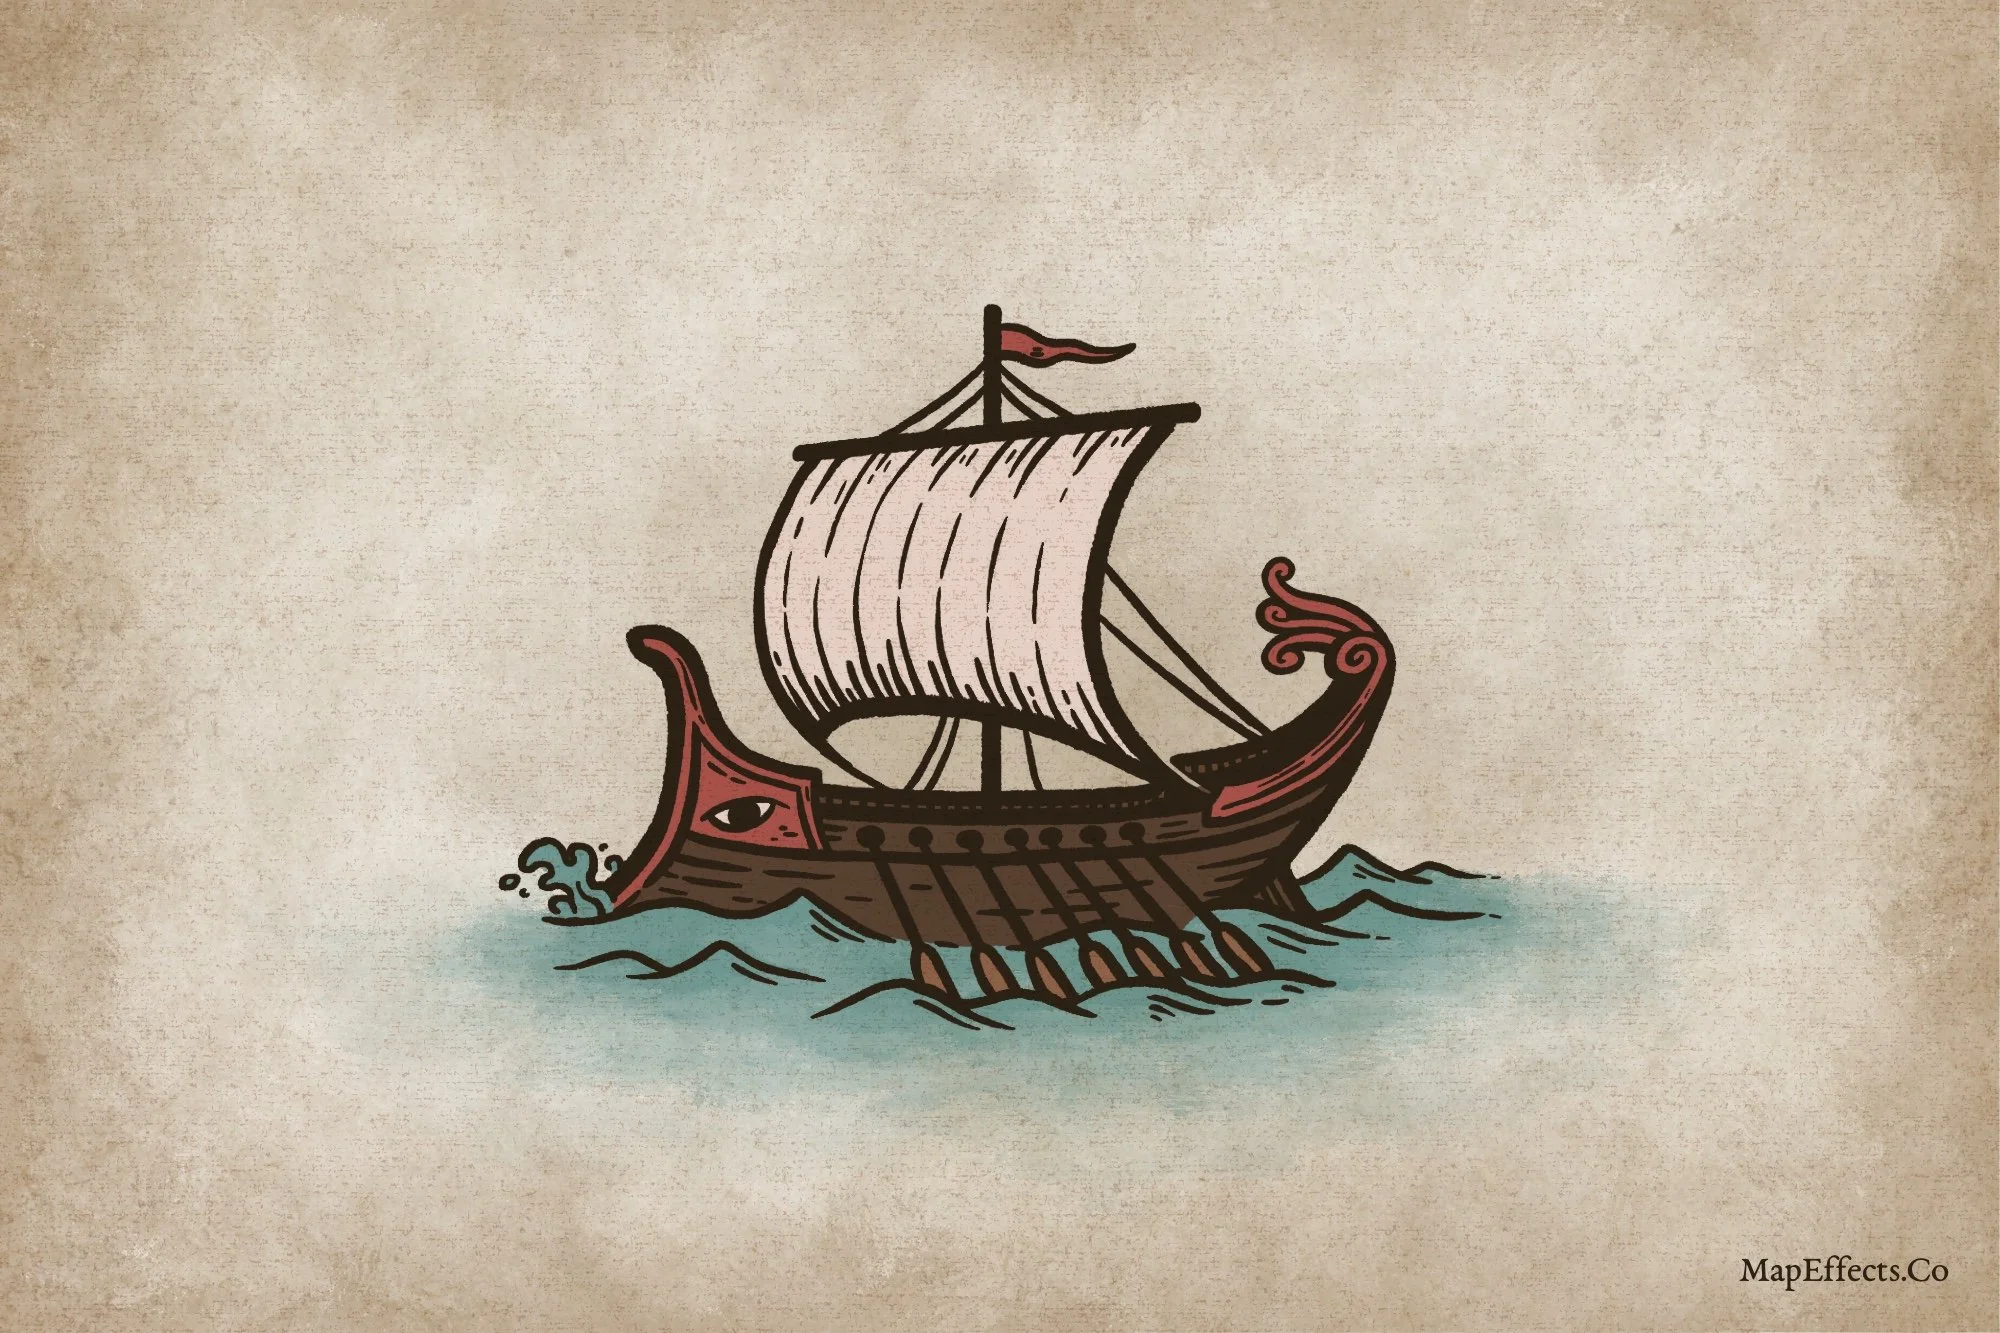
Paint Main Colors on Ship & Water
Create a new layer beneath your line art and block in the main colors of your ship. In Homer’s Odyssey, the hull of Odysseus’ vessel is repeatedly described as dark or black, since Greek ships were coated in tar or pitch to keep them waterproof. For this piece, I chose a deep brown instead, which fits the warmer palette of my map while still echoing that historic detail. I also added red accents along the prow and stern a color often used in Greek decoration to give ships a bold, distinctive character.

Paint the Shadows on the Ship & Water
To add some simple shadows, the first thing you’ll want to decide is the location of your light source. Then, create another layer above your color layer and below your line art to begin painting your shadows. Set the blend more of that layer either to “Multiply” or “Linear Burn”, and you may want to play with the opacity slider once you get going to dial in the intensity of the shadows. I like to use a low opacity brush like the shading brush included in The Free Apprentice Brush Pack and a blue/gray color.
Imagine how the light would be hitting the ship and look for areas that would be obscured from the light. Use your line art as a bit of a guide and add shadow where different things on the ship and water overlap.
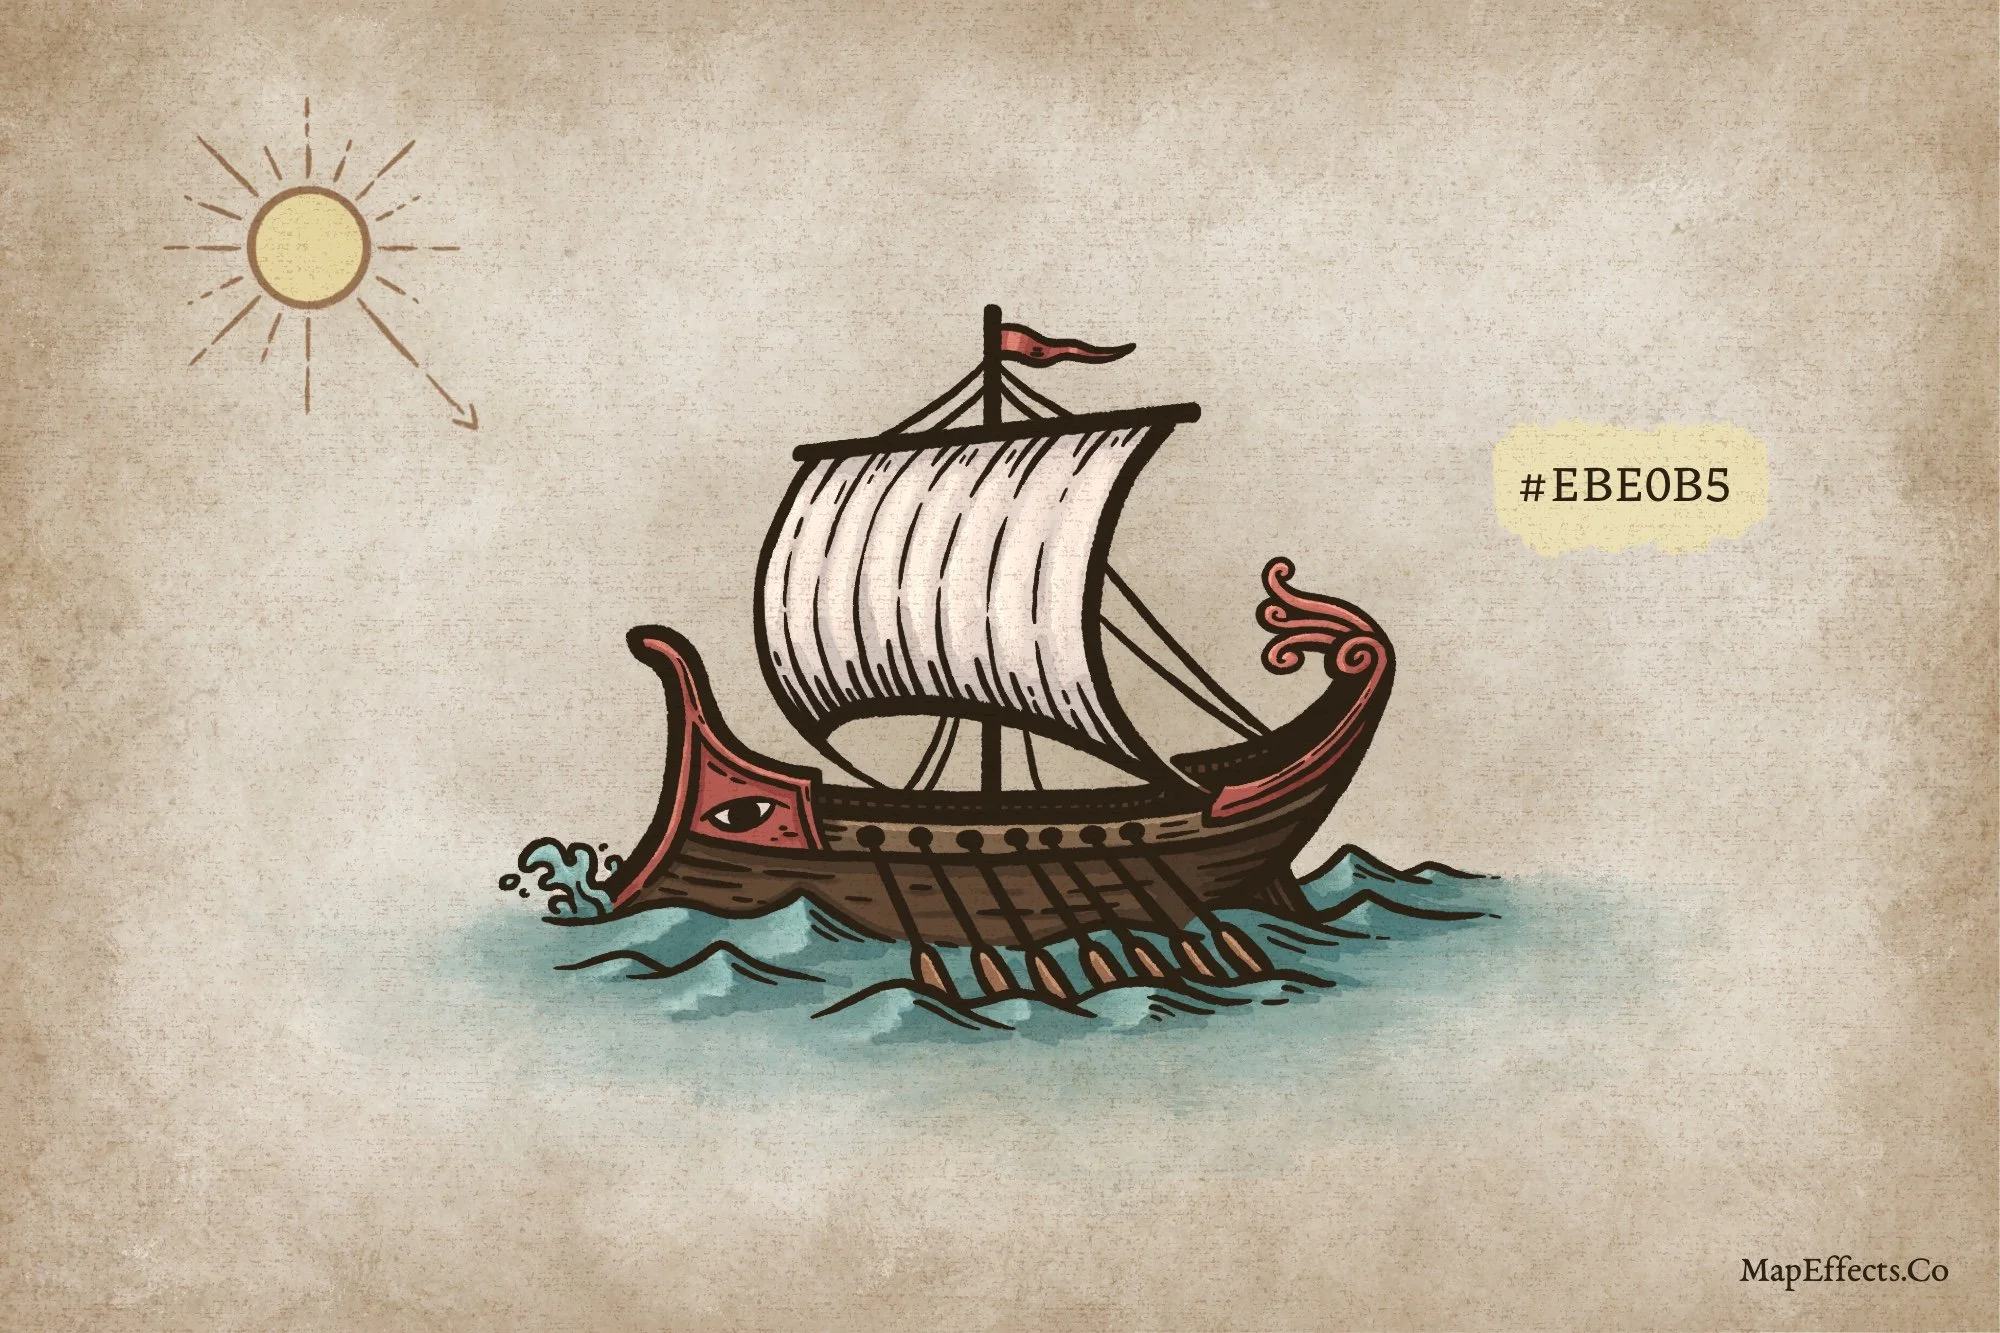
Add Highlights to the Ship & Water
Finally, create one more layer and set the blend mode to “Screen” or “Add”. Again, once you get painting, you can adjust the opacity slider to dial it in. Just note that “Add” tends to allow more of the color you’re using to bleed in and influence the color you’re painting over. In this case, I’ve switched to a desaturated yellow to reflect the color of the sunlight. Look for edges and areas that would be sitting in direct sunlight to give everything some pop.

You’re done! I hope you found this helpful, so you can draw a delta on your next fantasy map! Be sure to check out some of the other tutorials below to help you in your map-making journey.
Happy Mapping!
Josh