
How to Draw a Volcanic Eruption
It’s one thing to draw a dormant volcano, but how about one that’s erupting? In the previous tutorial, we walked through How to Draw a Volcano on Your Fantasy Maps, but now let’s make it a bit more dynamic so it can be a real focal point for your worldbuilding.
All of the brushes I will be using for this tutorial are available in The Cartographer’s Liner Brush Field Kit for Procreate & Photoshop

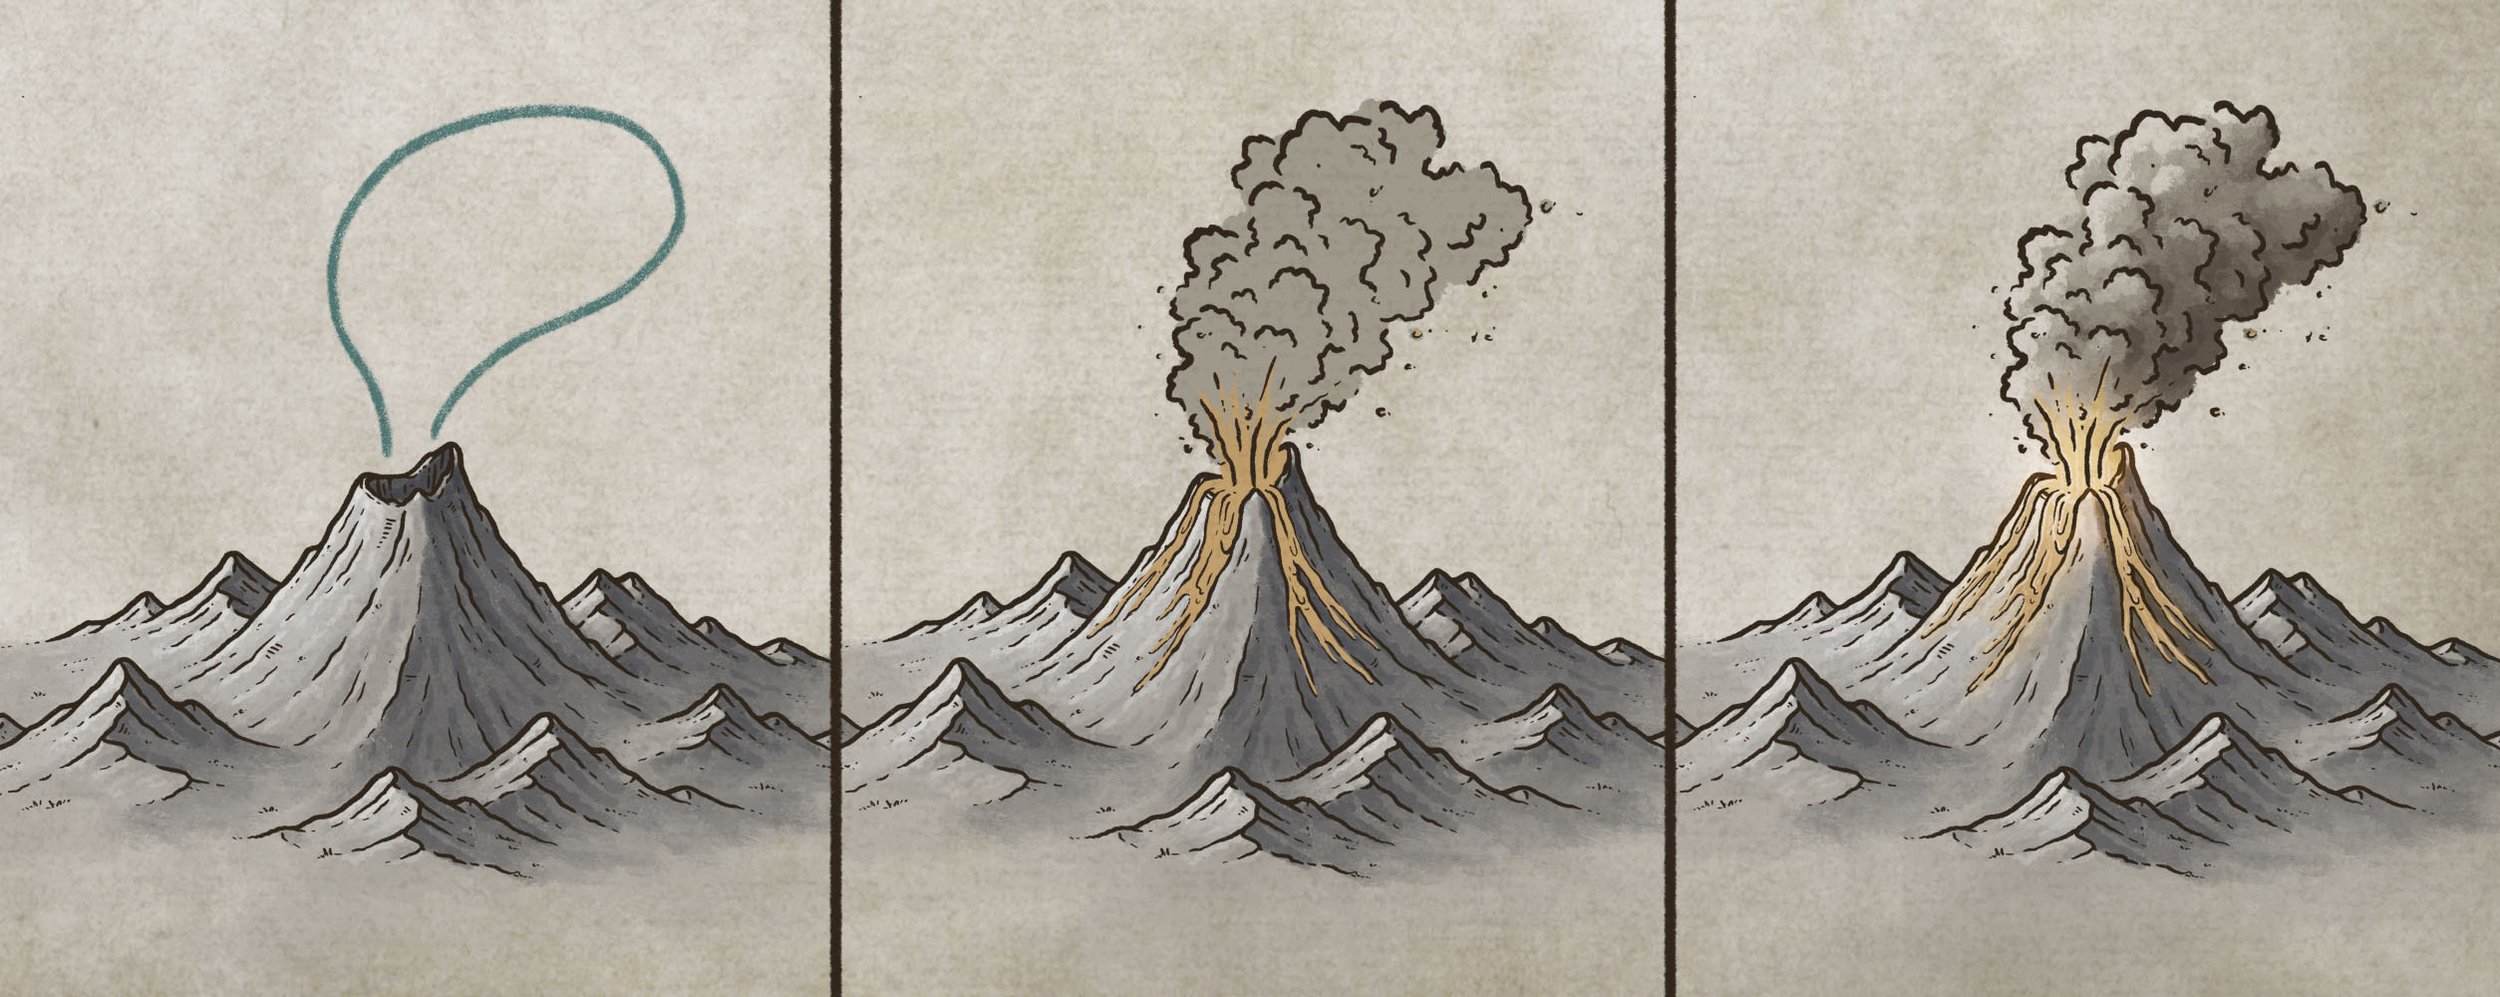
1: Sketch the Smoke
Begin by drawing a balloon shape that begins smaller at the base and billows out at the top. You can also make the shape drift one way or another as if the wind is catching and moving the cloud as it goes into the atmosphere.
Be sure to check out the first tutorial on How to Draw a Volcano by clicking the button below.

2: Rough in the Cloud
Use your shape as a guide to rough in the main shape of the cloud with broken lines. Don’t be afraid to let them overlap a bit.

3: Block in Colors
Create a new layer above your original volcano drawing and block in some color. Beginning with blocks of color for the lava can be helpful to define the shape as it flows down the mountainsides.
Be sure to include some streaks of orange spraying upward into the cloud.
More Tutorials You May Enjoy


4: Add More Detail to Give Form
You can now outline the lava and add some billowing clouds to help define the shapes. Keep the basic form in mind as you add details to maintain the dimension.
Add some lines around and in the lava to convey some movement and shape.

5: Paint in the Shadows
Switch to a low opacity brush and create a new layer with the blend mode set to “Multiply.” Start with broad shadows and gradually darken the areas most obscured by the light source.
In this example I used a low saturation color with a bit of a red hue.
The Fantasy Map Builder
$34 | Now Compatible with Procreate, Photoshop, Affinity, & Clip Studio Paint
Easily create hand-drawn fantasy maps for your upcoming fantasy novel or next role playing campaign without learning how to draw! Whether you want a map for the fantasy book you’re writing or want to make your role playing campaign more immersive, this has you covered. Includes 300+ hand-drawn features to help you map your story!

6: Add a Pop of Highlights
Create another layer and set the blend mode to “Add.” You can now go through with the same brush and paint in some highlights in the areas that would be hit by your light source. Once again, build them up gradually beginning with broad strokes and getting more detailed as you go.
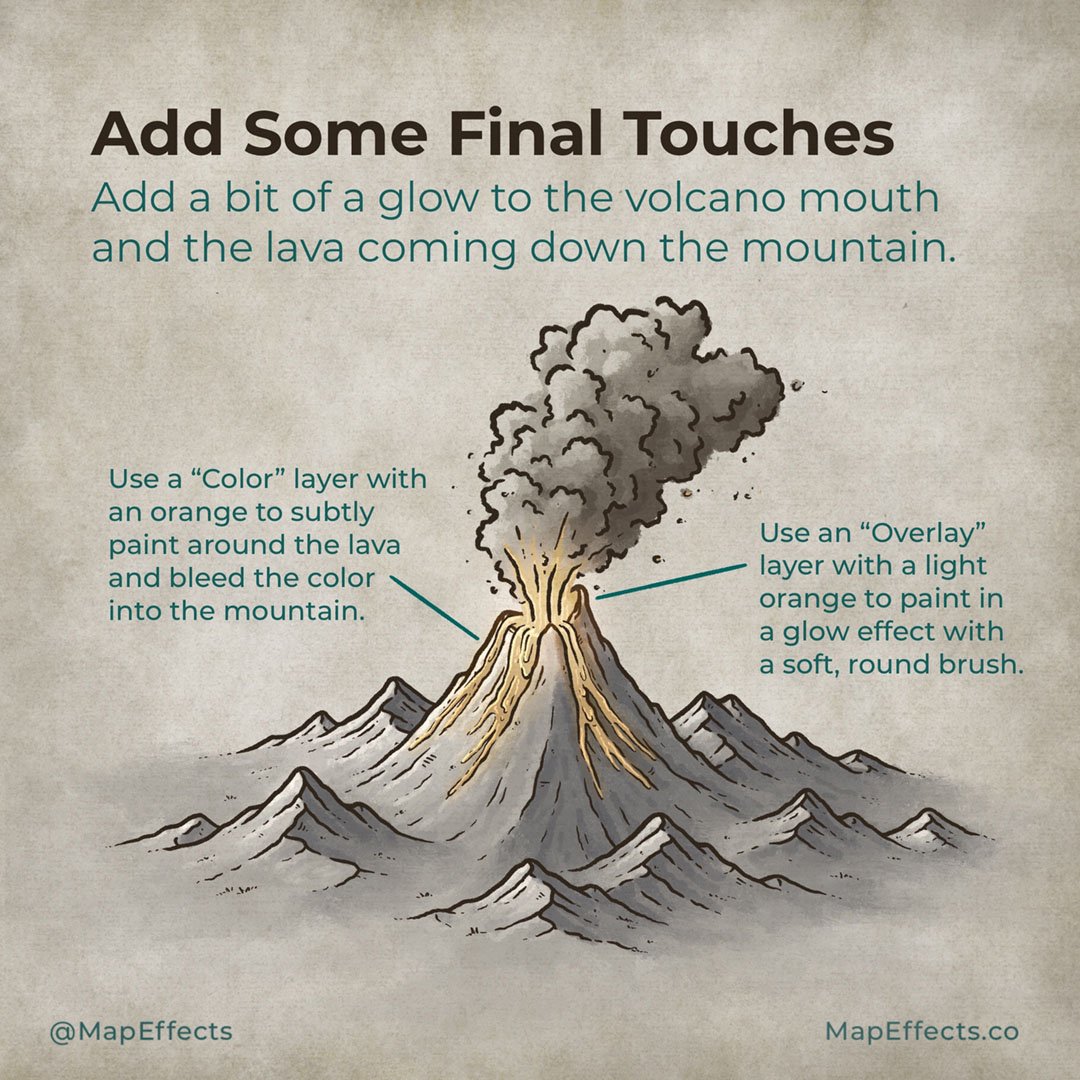
7: Add Some Final Touches
You can now add a bit of glow to the volcano mouth and the lava coming down the mountain to tie everything together.
Use a “Color” layer with a light shade of orange to subtly paint around the lava and bleed it into the mountain. Remember, the lava is essentially an additional light source that would affect the colors around it.
Then use an “Overlay” layer with the same orange color to paint in a glow effect around the mouth of the volcano.
You’re all done! If you found this tutorial helpful be sure to follow Map Effects on Vero and tag me with the map you create following this tutorial and I may feature your work! Thank you, and I look forward to seeing you map your story!
Happy Mapping!
Josh
