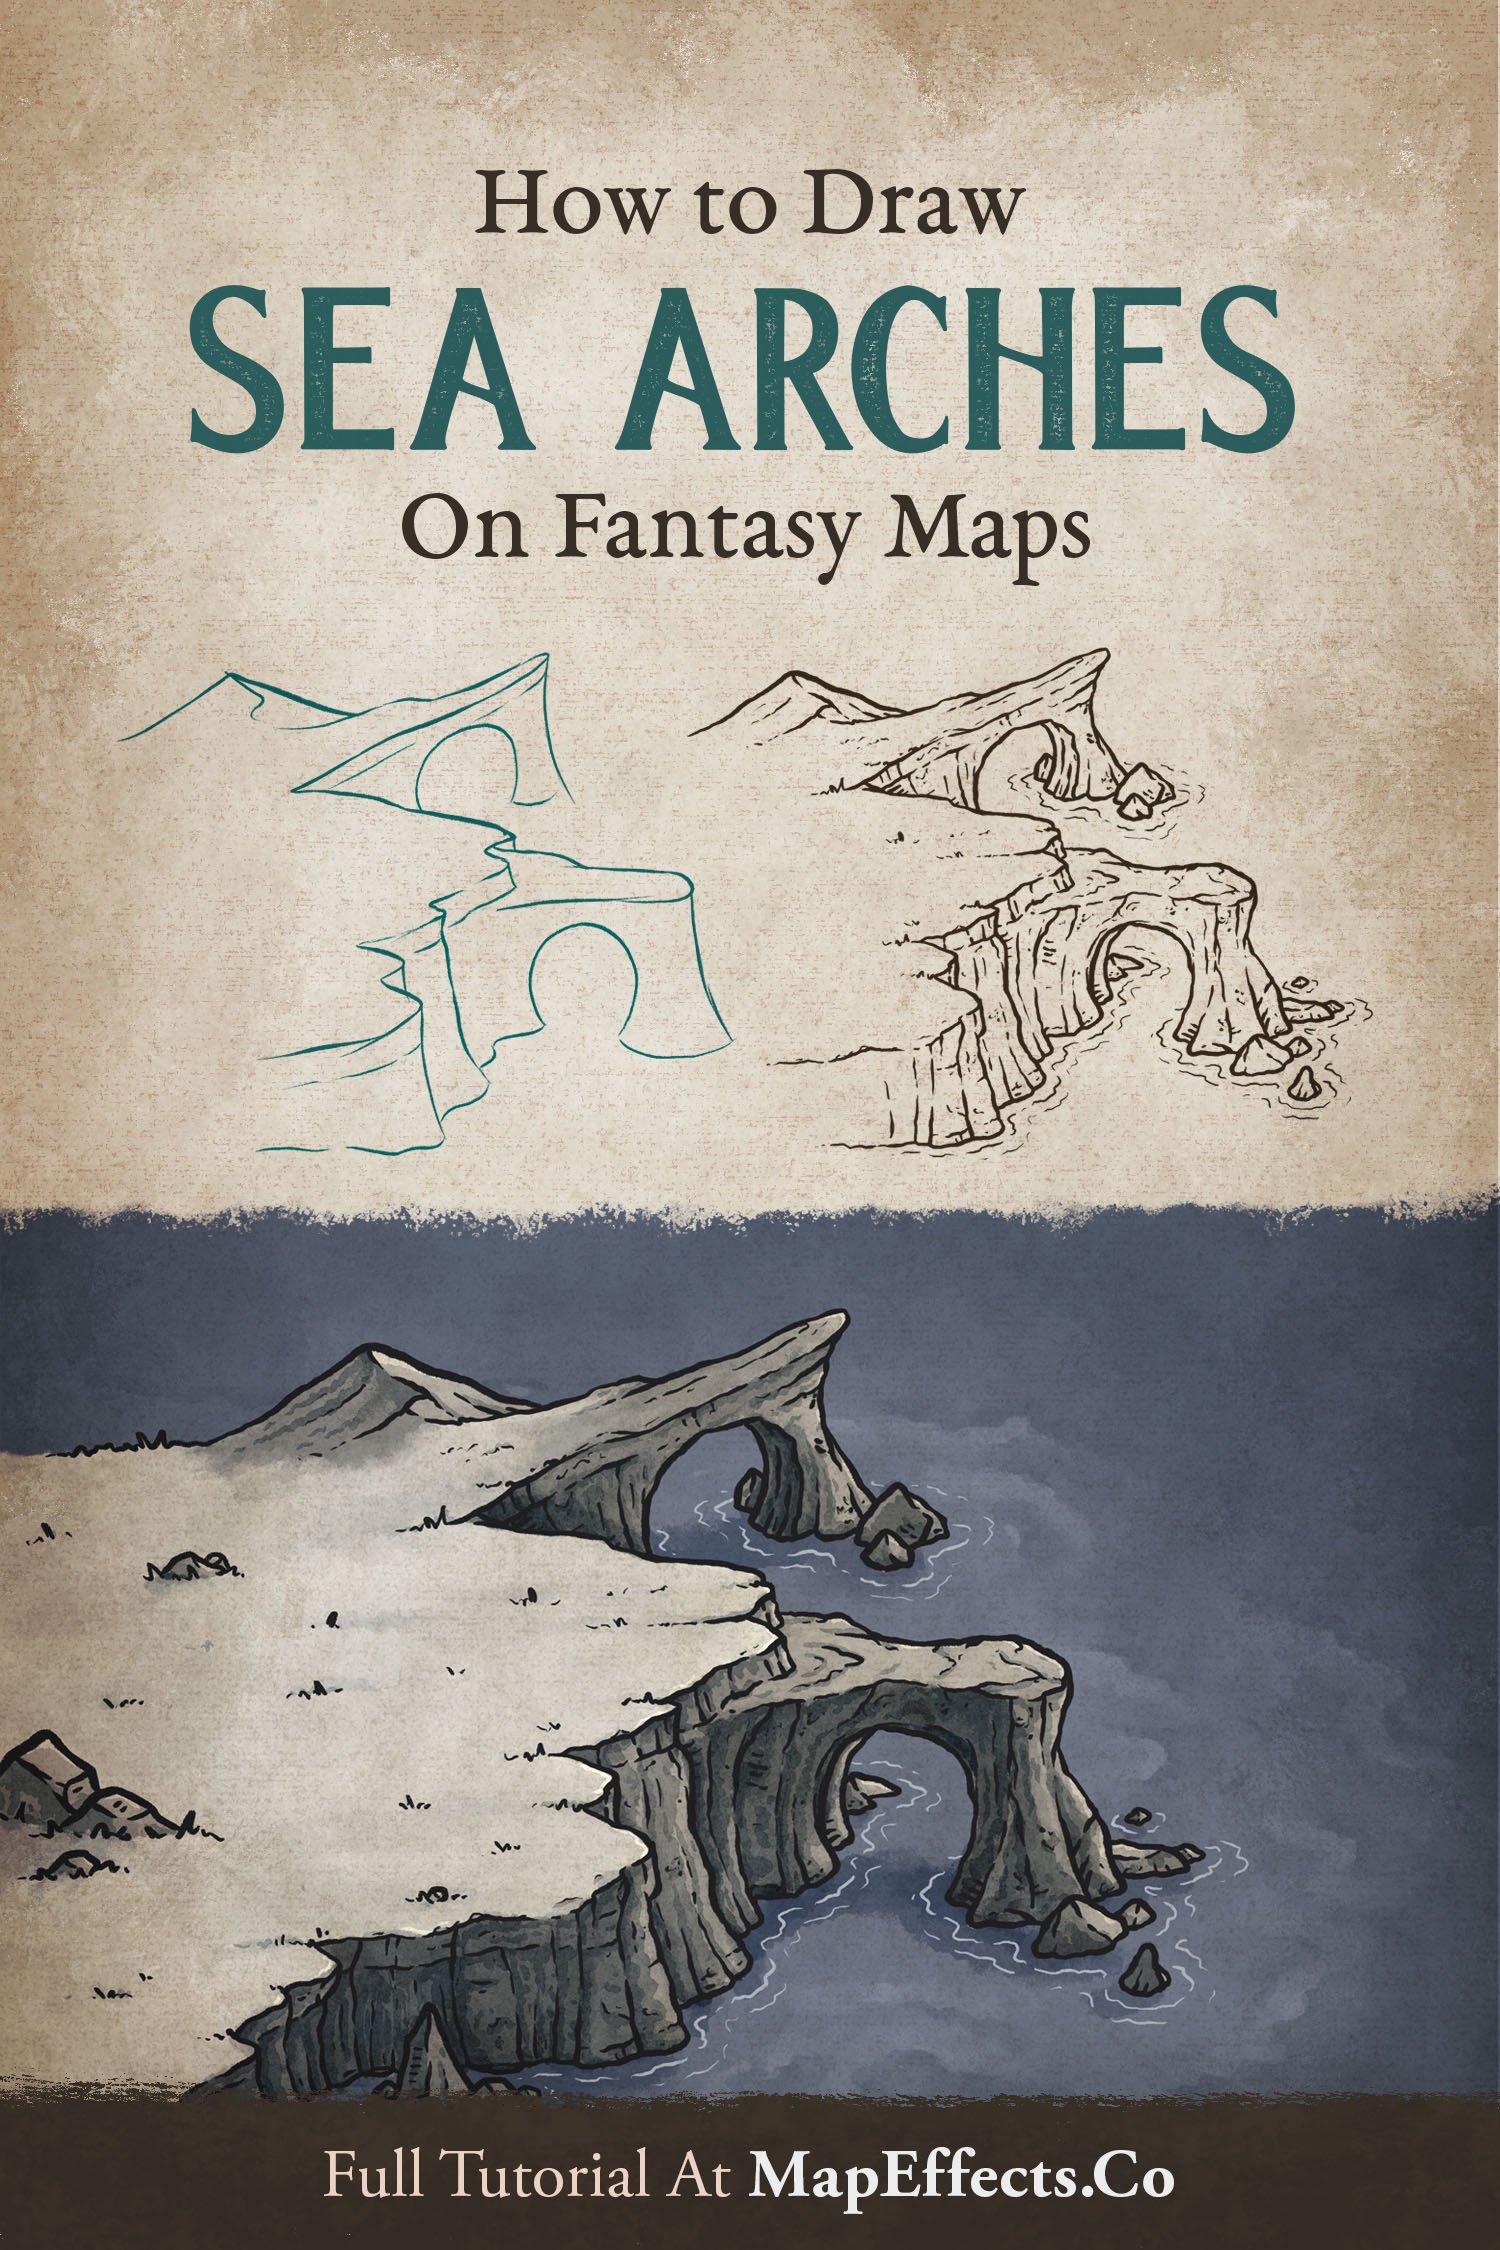
How to Draw Sea Arches
Waves work patiently at the land, and now and then an arch of stone remains, carved by water and weather. Their silhouettes define the shoreline, and become iconic features on your fantasy map.
In this tutorial, I’ll show you how to draw a sea arch, breaking it down into simple steps you can easily follow.
Want some free brushes to draw your maps? Get The Free Apprentice Brush Pack HERE
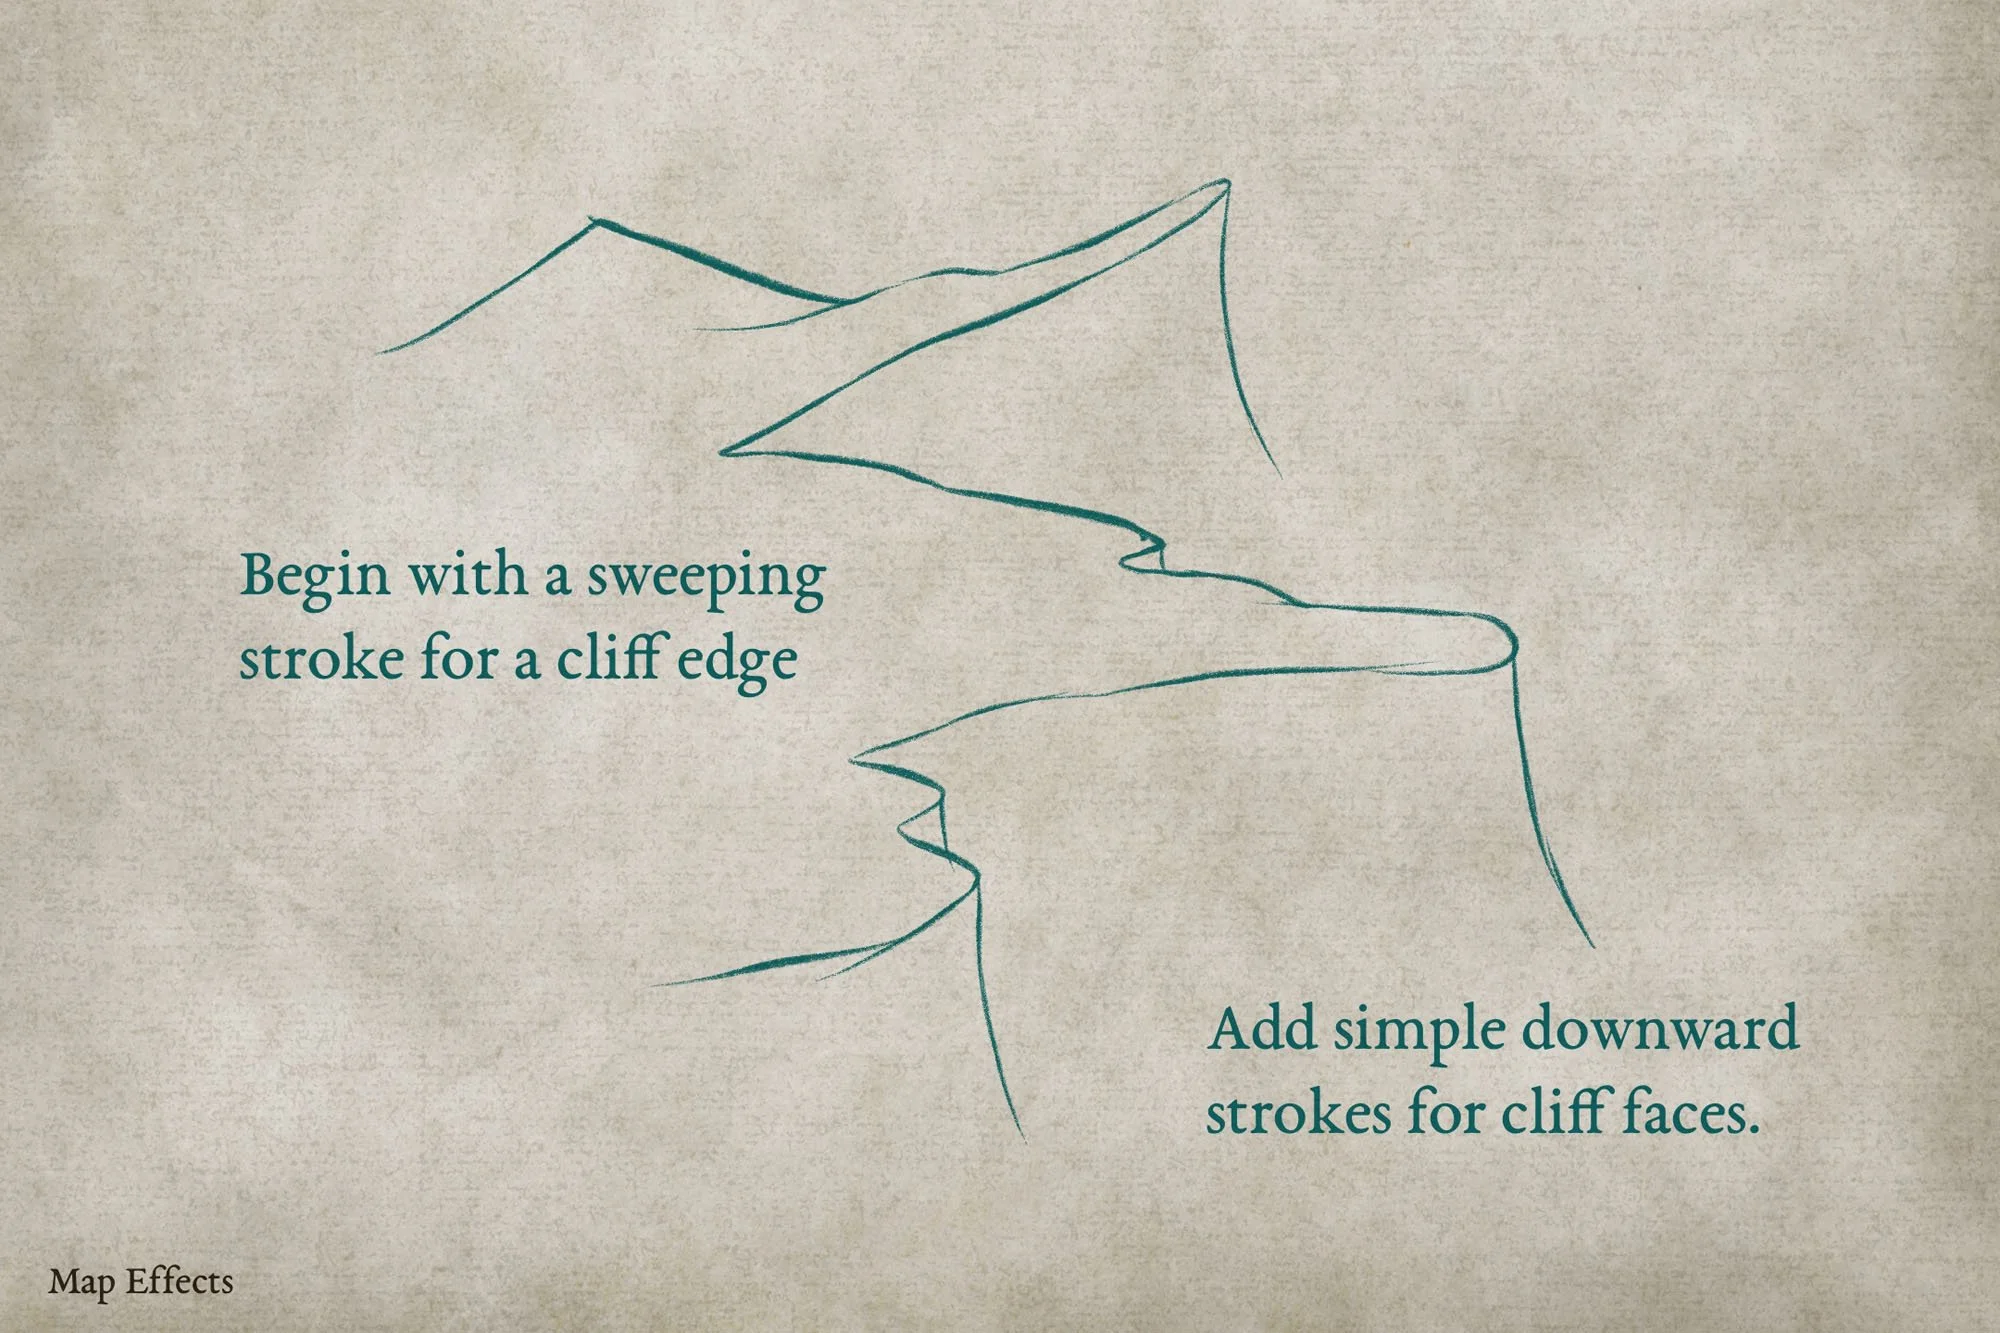
Sketch the Coastal Cliff Shapes
The first thing you’ll want to do is sketch out the basic shape of the coastline. Use a sweeping horizontal stroke to really seel the perspective, and then draw some simple cliff faces down from the points.

Sketch the Archways and the Base of the Cliffs
Now you can close off the bottoms of the cliffs where they will contact the water. Remember, the shape should generally follow the cliff edge on the top. Finally, you can sketch in a couple of partial circles in the areas of the cliff that are jutting out to place your sea arch.
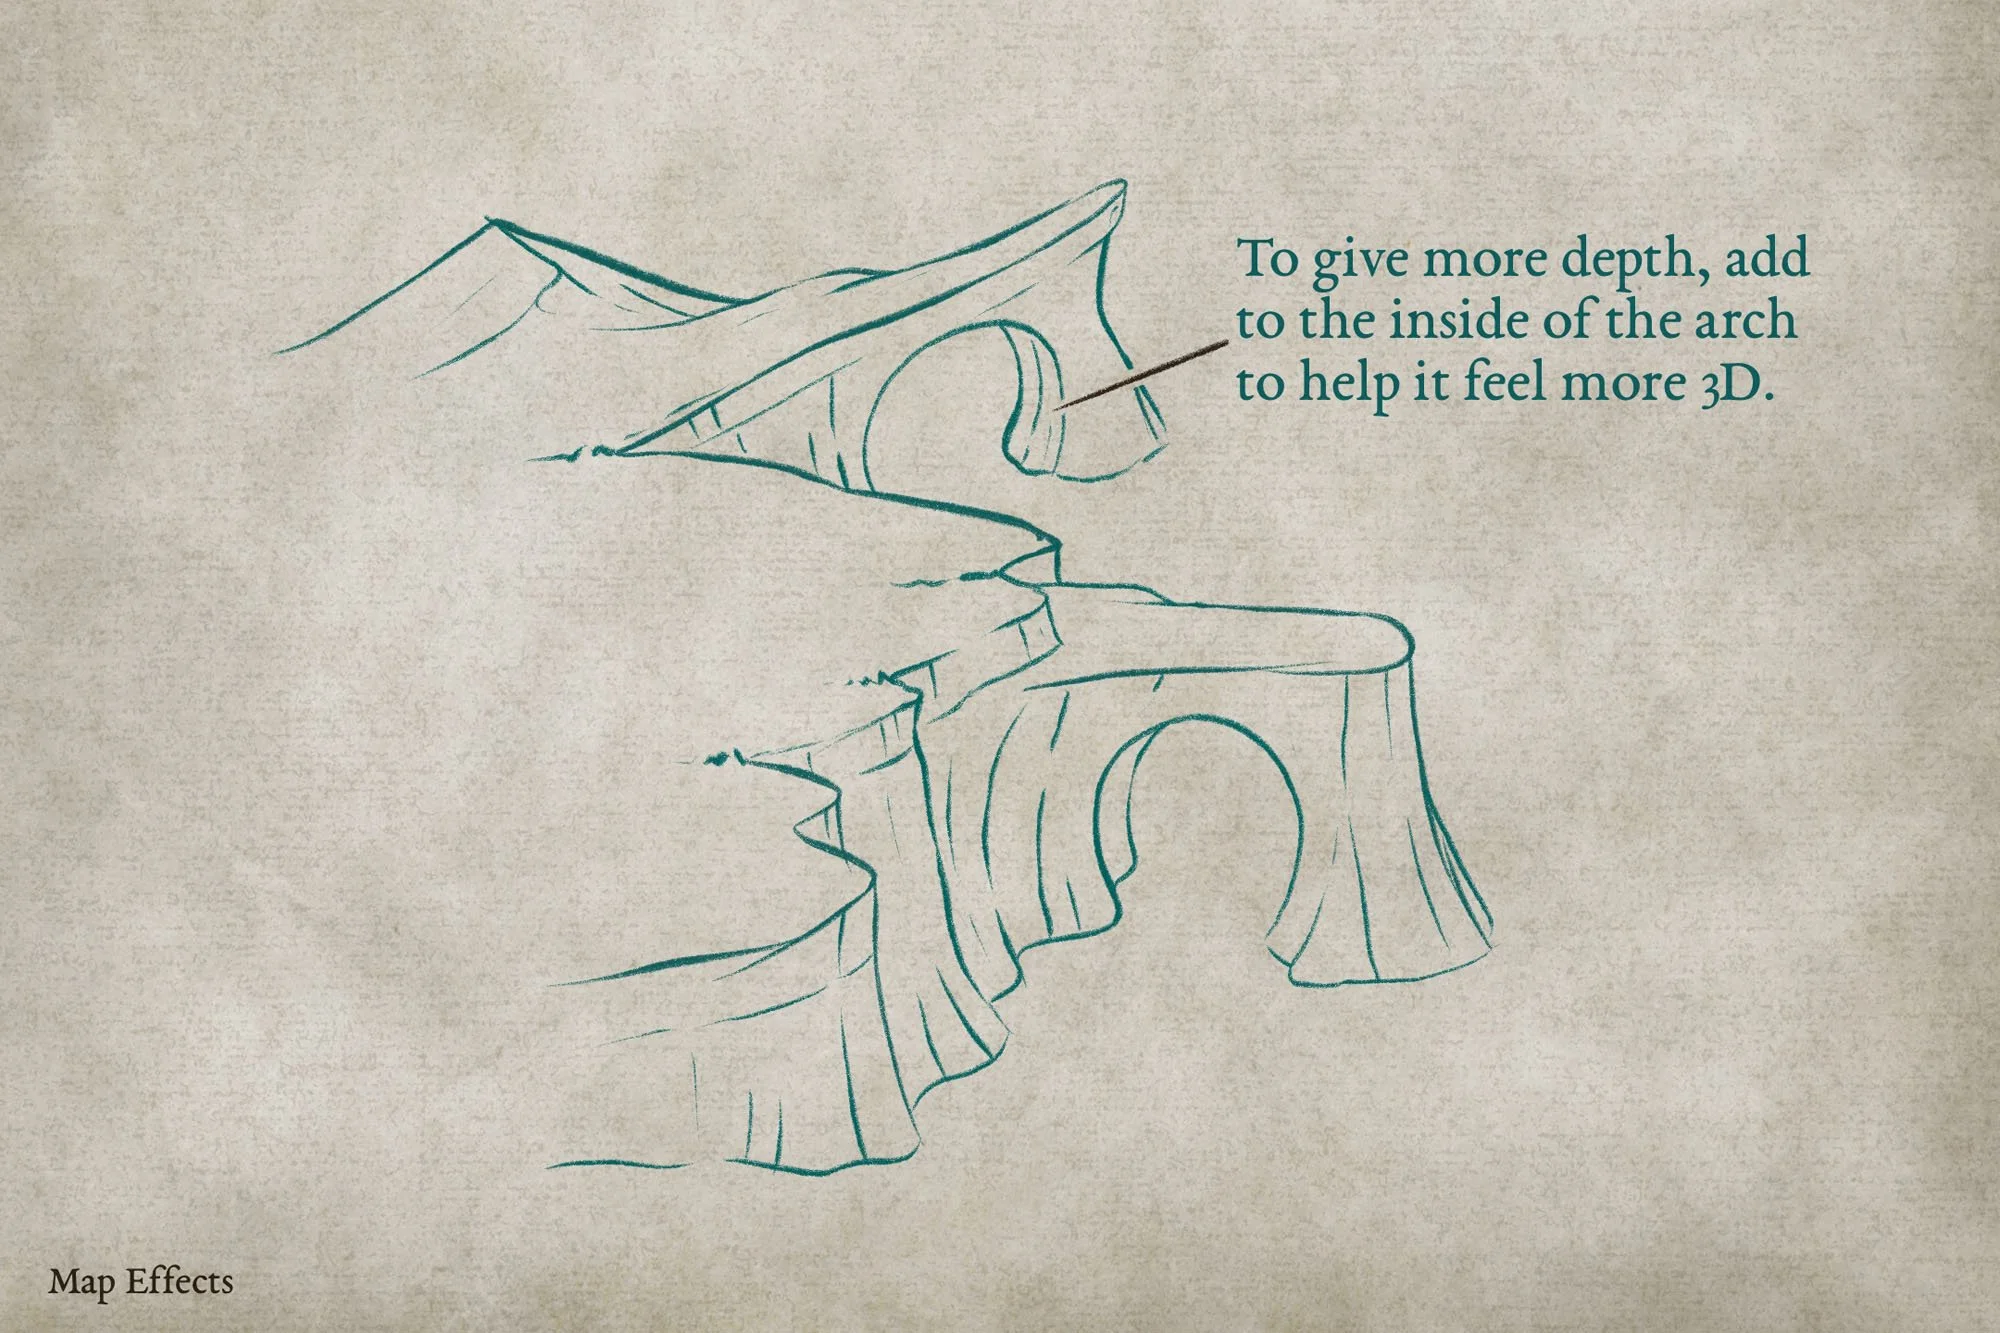
Add More Form to the Cliffs
Keep fleshing out some of the details, like sediment layers in the cliffs, and vertical lines to give further form. The other key to getting a more 3D look is to draw in the inside of the arches to give a sense of thickness to the rock.
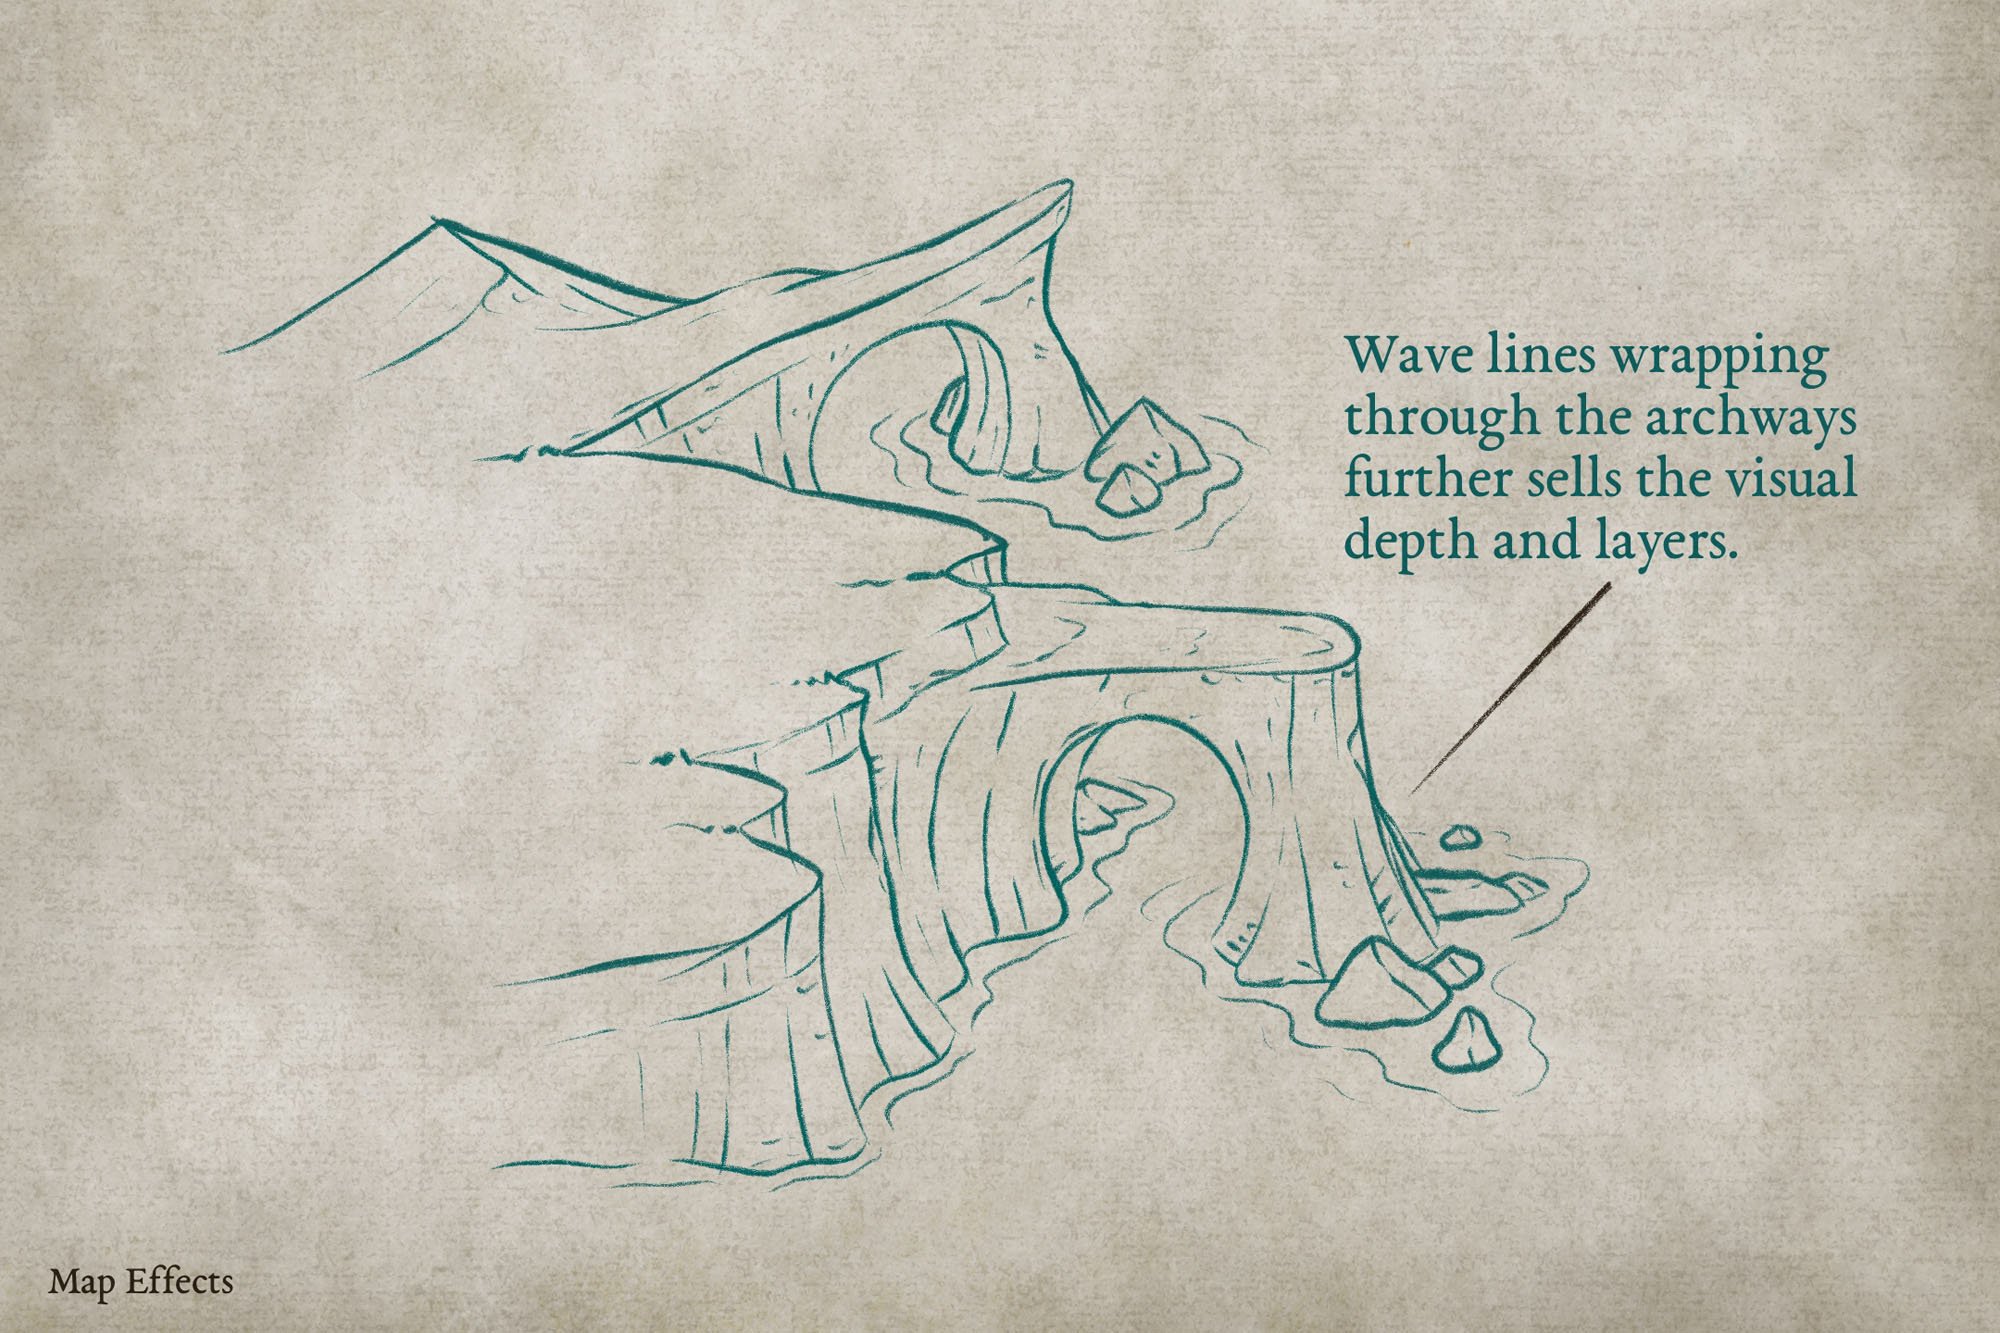
Draw Smaller Rocks & Wave Lines
The final part of the sketch is to add in a scattering of rocks in front of and behind the arches to add visual interest. Then you can draw some wavy lines that generally follow the shape of the cliffs and don’t be afraid to have them disappear behind certain parts of the arch to give more depth!
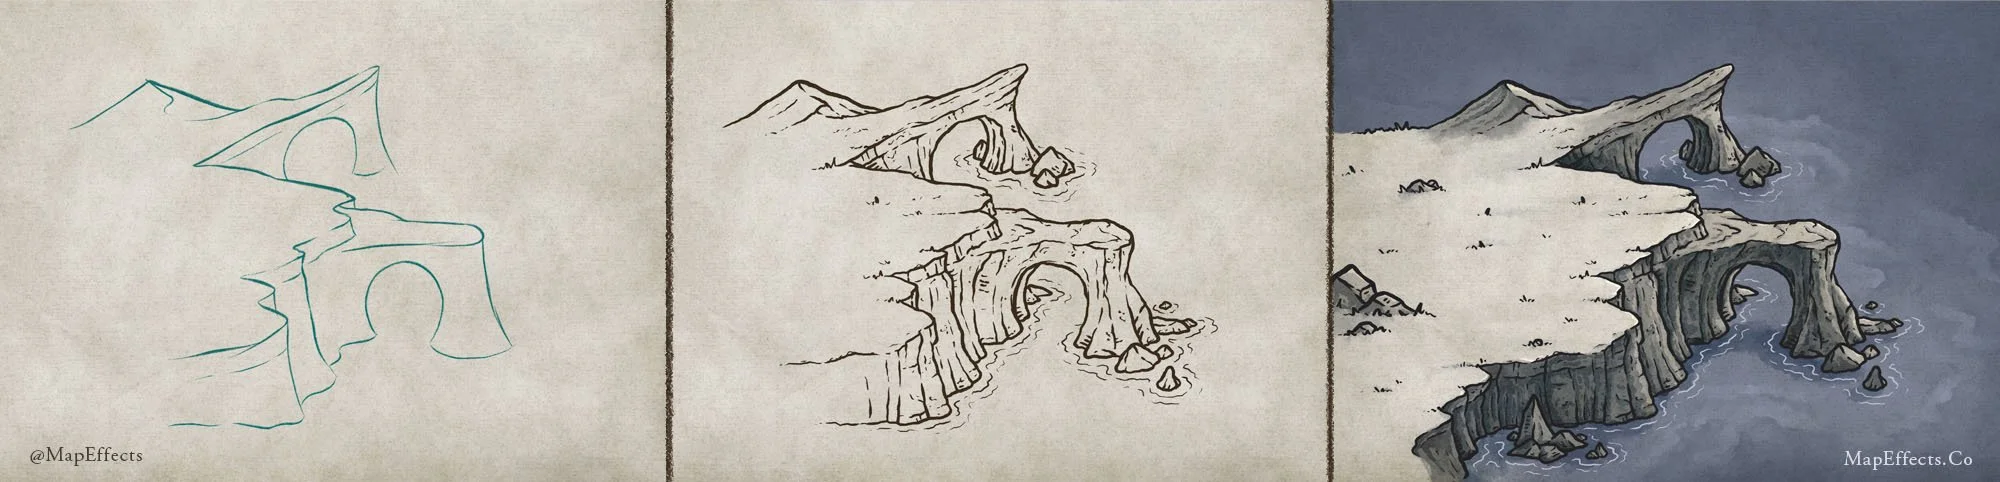
Now let’s ink the line art!
More Mapping Tutorials


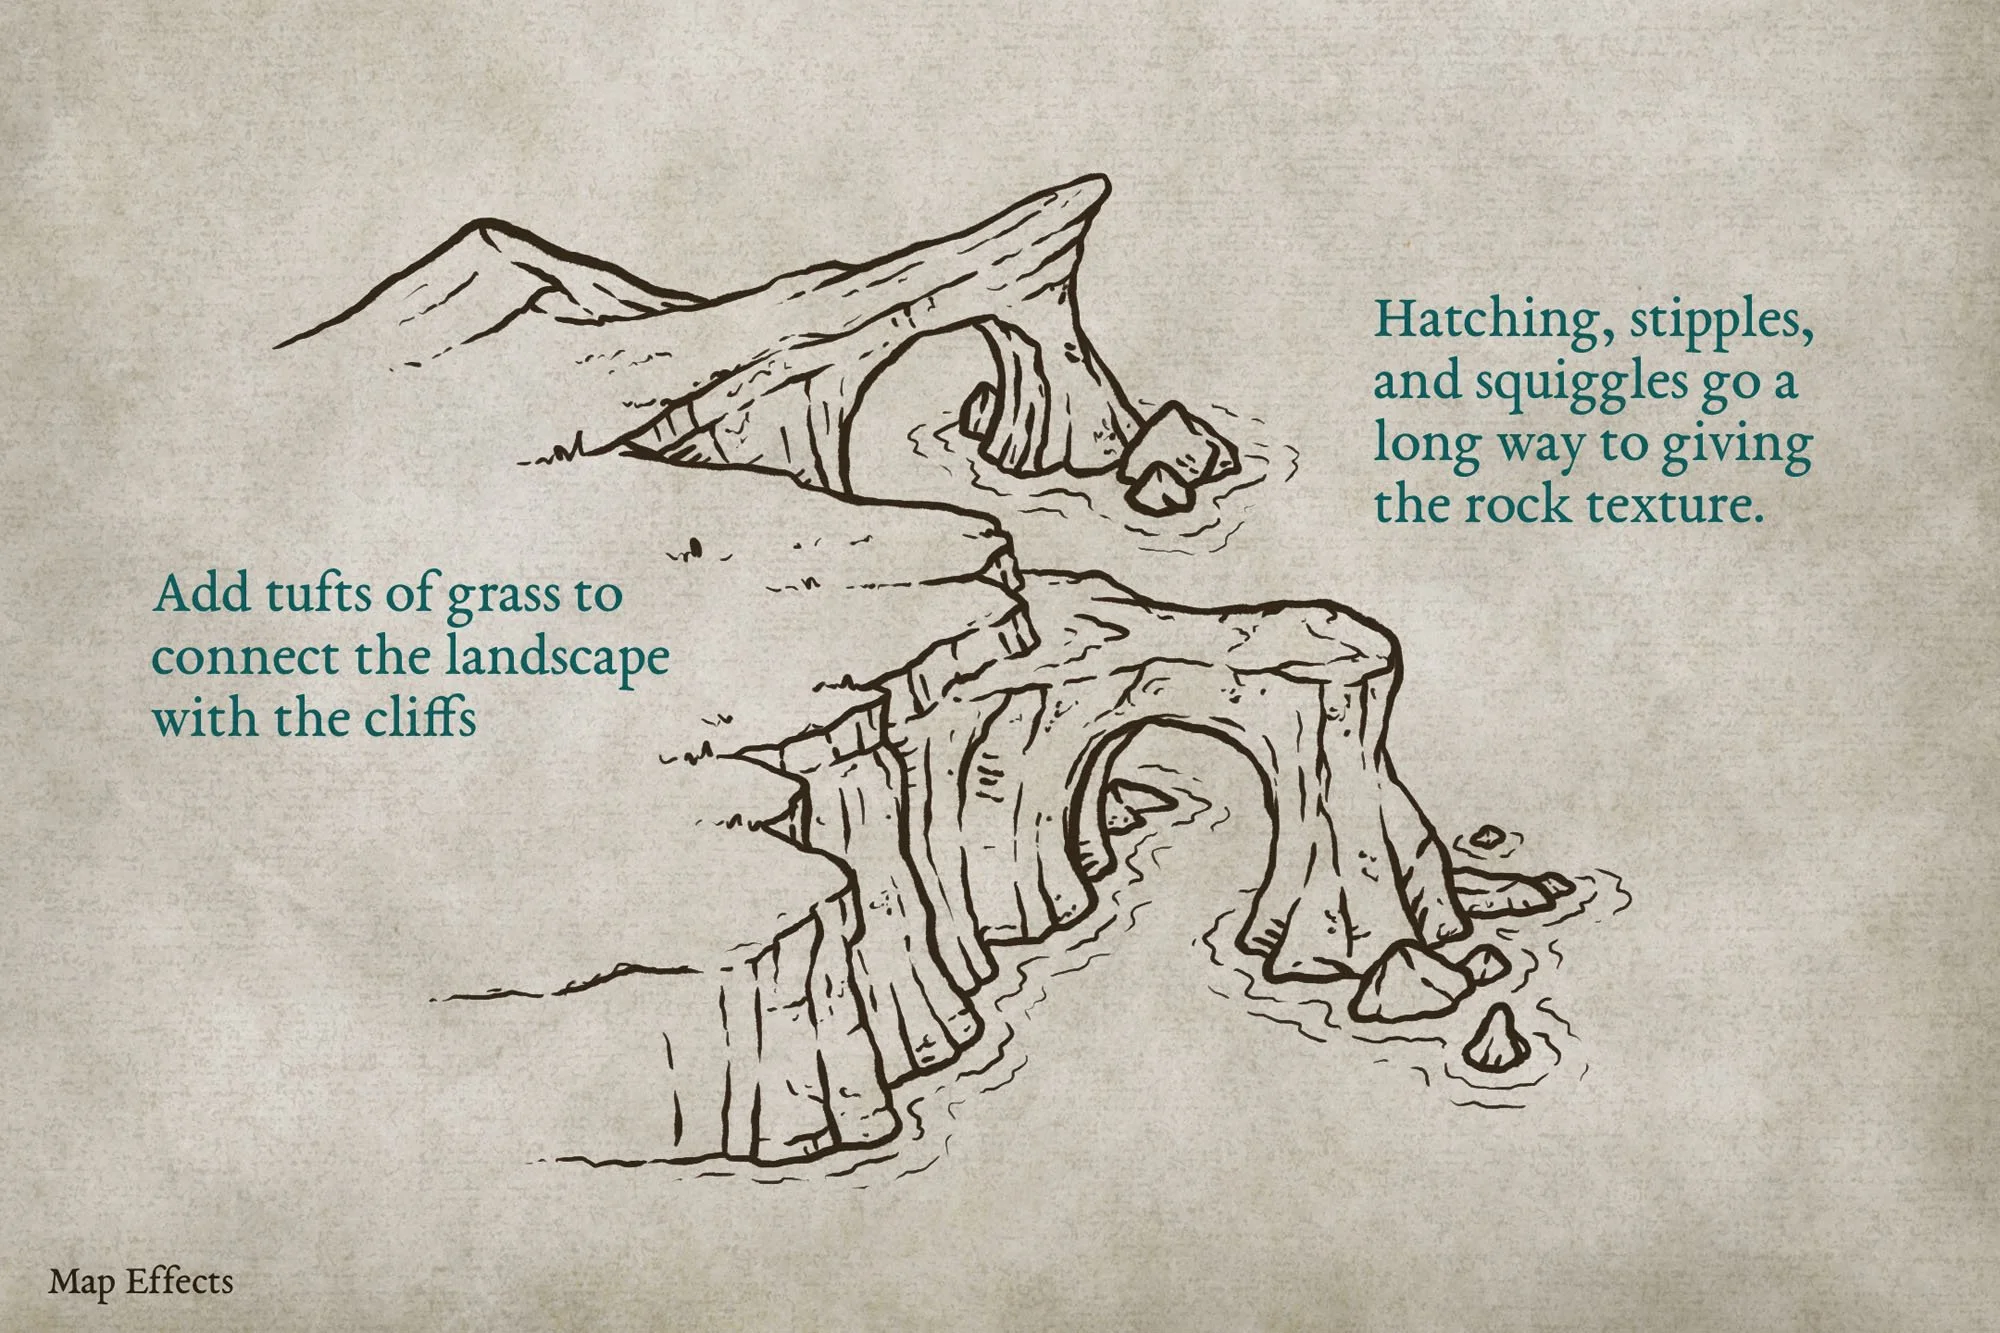
Ink the Final Line Art
Create a new layer above your sketch if you’re working digitally and switch to a heavier brush that has line weight sensitivity turned on. This means the harder you press, the thicker the line will be. This will allow you to get some more natural, organic-looking lines. If you’re working with traditional tools, I prefer a brush pen for this step.
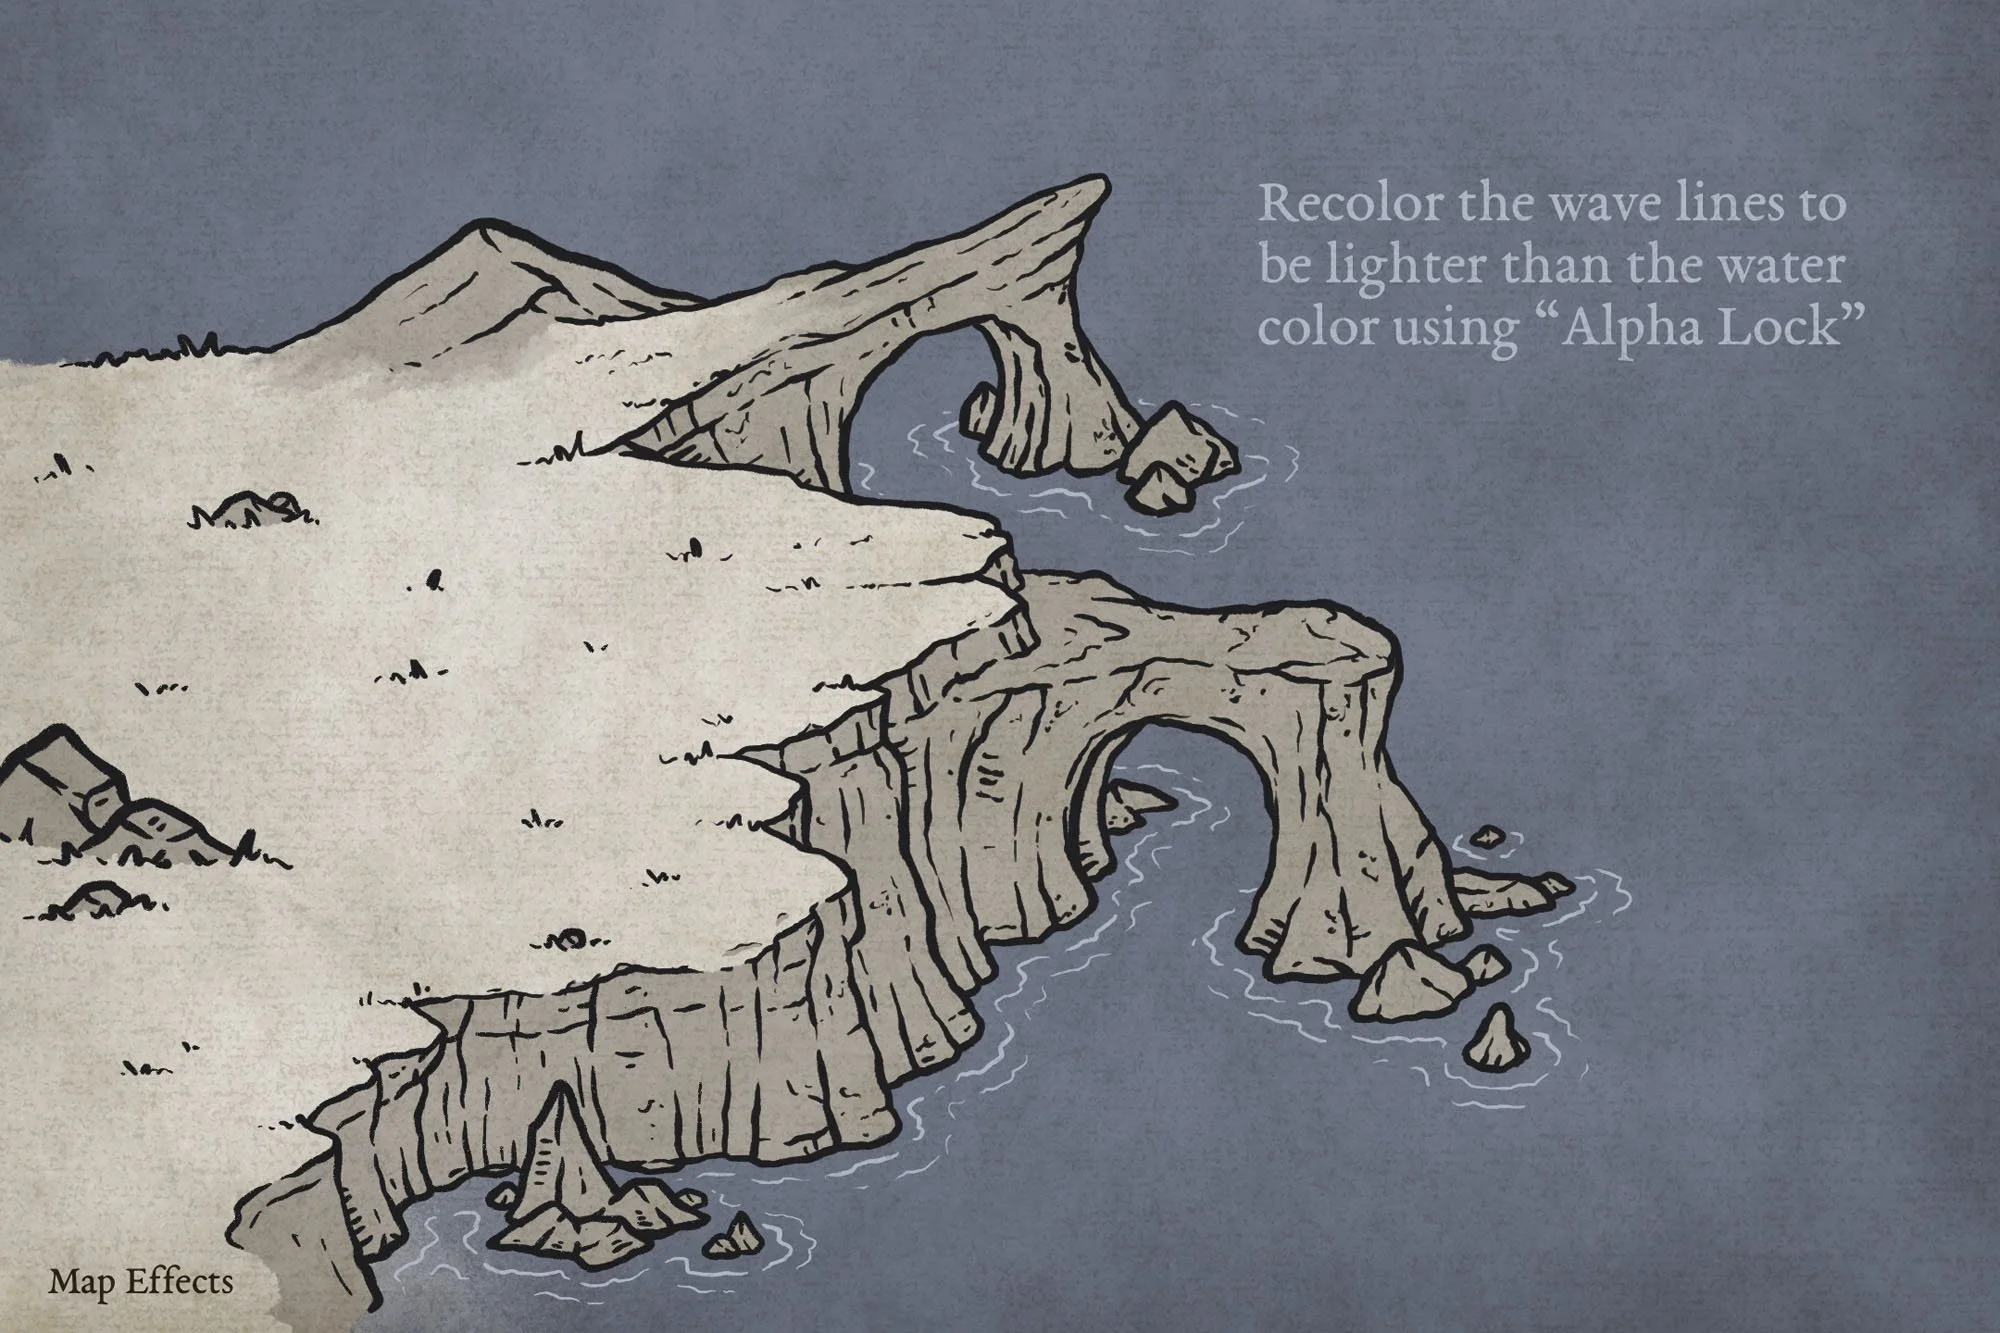
Block in the Main Colors
Create another layer below your line art and block in some colors for your map. The colors you choose are really up to you, and it depends on the aesthetic of the map. For me, I am going to stick with more sepia values for the land and contrast it with the cooler blues in the water.
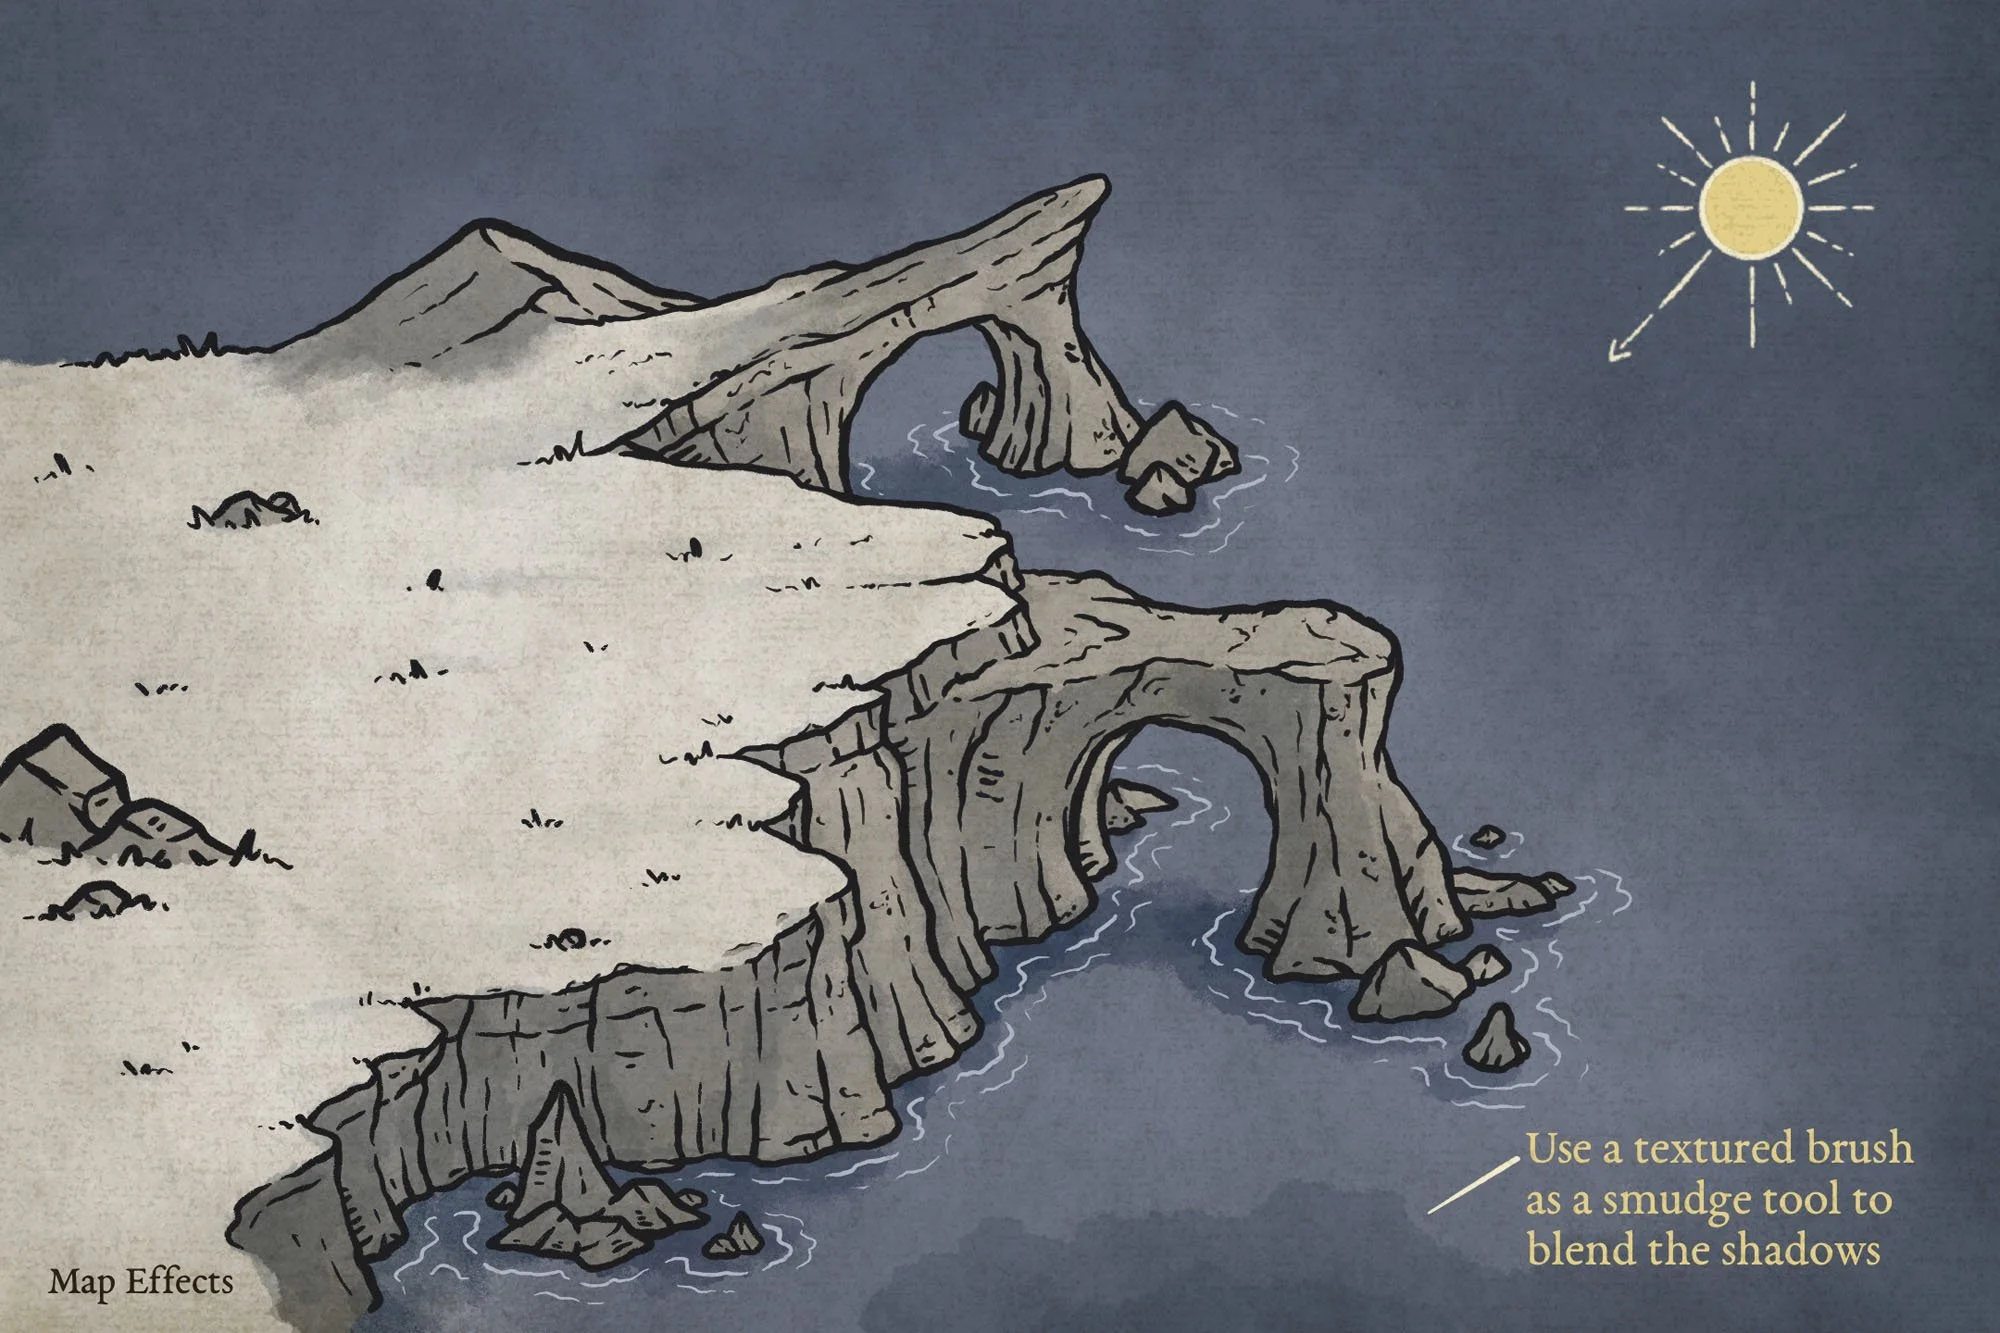
Paint the Base Shadows
Create a new layer below your line art and above your color layer and set the blend mode to “Multiply”. Then use a low opacity brush like I include in the Free Apprentice Brush Pack HERE. This will allow you to make several passes and gradually deepen the shadows. I like to use a very desaturated blue (almost grey) for this step.
For the blending, I like to use a textured brush as a smudge tool to give a bit of a painterly look. Again, you can find a free one I like to use in the Apprentice Brush Pack.

Quickly Create Fantasy Maps with 300+ Features
Compatible with Procreate, Photoshop, Affinity, Infinite Painter, & Clip Studio
Easily create fantasy maps with a classic hand-drawn style for your next rpg campaign or book with a few clicks and a bit of imagination. Best of all, you don’t need to invest hundreds of hours learning to draw!
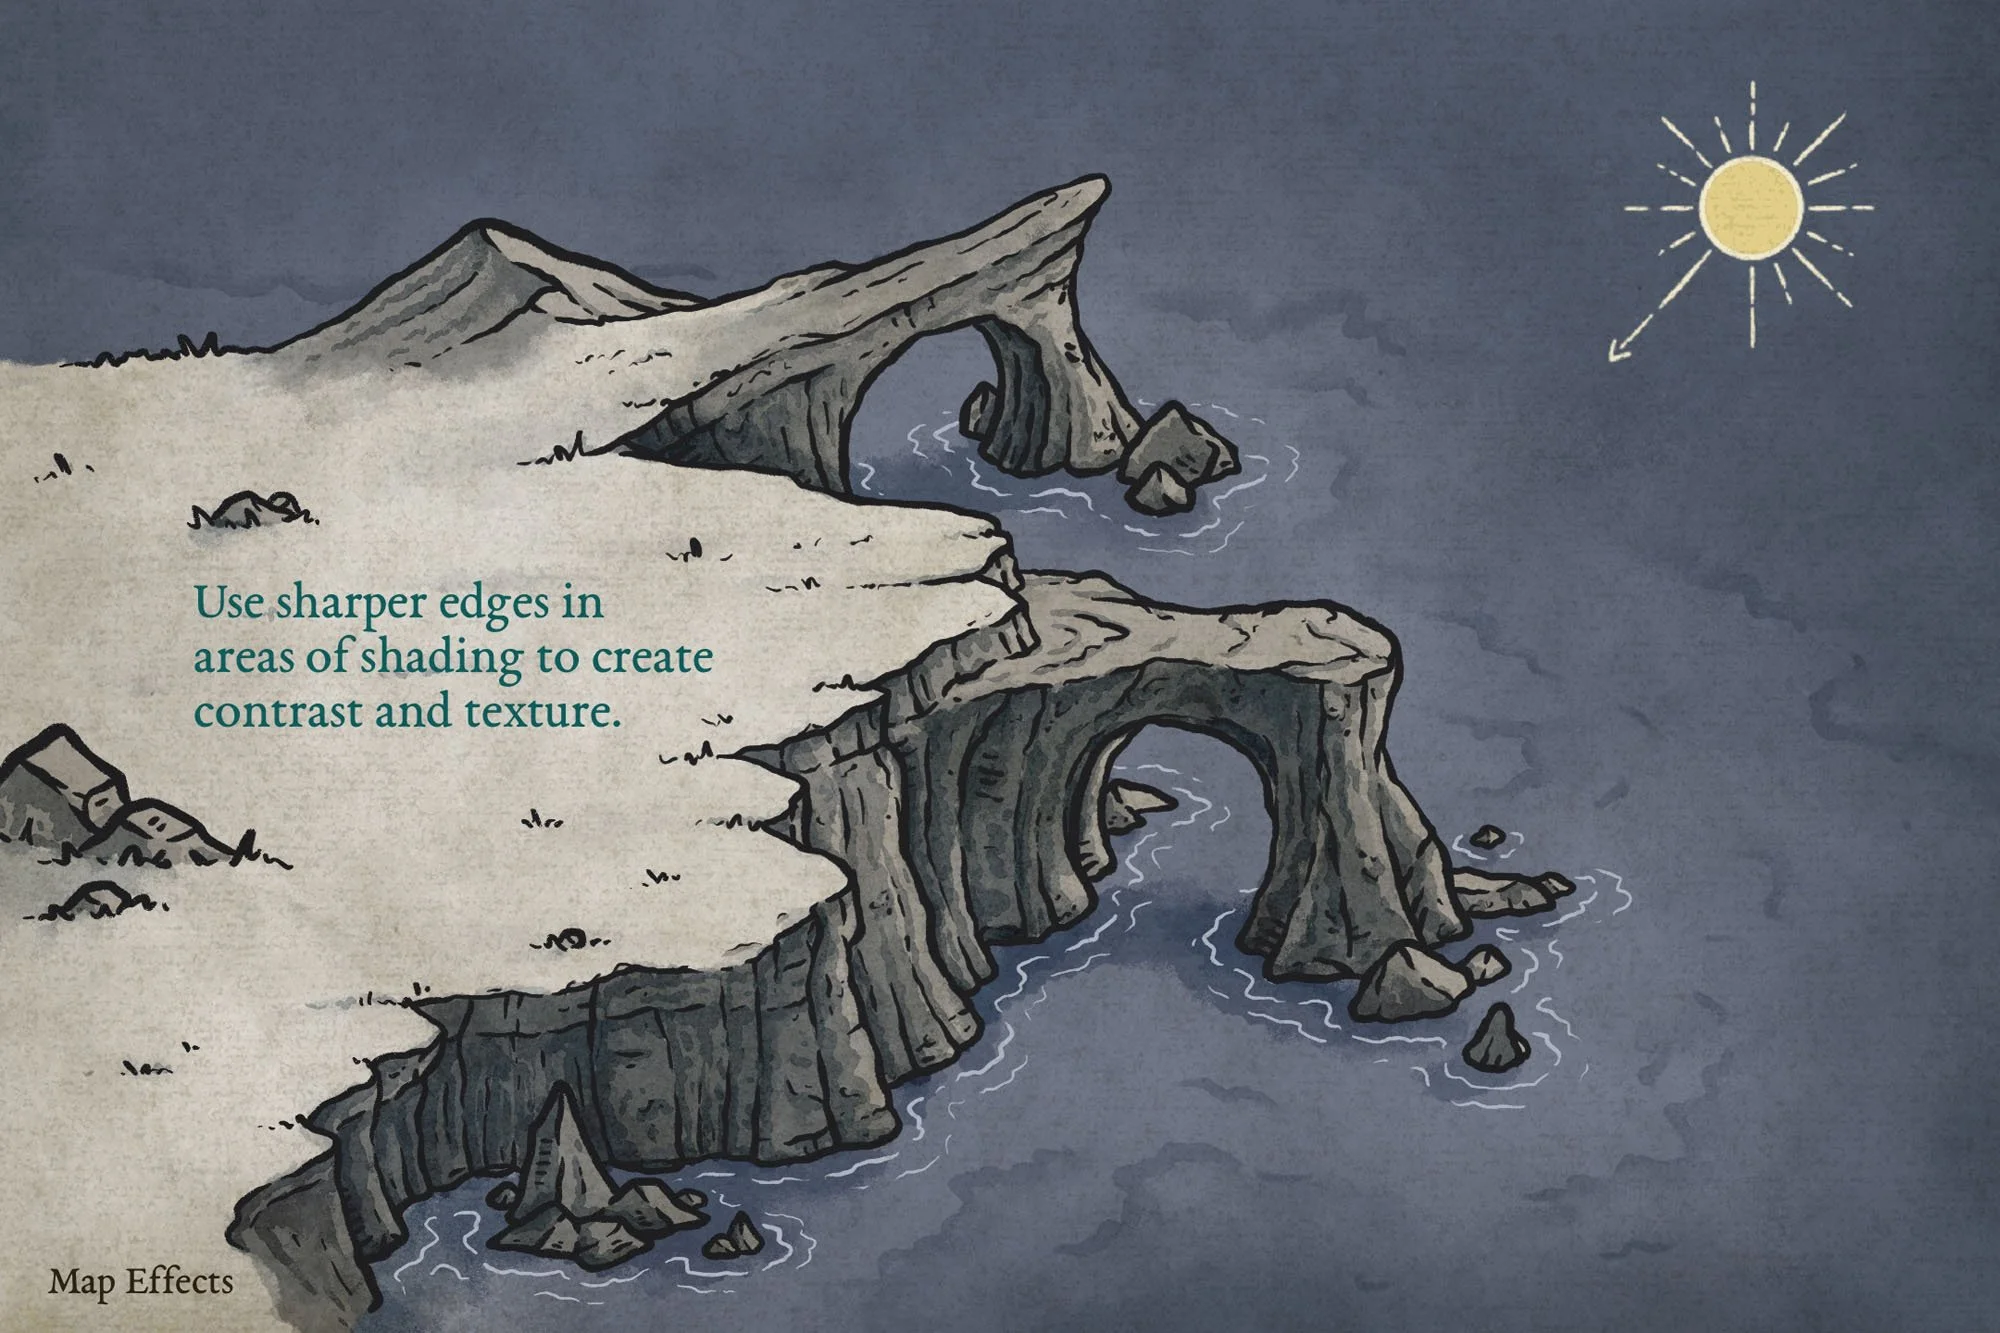
Deepen Shadows & Add Detail
Create another layer above your previous layer, but this time set the blend mode to Linear Burn! You can use that same desaturated blue, but I switched to the Wash Brushes in the Modern Map Maker Brush Pack to get a bit more of a watercolor look.
The key here is to look at the details in your line art, and determine the areas that would be more hidden from the light source. You want to add shadows where the sun would be completely blocked by the cliffs, but also where objects overlap.
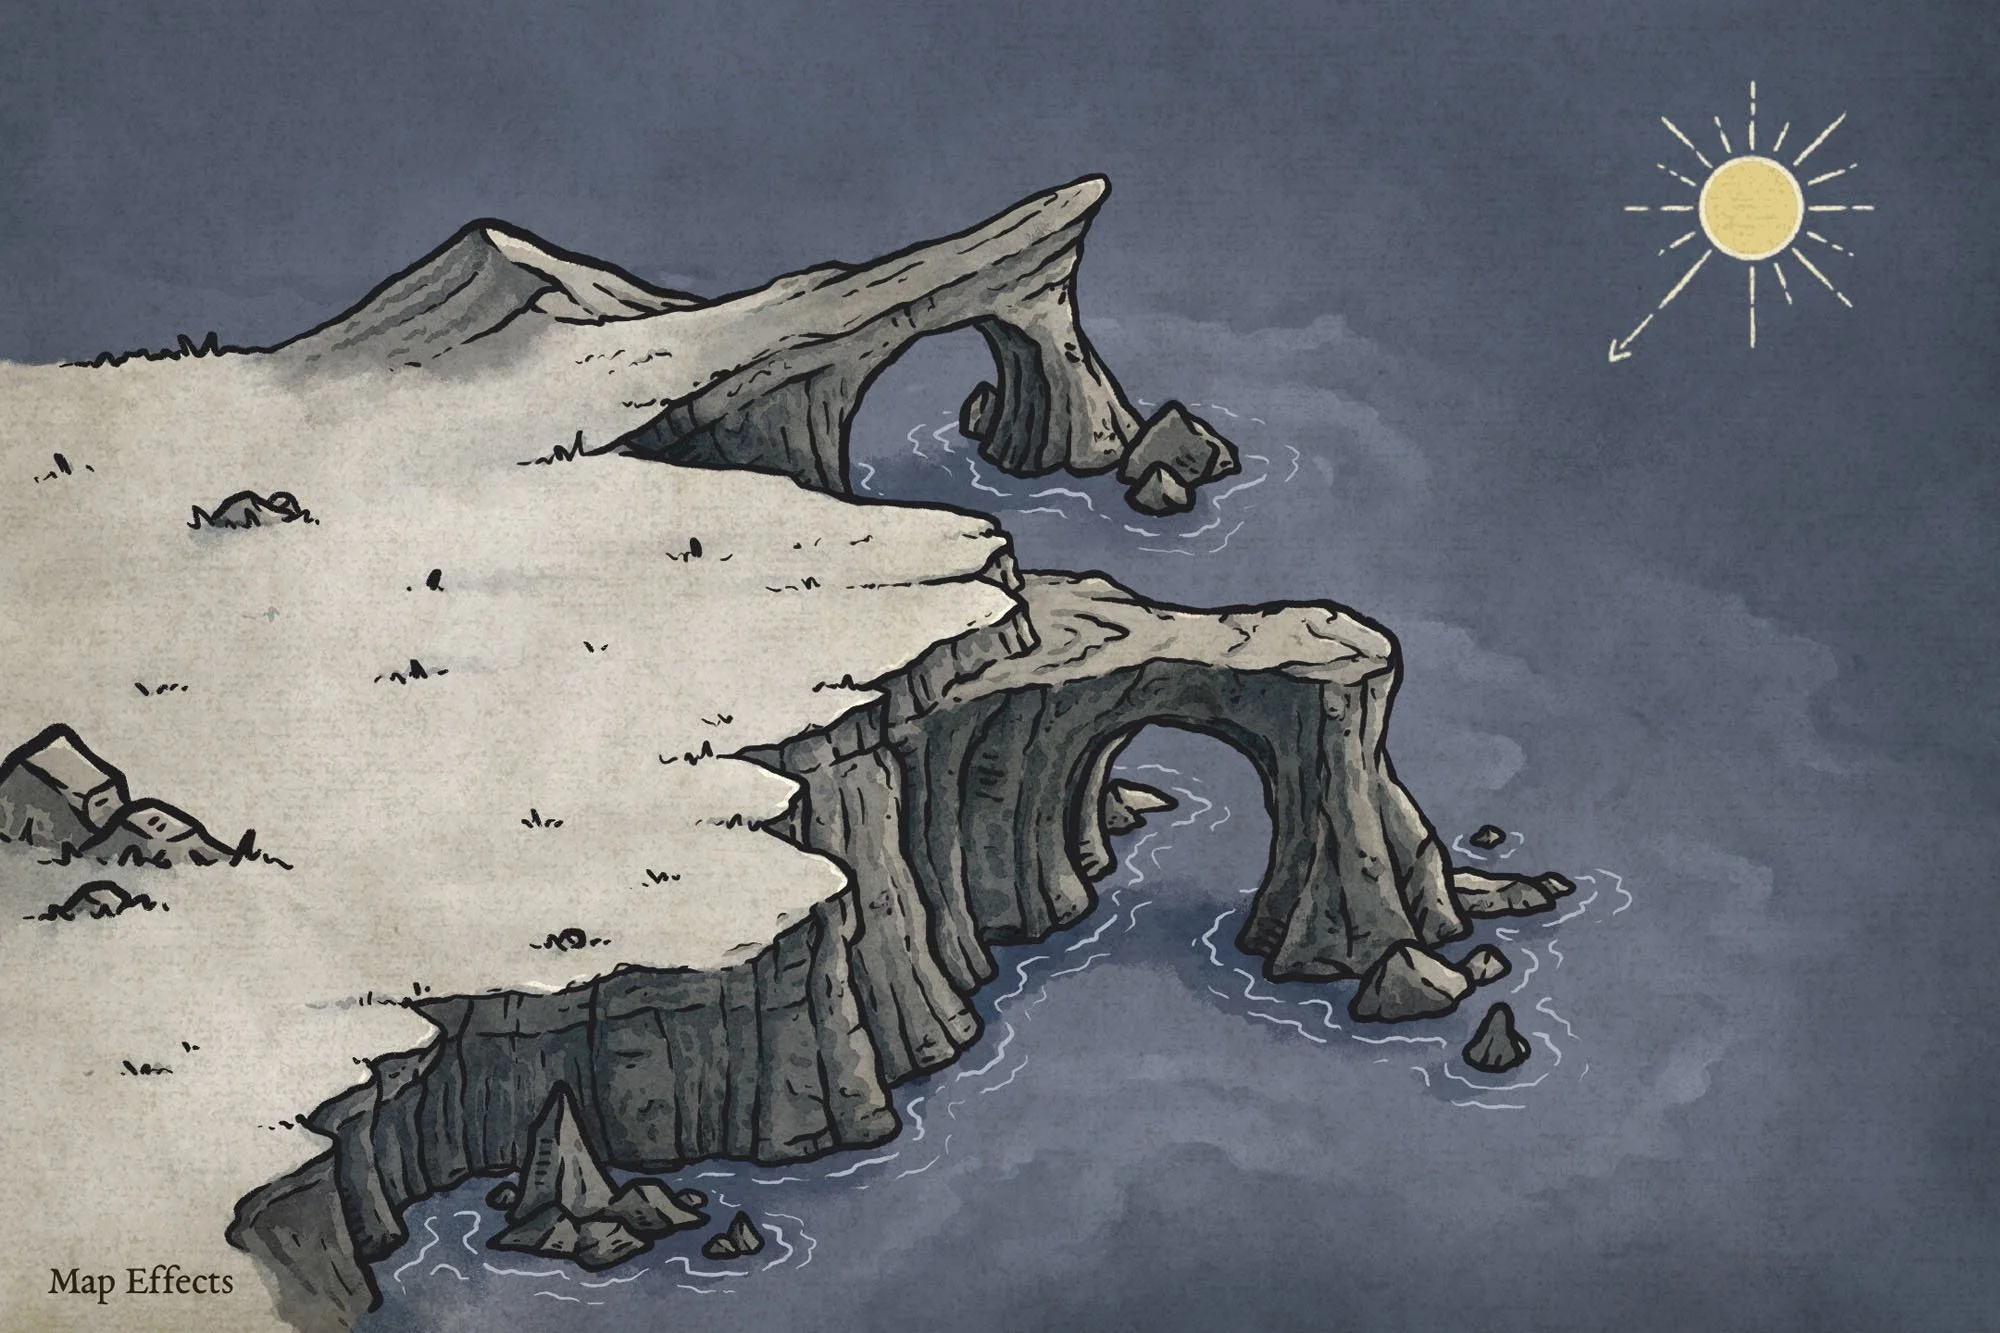
Add Highlights to Make it Pop!
Create one more layer, but this time set the blend mode to Add or Screen, then switch to a very light yellow or grey. Once again, look at your light source and just paint a bit of highlights where the light would be striking. Don’t be afraid to use that smudge tool to blend things a bit, or the opacity slider on the whole layer to tone things down if you need to.
You’re done! I hope you found this helpful, so you can draw a sea arches on your next fantasy map! Be sure to check out some of the other tutorials below to help you in your map-making journey.
Happy Mapping!
Josh