
How to Draw a Whirlpool Vortex

There is something mysterious about a swirling vortex of water that seems to be draining into the depths of the ocean. This is why a whirlpool or maelstrom is a compelling feature to include on your fantasy maps as it opens up so many storytelling possibilities.
In this tutorial, I’ll walk you through some easy steps so you can draw your own whirlpool on your fantasy maps.
All the brushes used in this tutorial are available in The Cartographer’s Liner Brush Field Kit

1: Sketch an Oval
Begin by sketching a simple oval where you want the whirlpool to appear on your map. This will just help give you an idea of placement, shape, and size.
Remember, since you will be drawing in isometric perspective, the basic shape of the vortex will be an oval rather than a circle. If you were to draw this from an overhead perspective however, it would appear more as a circle.
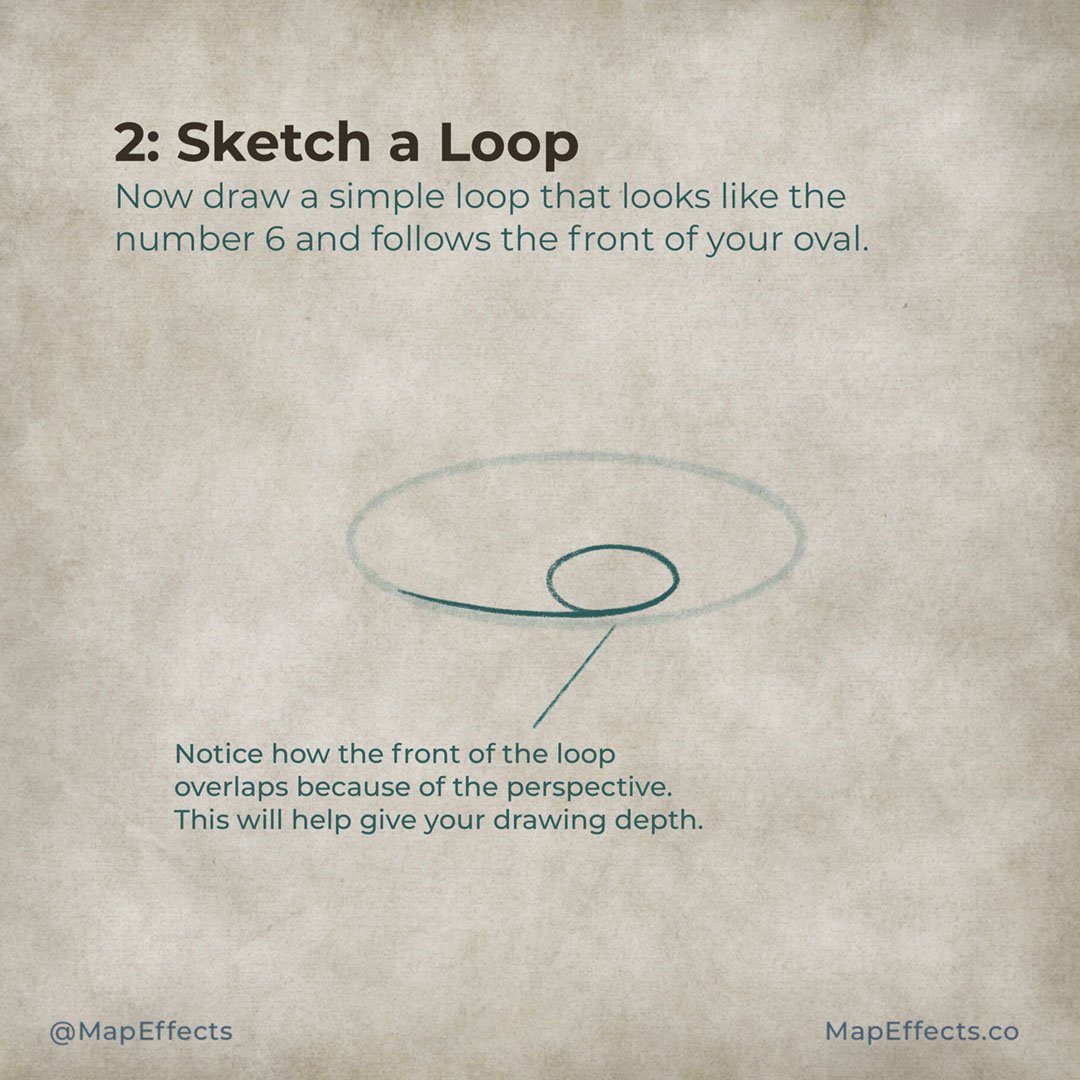
2: Sketch a Loop
Next you can draw a simple loop that looks similar to the number “6”, and follows the front line of your oval. It’s not as obvious as it will be in later steps, but notice how the front of the loop overlaps and obscures part of the circle. This is important to giving your drawing depth.
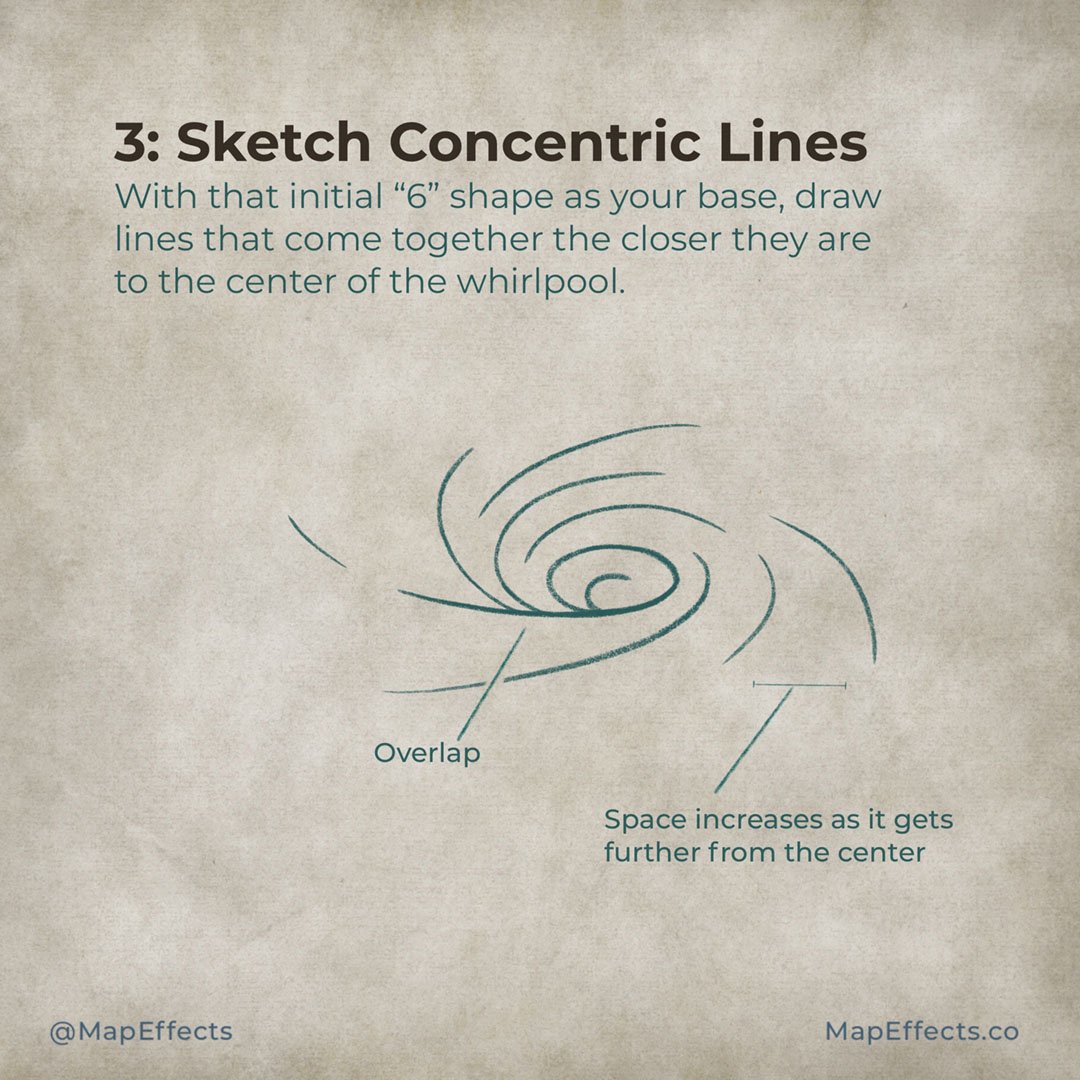
3: Sketch Concentric Lines
Use the initial “6” shape you drew in the previous step as your guide and add several broken lines that end up swirling toward the center. Notice how the space between lines increases as they get further from the center of the maelstrom.
More Tutorials You May Enjoy


4: Ink in the Line Work
Now it’s time to begin inking in the final line work. Use your sketch as a guide and add some lines that follow the basic shape, but don’t be afraid to add some small breaks and dashes to give your drawing a more natural look.
Throughout this process, it is helpful to keep the most basic shape of what you’re drawing in mind. In this case, try to imagine a funnel or upside-down cone.
For the line art, I wanted the lines to have a bit of flow to them, so I used the Ragged Bristle Brush in the Liner Brush Field Kit. The nice thing about this brush is you can see the brush strokes in it so it looks more like a real brush.

5: Add Some Color
With the line work down, you can now begin painting in some basic color. I am admittedly being more subtle with my palette because I want it to blend well with the aged paper background, but it will all depend on your map.
Digital Bonus Tip
If you are using digital tools like I am, you can set your line art layer to “Alpha Lock” and paint over your lines to change their color to fit the color palette of your map. This is a handy trick I use all the time.

6: Block in Base Shadows
Now it’s time to start giving your whirlpool some depth by adding some really basic shadows. Begin with a large, low opacity brush to paint some shadows based on your light source. In this tutorial the light will be coming from the upper left corner.
Keep things very simple and blocky at this point, and don’t let yourself caught up in trying to add detail. This step is all about capturing the initial form and shape of the vortex which gets darker the closer you get to the center.
The brush I will be using to do all the shading in this tutorial is The Wet Canvas Brush included in The Cartographer’s Liner Brush Field Kit. The reason I love this brush is that I can build up the shadows gradually like you would with traditional watercolors, and it has a nice edge for a more painterly look.

7: Blend & Deepen Shadows
If you are working digitally, you can now switch to a smudge tool to blend the shadows from the previous step and deepen shadows as they near the center of the vortex.
I personally like a more painterly look on my maps, to achieve this I use a smudge tool with a little texture and a ratty edge can help give a painterly effect. The brush I am using for this step is The Mummified Brush Pen because it has an element of randomness that lends to the look.
Using the Blend or Smudge Tool
Watch this quick video where I show you exactly how I use the smudge tool for this step of the tutorial.
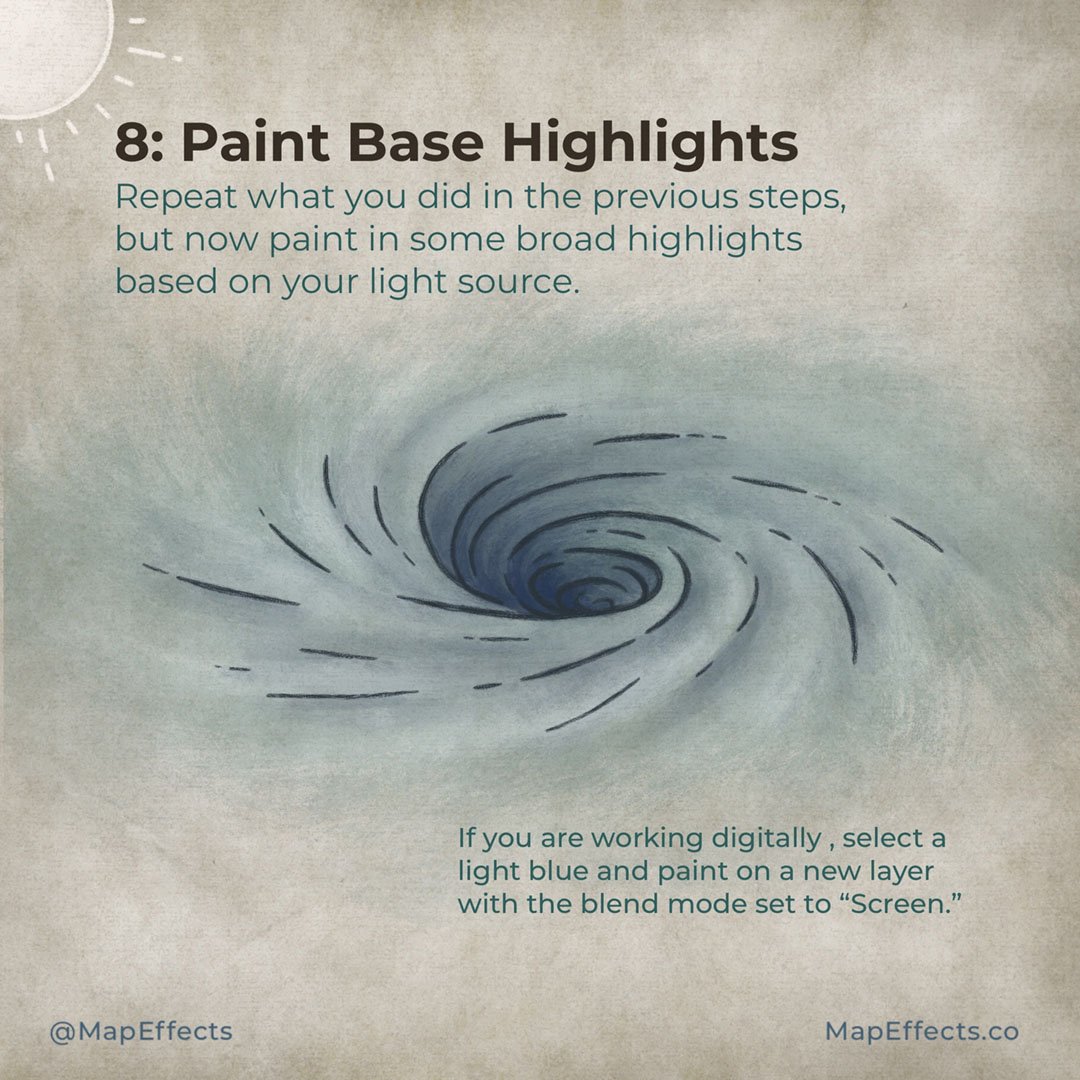
8: Paint Base Highlights
You can now repeat what you did in the previous steps by starting with a larger brush and painting in some broad highlights. If you are working digitally, select a lighter blue, create a new layer, and set the blend mode to “Screen”.
Again, it’s important to use a low-opacity brush to build up the highlights gradually. You can use the smudge tool that was mentioned in the previous step to blend as you go.

9: Add Final Highlights
As you paint it’s usually good practice to begin with a large brush, and gradually make it smaller and smaller as you build up detail. For this final step you want the brush you’re painting the highlights with to be almost as small as your liner brush was.
Don’t overblend the shaper highlights with the smudge tool though. If anything, it’s good to be able to see some brush strokes and edges as it will add contrast.
You’re done! If you found this tutorial helpful be sure to follow MapEffects on Instagram and tag me with the map you create and I may feature your work. Thank you, and I look forward to seeing your map!
Josh
